Expenses, Leave and Certifications on Mobile
Field and office staff can submit their own expenses, request leave, and manage their own certifications from the Appello mobile app -- without needing the web application. These three areas live behind the profile menu (tap the avatar circle in the top-right corner of any screen), not on the bottom tab bar.
Screenshots on this page are from app version 1.71.0 on an iPhone simulator.
Opening the profile menu
Tap the avatar circle in the top-right corner of the app to open the profile menu. My Expenses, My Vacation, and My Certifications all live in this menu, alongside items like My Timesheets, Edit Profile, and Sign Out.
Expenses
The expenses list
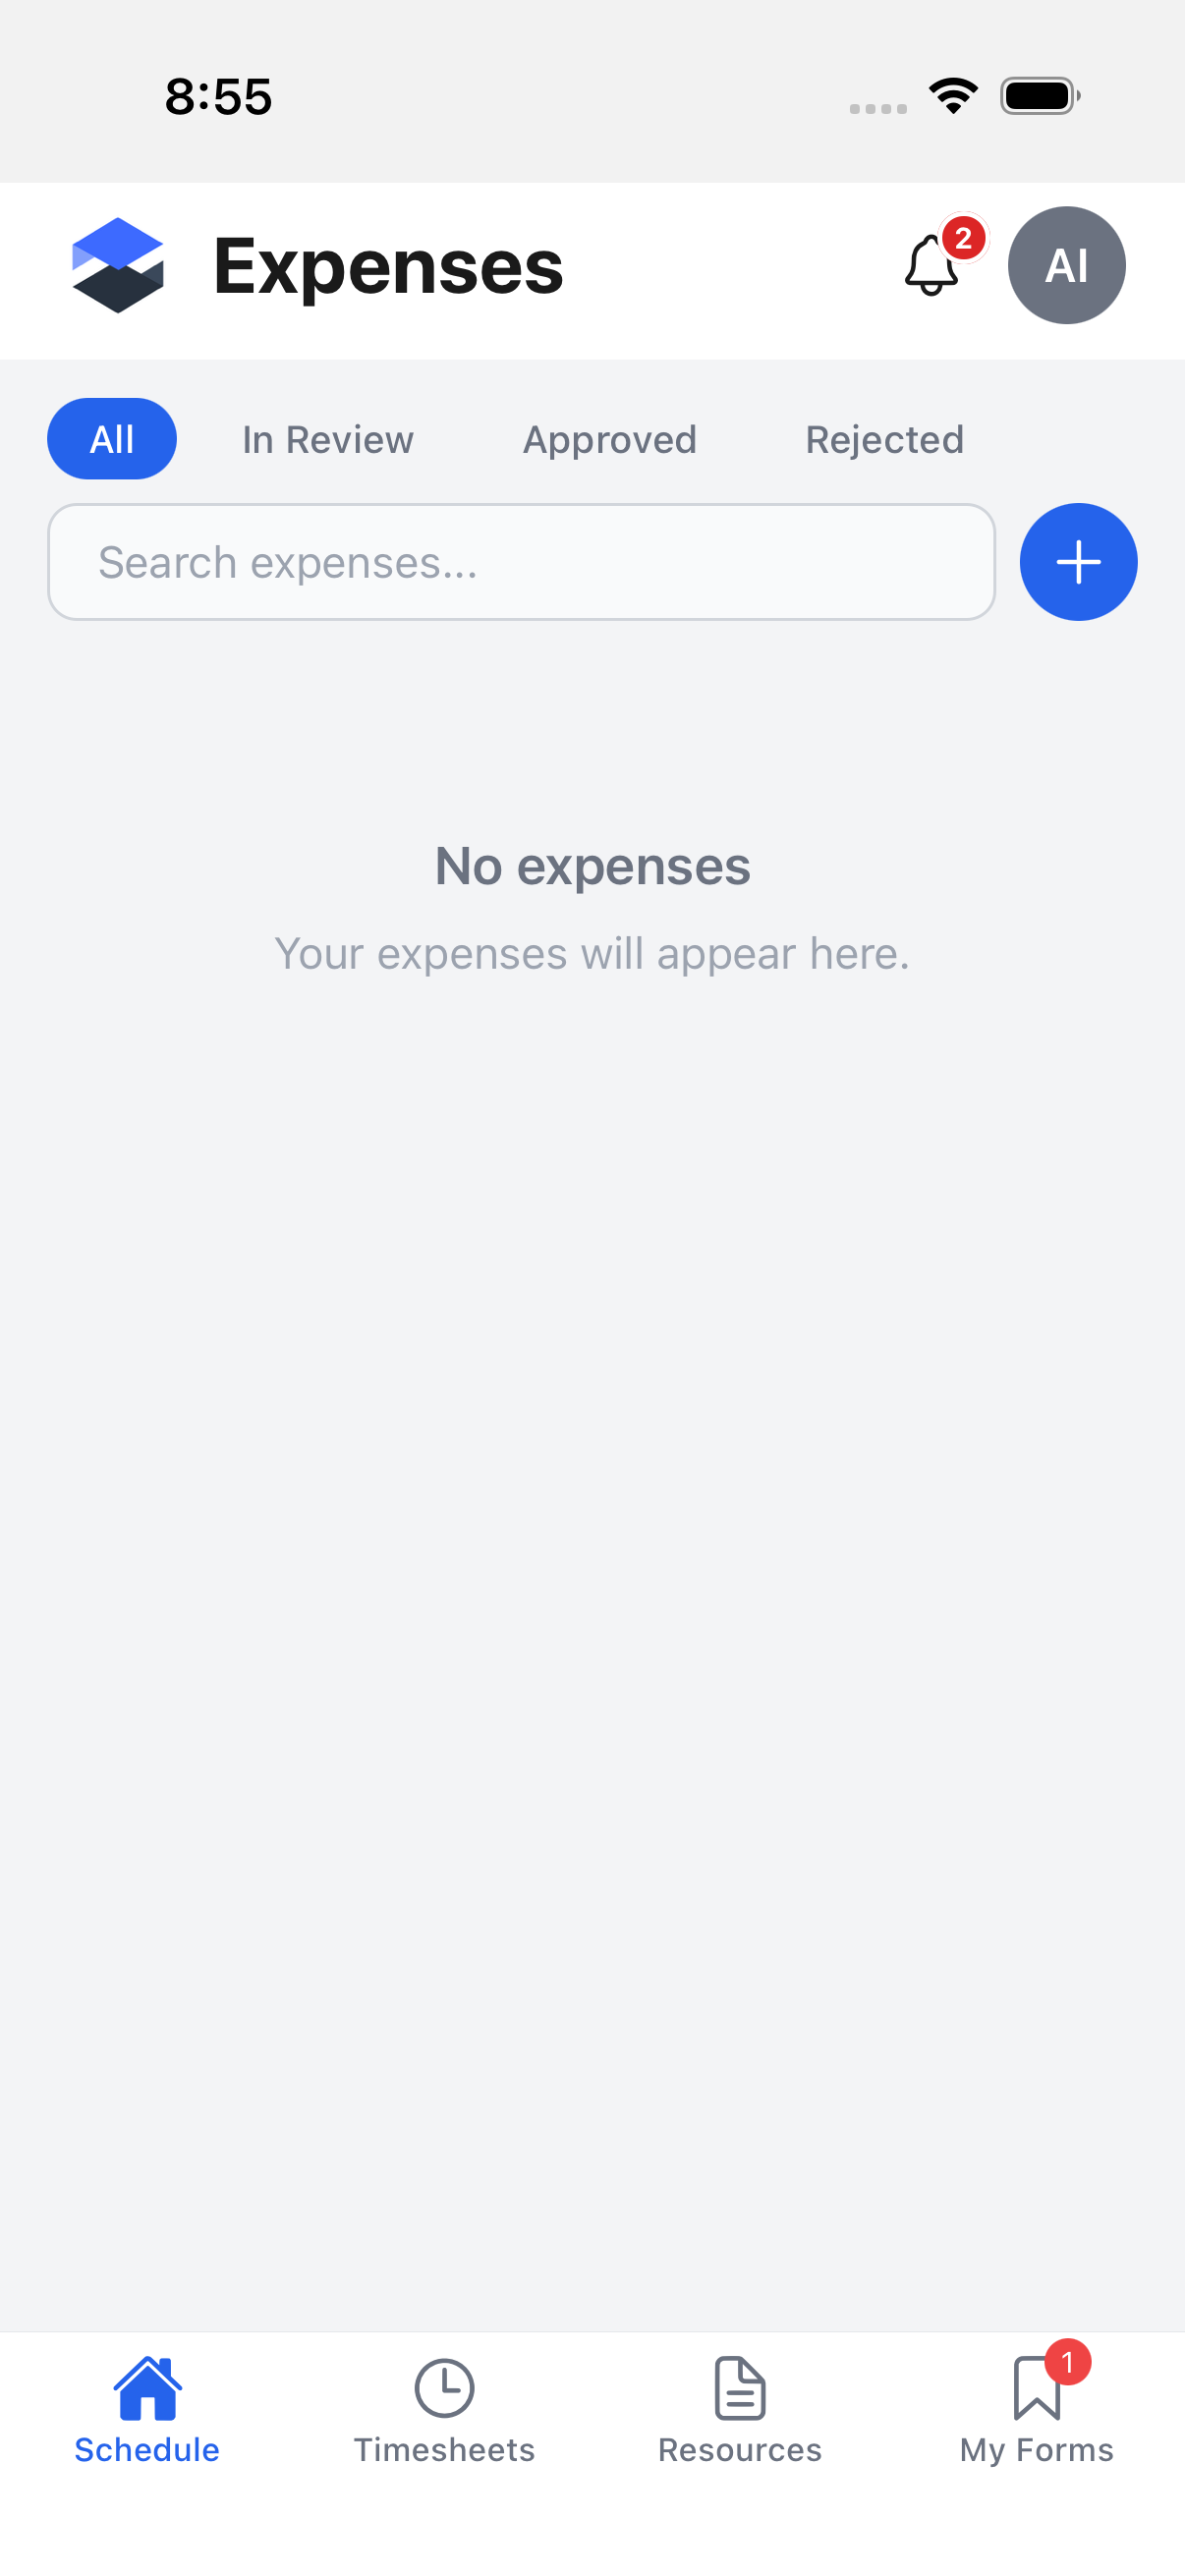
Tap My Expenses from the profile menu to see every expense you have submitted, with its current status (In Review, Approved, or Rejected). Use the All / In Review / Approved / Rejected tabs to filter, or the search field to look for a specific expense. Tap the + button to start a new expense -- this button only appears with the Expenses → Create permission (see Permissions below).
Adding an expense
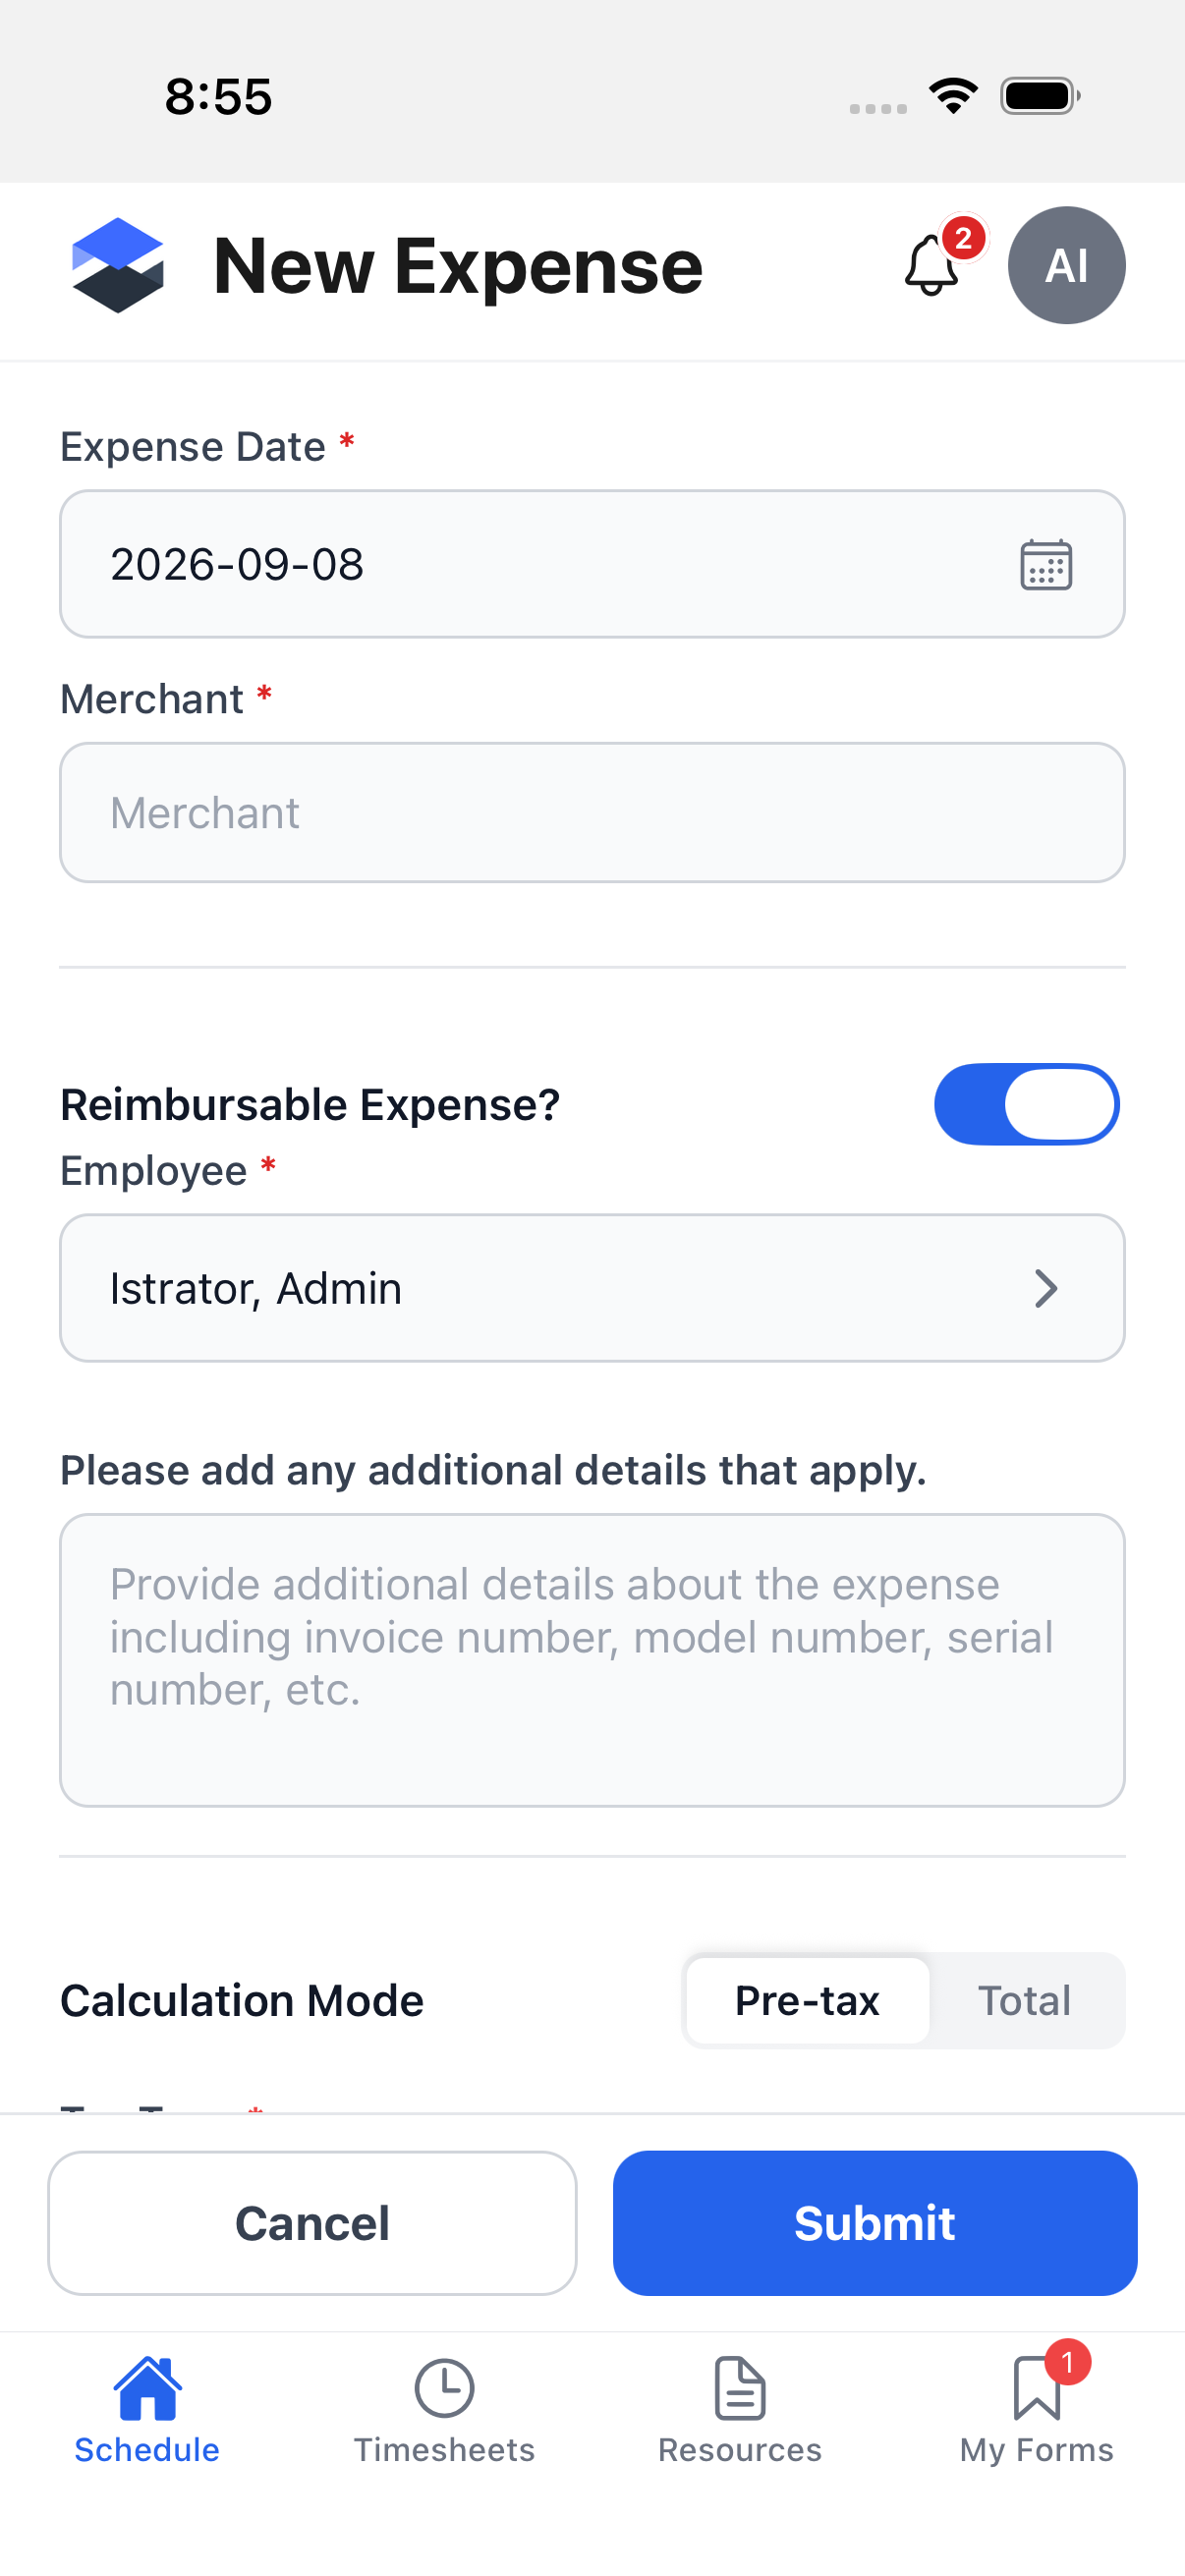
Tap the + button on the expenses list to open the New Expense form.
| Field | Required | Description |
|---|---|---|
| Expense Date | Yes | Defaults to today; tap to open a date picker. |
| Merchant | Yes | Free-text name of the vendor. |
| Reimbursable Expense? | -- | Toggle. Defaults on. |
| Employee | Yes, if reimbursable | Who should be reimbursed. Defaults to you. |
| Please add any additional details that apply. | No | Free-text notes (invoice number, model number, serial number, etc.). |
| Calculation Mode | -- | Pre-tax or Total -- controls which amount field below you enter directly. |
| Tax Type | Yes | Select the applicable tax type. |
| Override Tax Rate | -- | Toggle. When on, replaces the calculated tax amount with a manual Tax Amount field. |
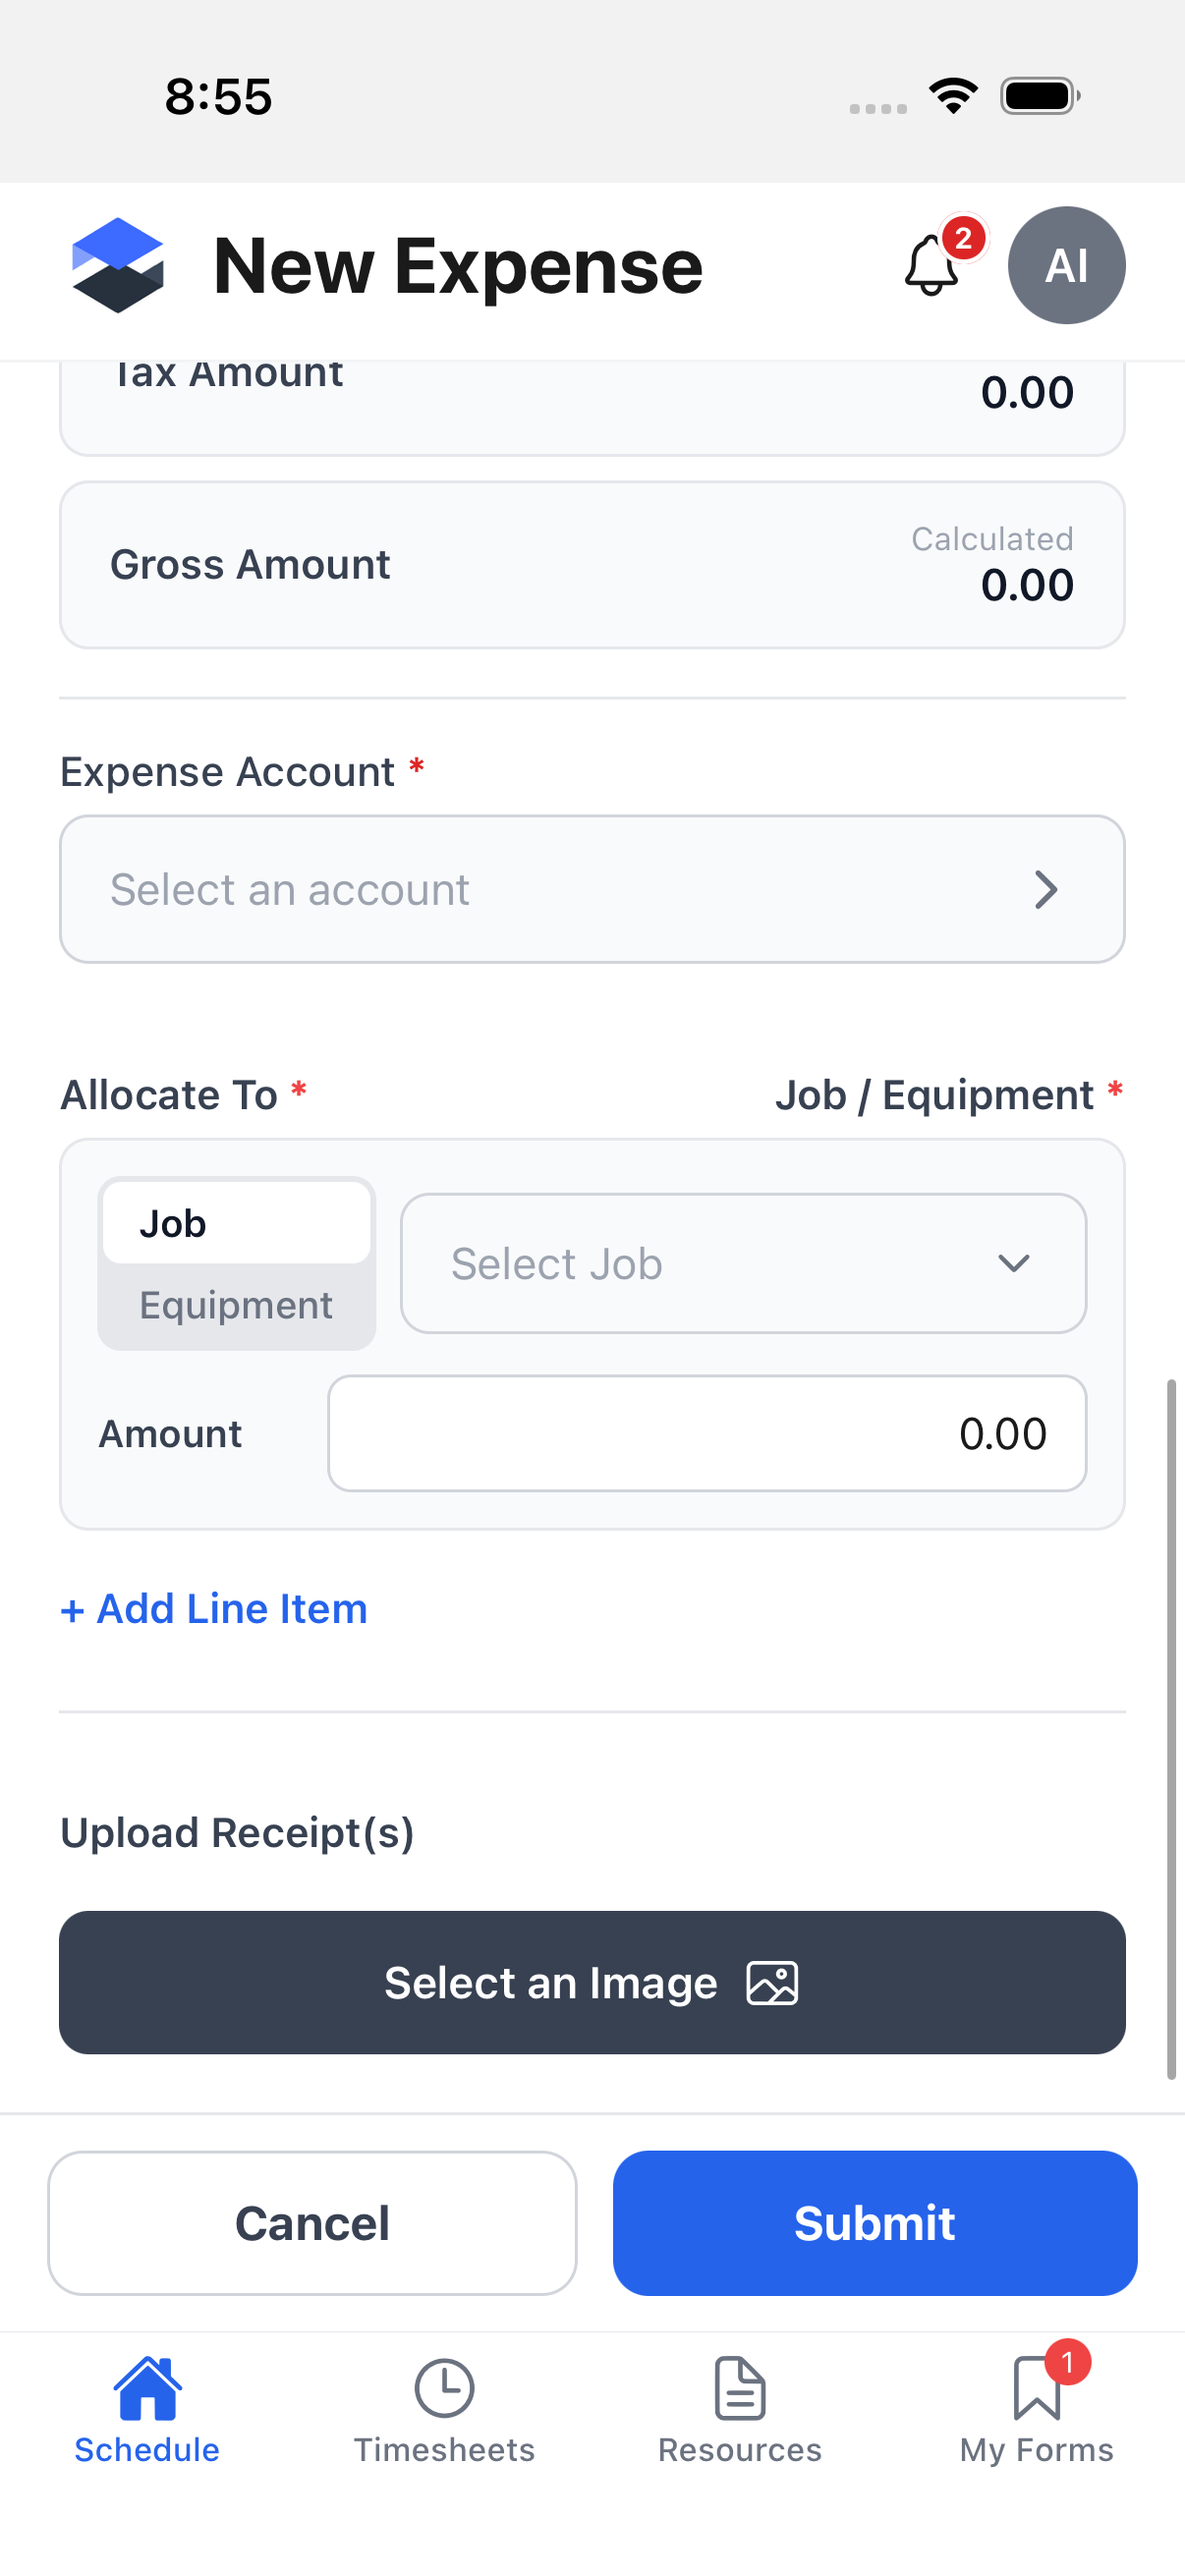
| Net Amount / Gross Amount | Yes | Whichever one isn't driven by Calculation Mode is shown read-only as Calculated. |
| Expense Account | Yes | The account this expense posts to. |
| Allocate To | Yes | Job or Equipment, plus a line-item Amount. Use + Add Line Item to split the expense across multiple jobs or equipment; a summary shows the total, allocated, and remaining amounts. |
| Upload Receipt(s) | No | See below. |
Scrolling to the bottom of the form shows the job/equipment allocation and the receipts control:
Attaching a receipt photo
Tap Select an Image to attach a receipt. This opens the device's native photo-source menu:
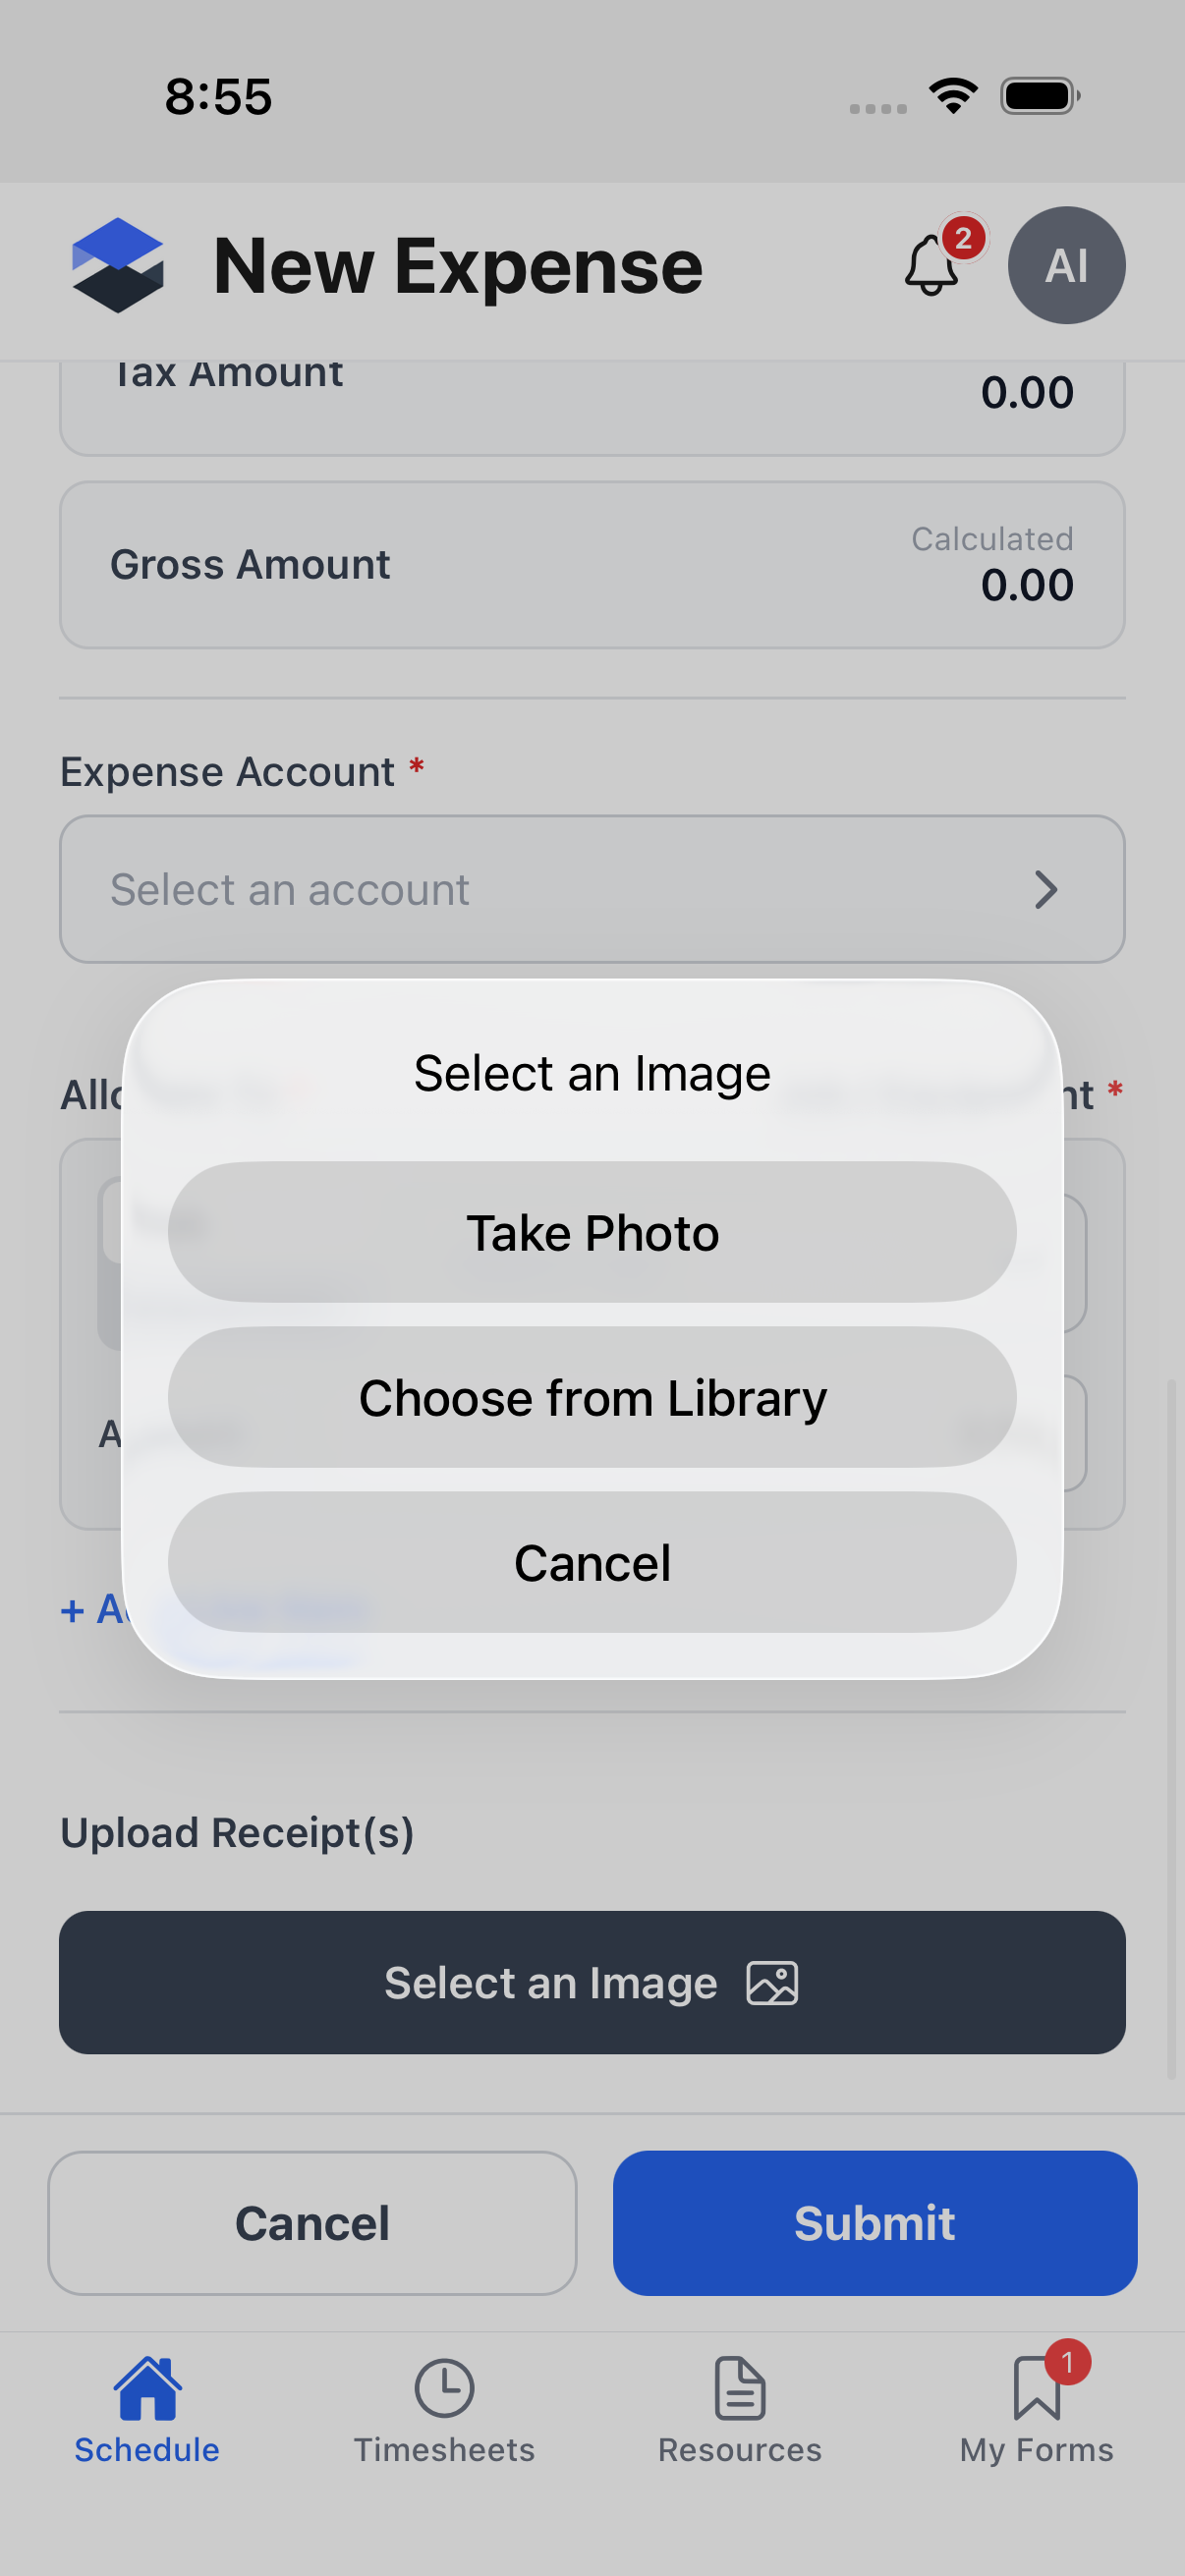
- Take Photo -- opens the camera.
- Choose from Library -- opens the device's photo library.
- Cancel -- dismisses the menu without attaching anything.
You can attach up to 8 receipt images; each attached image shows a thumbnail with a small ✕ button to remove it before submitting.
Tap Submit to send the expense for approval, or Cancel to discard the form and return to the list.
Whether Front Scan style upload validation applies to receipts, and any file-size limit on receipt photos, could not be confirmed from the mobile app's source in this pass.
On the desktop web application, submitted expenses are reviewed and approved from Employee Expenses.
Expense detail and Edit Expense
Tapping an expense in the list opens its detail screen, showing the status badge, expense date, merchant, expense account, net/tax/gross amounts, reimbursable-or-not (with employee or reimbursement type), any additional details, the submitted timestamp, the calculation mode and tax type, each job/equipment allocation line item, and any admin note or worker note. An Edit Expense button appears at the bottom when the expense can still be edited (status is not Approved and it isn't locked); tapping it opens the same form as Adding an expense, pre-filled with the existing values, with its Submit action re-submitting the expense (status resets to In Review) rather than creating a new record.
The demo instance used for this page's screenshots has no expense records for the signed-in account, so the detail and edit screens could not be screenshotted this pass. Both are described in writing instead.
Workflow: adding an expense
Adding an expense writes a new record. These are the steps, described rather than performed:
- Open My Expenses from the profile menu and tap +.
- Fill in the Expense Date, Merchant, and whether it's Reimbursable (and to whom, or which reimbursement type otherwise).
- Choose the Calculation Mode (Pre-tax or Total), pick a Tax Type, and optionally turn on Override Tax Rate to enter a manual tax amount instead of the calculated one.
- Enter the Net Amount or Gross Amount (whichever the calculation mode drives); the other figure and the tax amount are computed and shown read-only as Calculated.
- Pick an Expense Account, then allocate the total to one or more Job or Equipment line items -- job and equipment allocations are tracked independently, so a $100 expense can be allocated $100 to a job and $100 to equipment, not split $50/$50 between them. Use + Add Line Item to split across multiple jobs or equipment.
- Optionally attach up to 8 receipt photos via the camera or photo library.
- Tap Submit. Online, receipts upload first, then the expense is created with status In Review. Offline, it queues locally (with the receipt files) and syncs on reconnect.
Statuses an expense record moves through: In Review -> Approved or Rejected. Editing and
re-submitting an expense resets its status back to In Review.
Who is notified:
- Submitting an expense sends an Expense Submitted notification. This type is not listed on the Notification Settings screen (it is grouped under submissions rather than approvals), so its exact recipient list is not covered here.
- Approving or rejecting an expense sends Expense Approved or Expense Rejected to the submitter -- these two are toggleable in Notification Settings under the Expense category.
Expenses permissions
| Permission | Governs |
|---|---|
| Expenses → View | Which expenses the list shows you. |
| Expenses → Create | Shows the + button on the expenses list. |
| Expenses → Edit | Not used by the mobile expense screens -- edit access depends on the expense's own status and whether it is locked. |
| Expenses → Delete | Not used by the mobile expense screens -- there is no delete action on mobile. |
| Expenses → Assign | Not used by the mobile expense screens. |
| Expenses → Archive | Not used by the mobile expense screens. |
Leave
The vacation / leave list
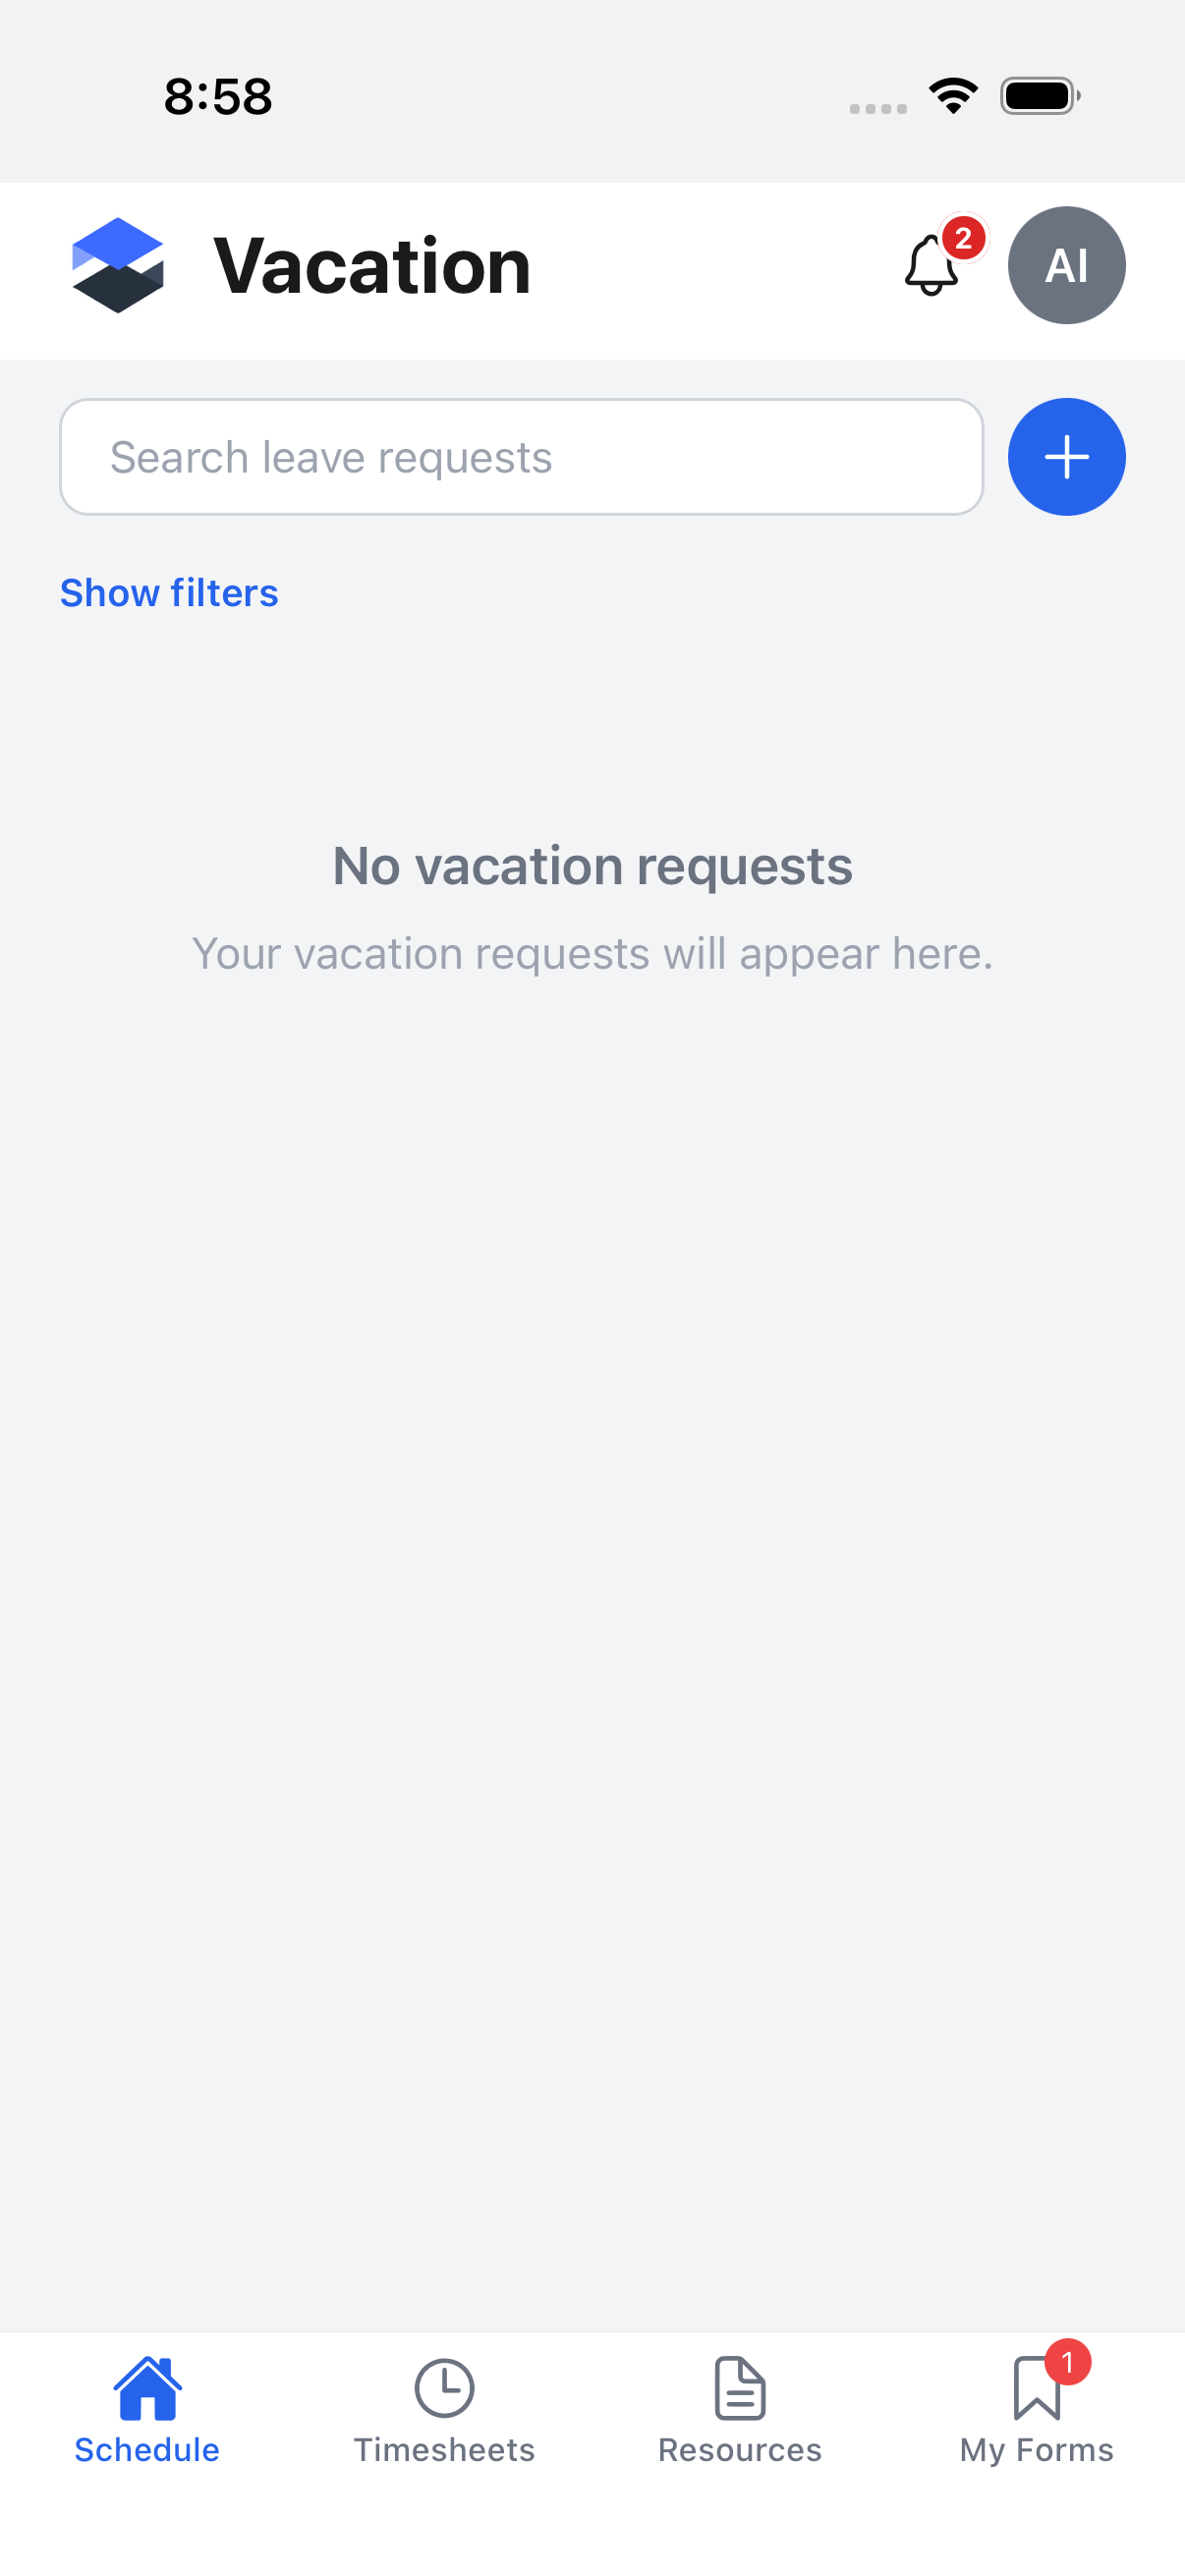
Tap My Vacation from the profile menu to see every leave request you have submitted, with its status (In Review, Approved, Rejected, or Not Submitted). Tap Show filters to filter by status, leave type, date range, or submitter, or use the search field. Tap the + button to start a new request -- this button only appears with the Leave Requests → Create permission (see Permissions below).
Requesting leave
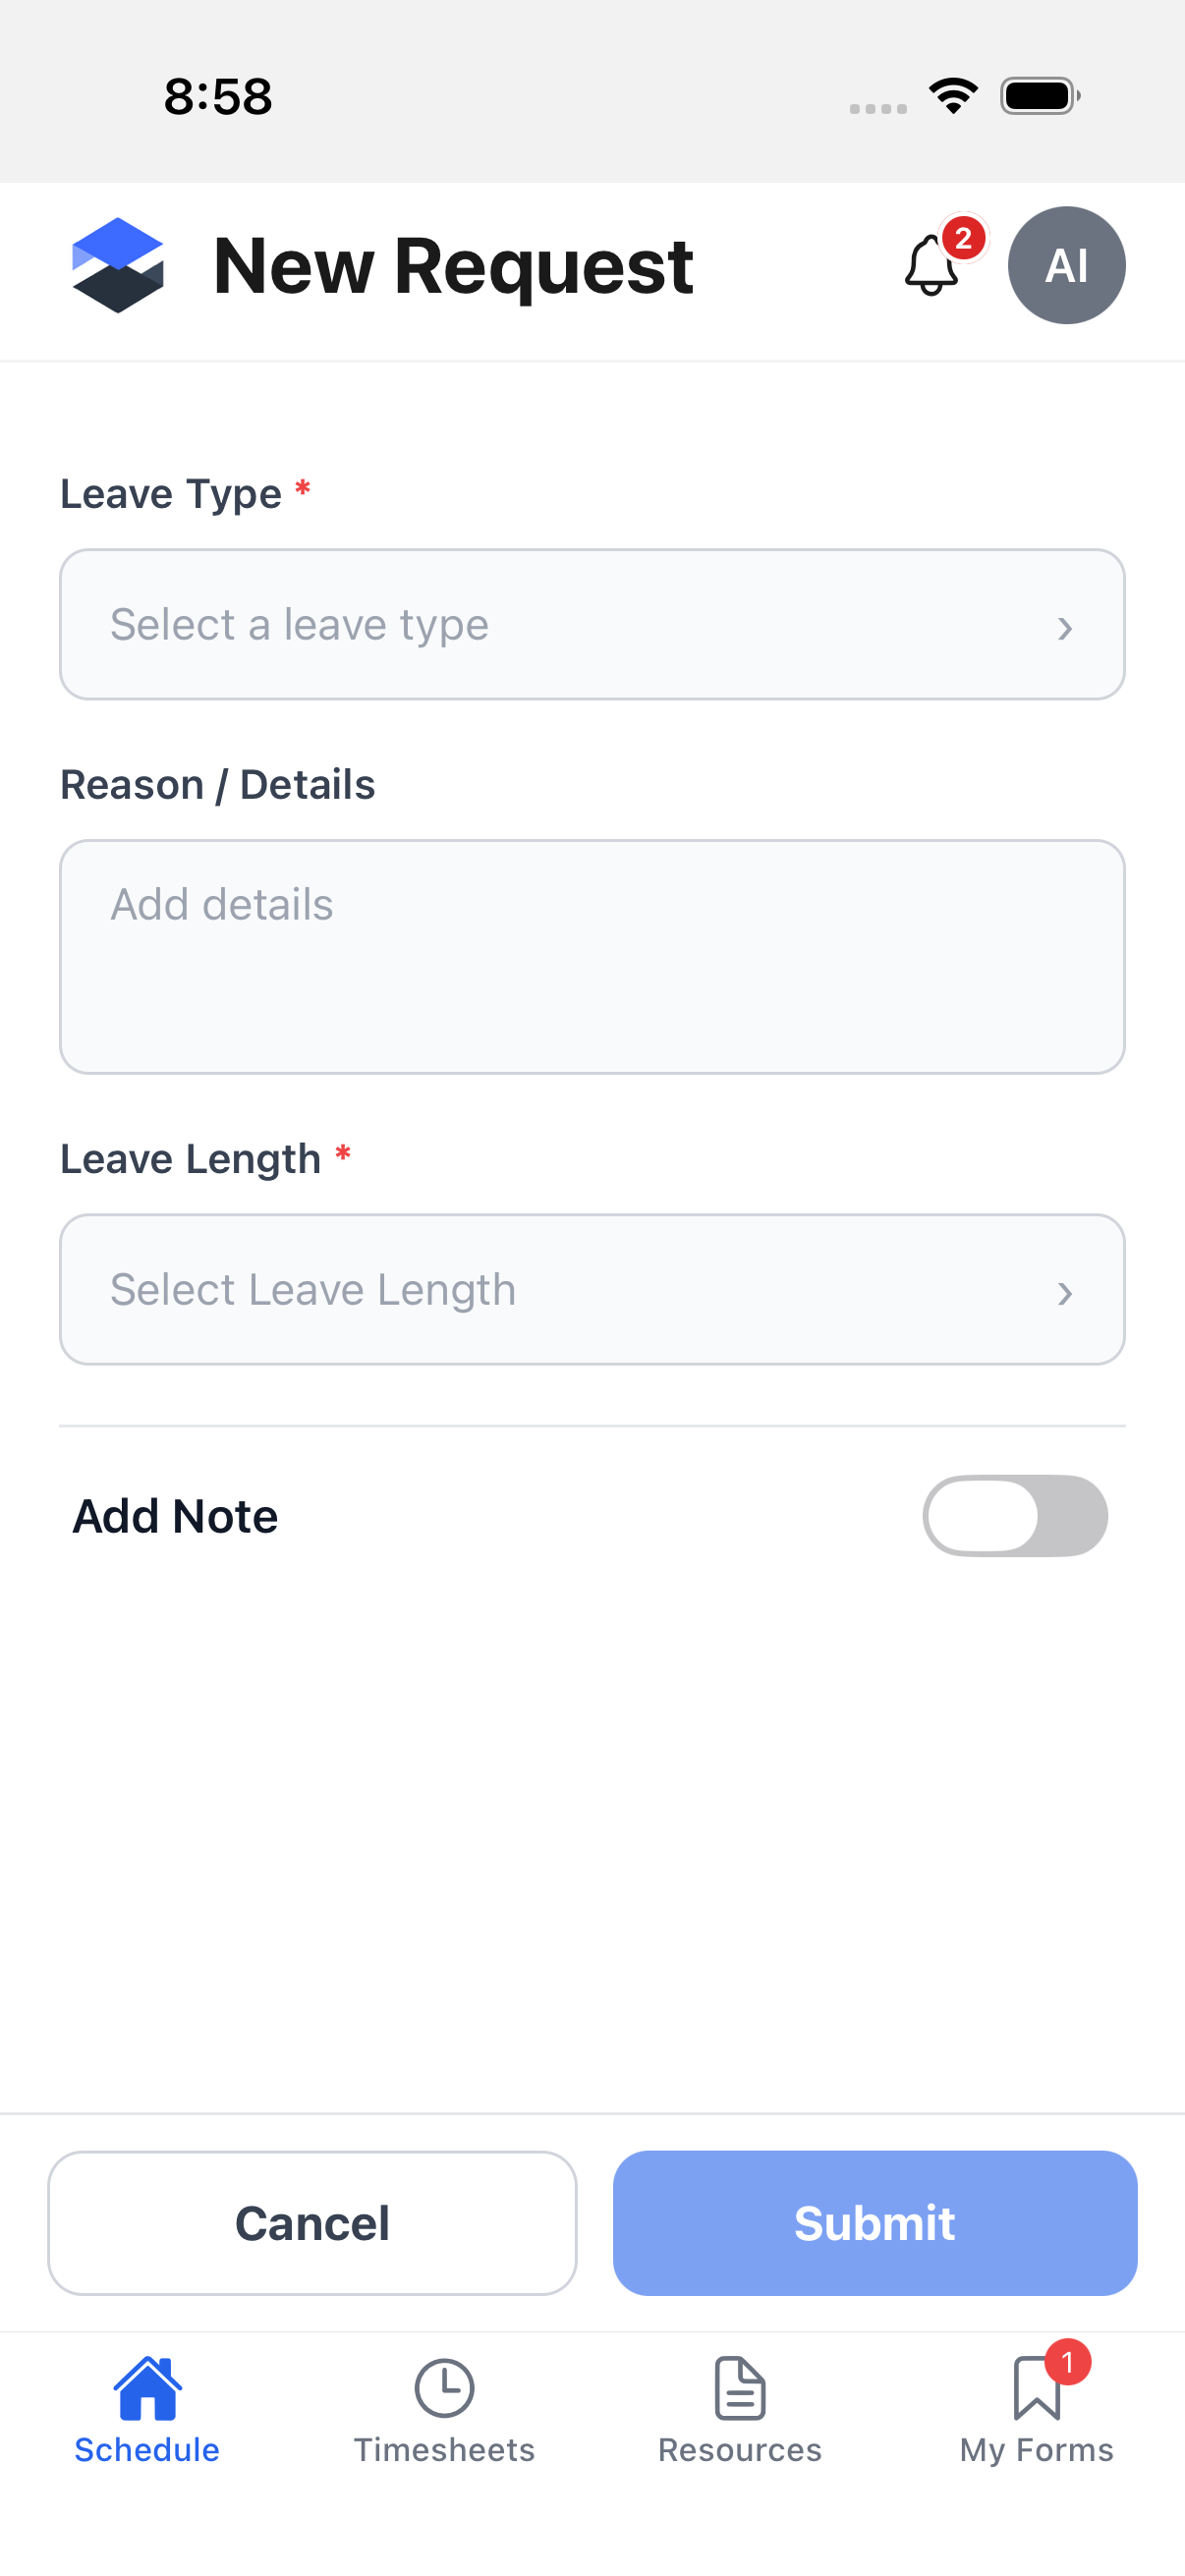
Tap the + button on the vacation list to open the New Request form.
| Field | Required | Description |
|---|---|---|
| Leave Type | Yes | Opens a searchable picker -- see below. |
| Reason / Details | No | Free-text notes. |
| Leave Length | Yes | Full Day, Multi Day, or Hourly. Choosing a length reveals the matching date/time fields below (not shown until a length is selected). |
| Date / Start Date / End Date | Yes | A single Date for Full Day and Hourly; Start Date and End Date for Multi Day, plus an optional Choose Days to Exclude picker. |
| From / To | Yes, for Hourly | Start and end time of the leave. |
| Add Note | No | Toggle that reveals a rich-text worker note field. |
Leave type picker
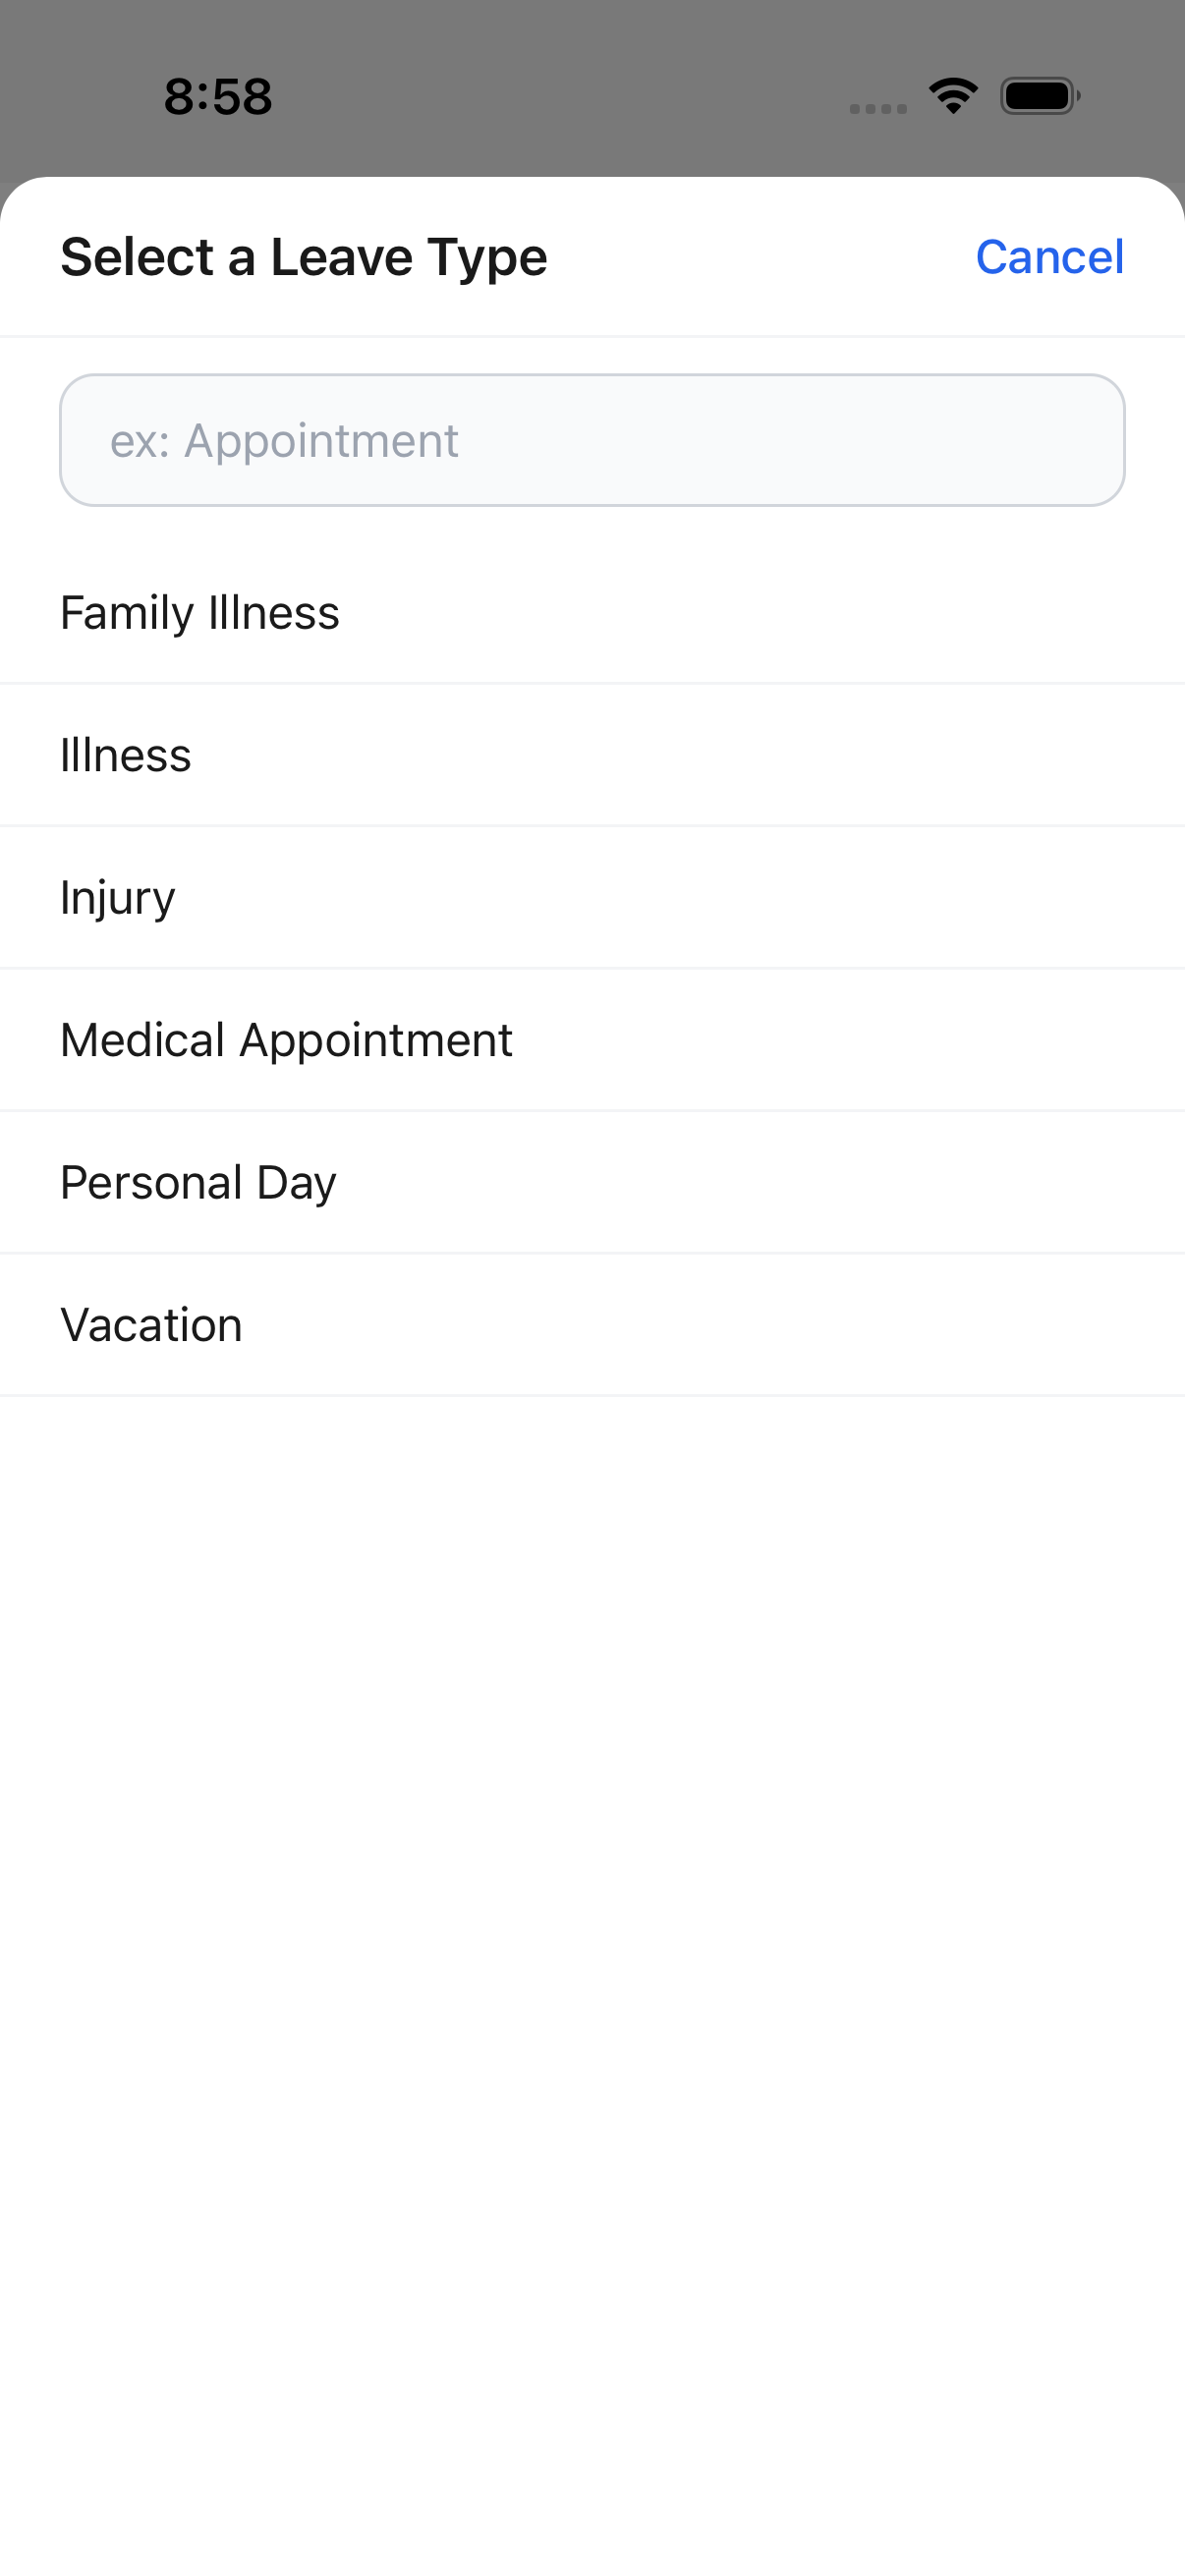
Tapping Select a leave type opens a searchable list of the leave types configured for your company (for example Vacation, Illness, Injury, Medical Appointment, Personal Day, Family Illness). Tap a type to select it, or Cancel in the top-right to close the picker without choosing one.
Tap Submit to send the request for approval, or Cancel to discard the form and return to the list.
If you already have leave on the selected date(s), the app shows a Leave Request Conflict message before you can submit.
On the desktop web application, submitted leave requests are reviewed and approved from Leave Submissions.
Editing a vacation request
Each non-Approved request on the list shows Edit and Delete actions (gated by Leave Requests → Edit and Leave Requests → Delete respectively). Edit opens the Edit Leave Request screen -- the same form as Requesting leave, pre-filled with the request's leave type, length, dates/times, details, and worker note. Its Submit button resets the request's status back to In Review; Cancel discards the change. Delete opens a confirmation dialog (title "Delete vacation request?") before removing the request.
The demo instance used for this page's screenshots has no vacation requests for the signed-in account, so the edit screen could not be screenshotted this pass. It is described in writing instead.
Workflow: requesting leave
Requesting leave writes a new record. These are the steps, described rather than performed:
- Open My Vacation from the profile menu and tap +.
- Select a Leave Type from the searchable picker.
- Choose the Leave Length: Full Day, Multi Day, or Hourly -- this reveals the matching date/time fields.
- Fill in the Date (Full Day/Hourly) or Start Date/End Date (Multi Day, with an optional Choose Days to Exclude picker), or the From/To times for an Hourly request.
- Optionally add Reason / Details, and optionally toggle Add Note to include a worker note.
- Tap Submit. The app checks the selected date(s) against your own existing leave locally first and shows a Leave Request Conflict banner if they overlap; a conflict blocks submission until resolved. Online, the request is created with status In Review. Offline, it queues locally and syncs on reconnect.
Statuses a leave request moves through: Not Submitted -> In Review -> Approved or
Rejected. Editing and re-submitting a request resets its status back to In Review.
Who is notified:
- Submitting a leave request sends a Leave Submitted notification. Like Expense Submitted, this type is not listed on the Notification Settings screen (it is grouped under submissions), so its exact recipient list is not covered here.
- Approving or rejecting a leave request sends Leave Approved or Leave Rejected to the submitter -- these two are toggleable in Notification Settings under the Leave category.
Vacation permissions
| Permission | Governs |
|---|---|
| Leave Requests → View | Whether the Vacation list appears at all (without it you see a "no view permission" message). |
| Leave Requests → Create | Shows the + button on the vacation list. |
| Leave Requests → Edit | Shows the Edit action on each non-Approved leave request card. |
| Leave Requests → Delete | Shows the Delete action on each non-Approved leave request card. |
| Leave Requests → Archive | Not used by the mobile vacation screens. |
The scope on these permissions (own / department / direct reports / all) is applied automatically, so the mobile screens only need the plain view/create/edit/delete checks documented above.
Certifications
The certifications list
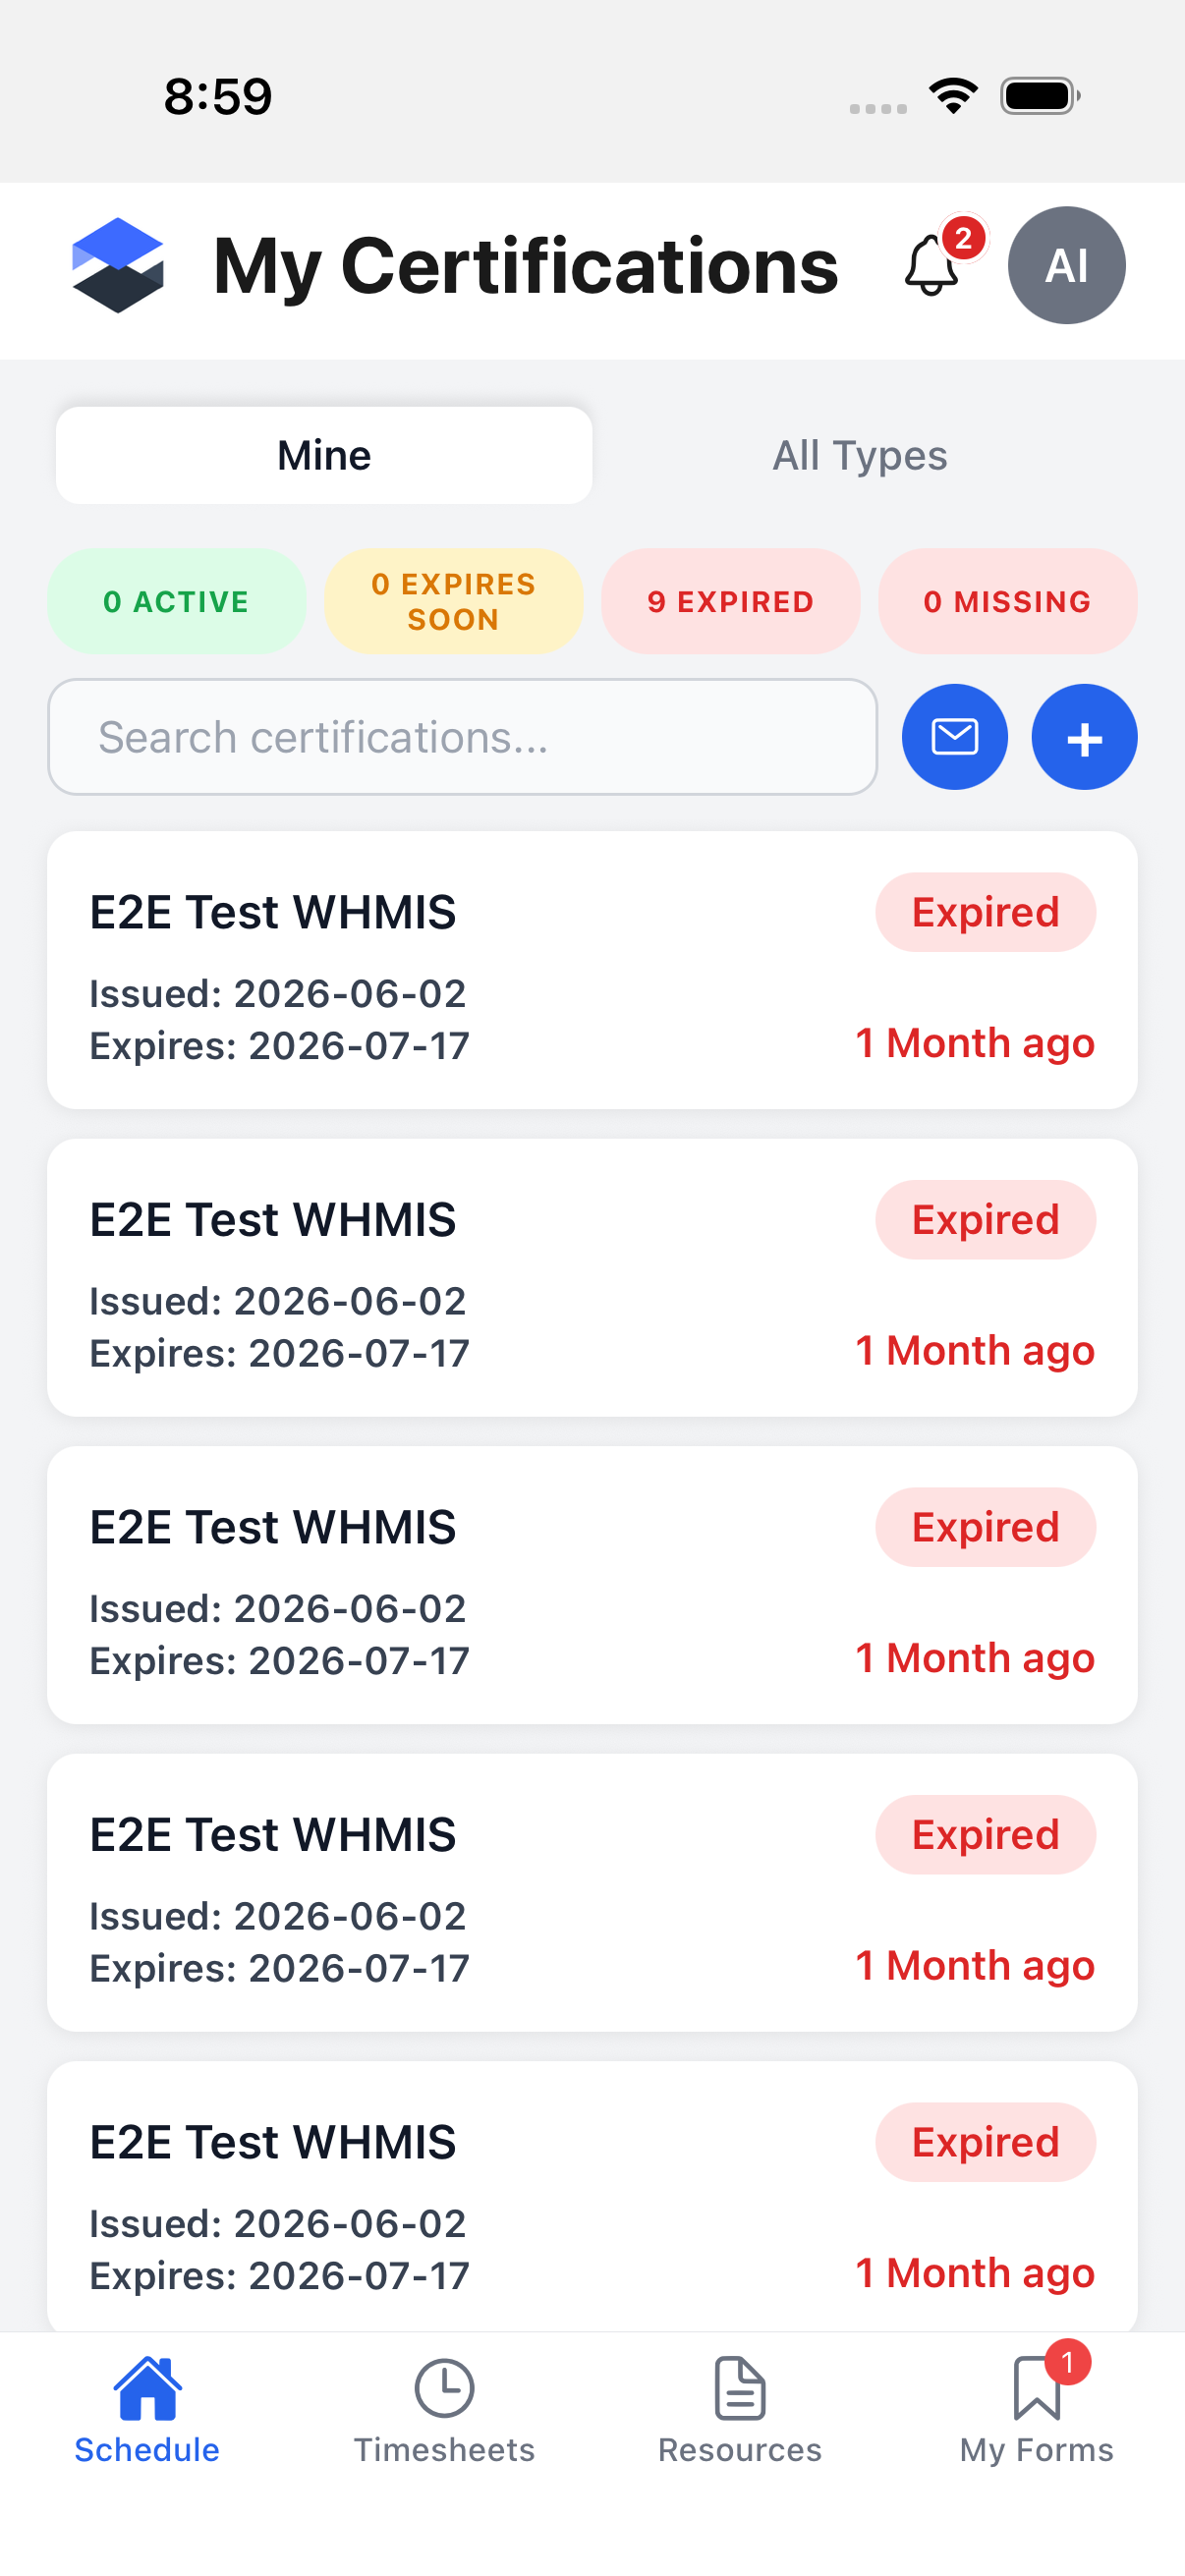
Tap My Certifications from the profile menu. If your role can review certifications company-wide, a Mine / All Types toggle appears at the top -- gated by the Certifications → View permission (see Permissions below). Mine (the default) shows your own certification records with status counts (Active, Expires Soon, Expired, Missing). Use the search field, the mail icon to email your certifications to someone, or the + button to add a new one.
All certification types (admin)
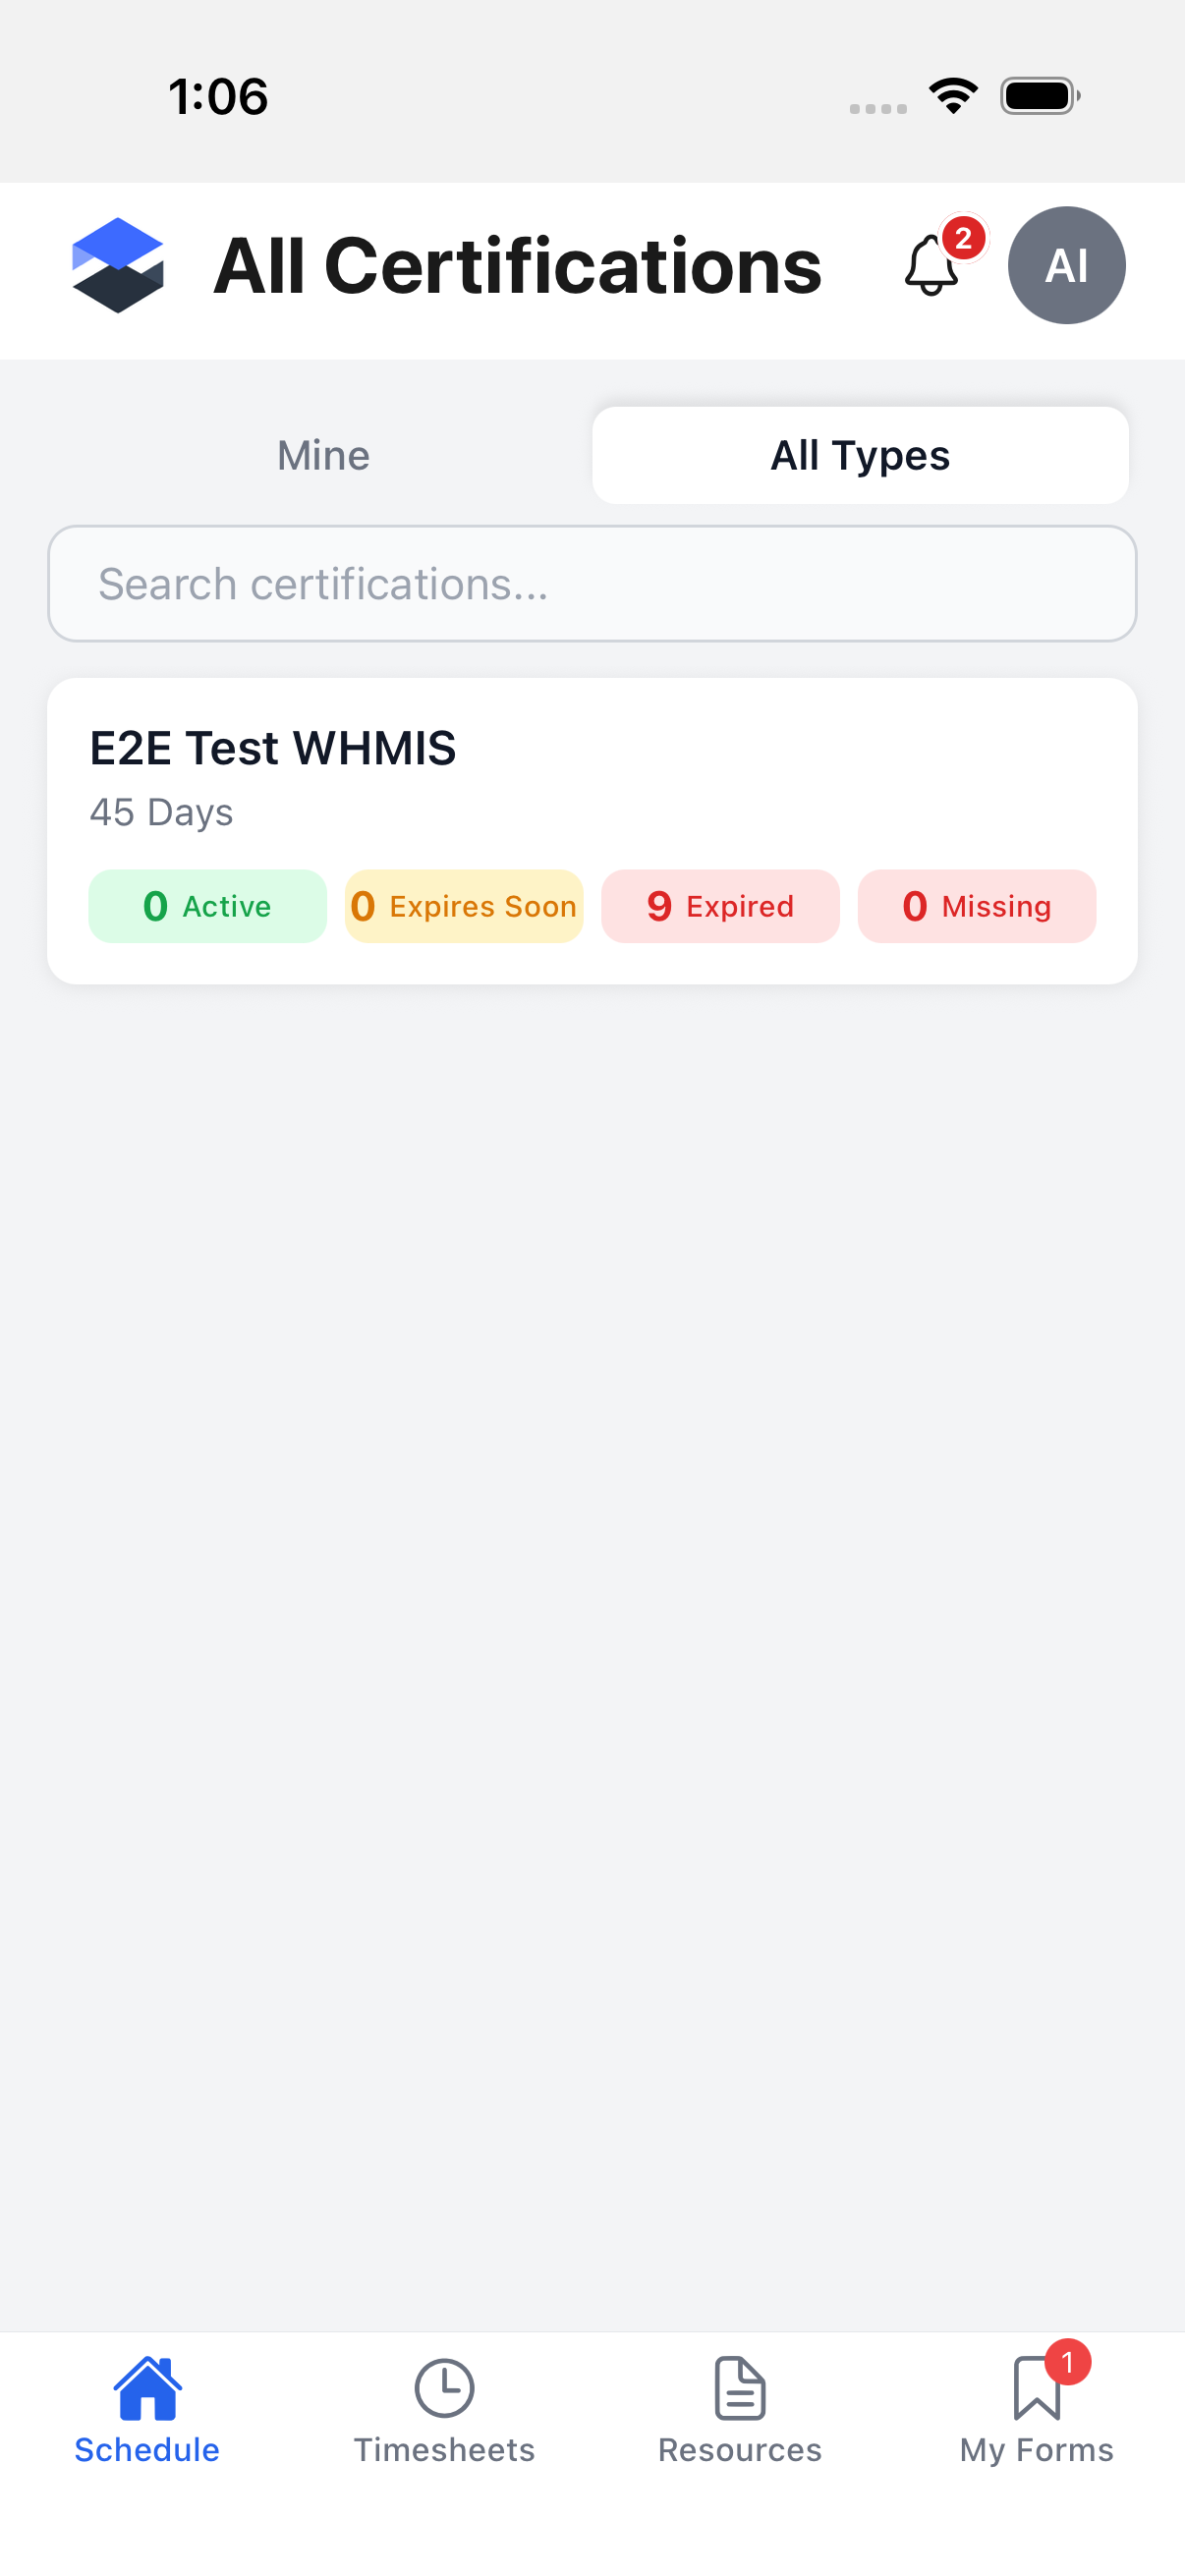
Tap All Types to switch the toggle. This shows every certification type configured for your company, each with a rolled-up count of Active, Expires Soon, Expired, and Missing records across all users. Tap a type to open its detail screen.
A certification type's detail (admin)
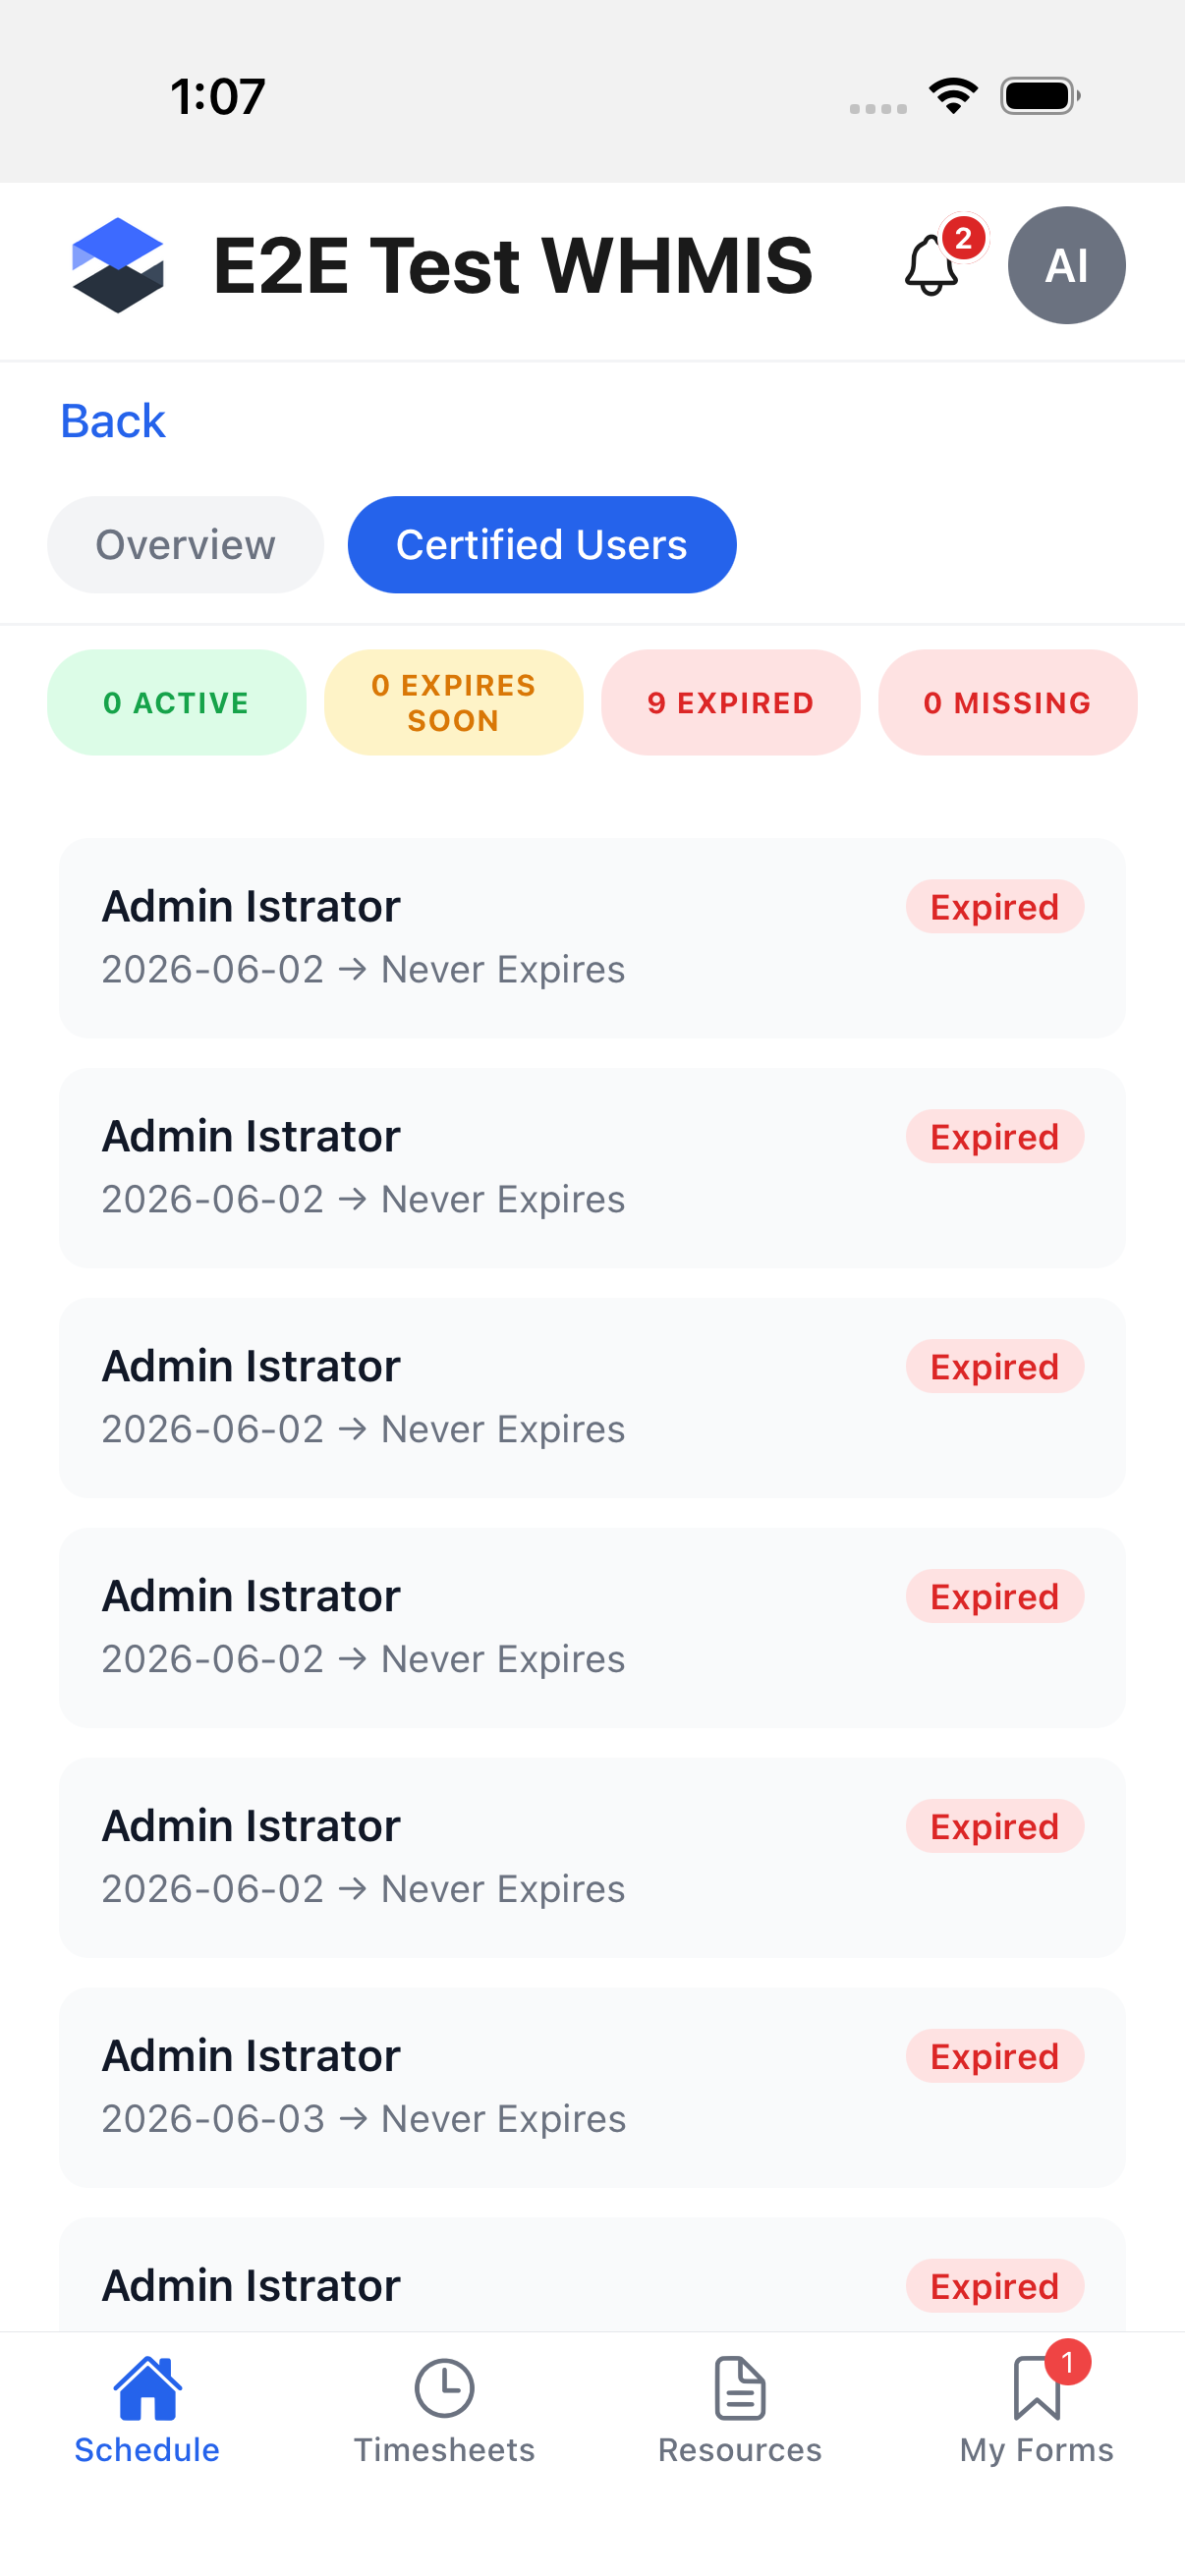
A certification type's detail screen has its own Overview / Certified Users tabs. Overview repeats the same rolled-up counts as the list plus the type's Category, Frequency, Upload Mandatory flag, and any configured Training Providers. The Certified Users tab lists every user with a record for this certification type, each row showing their name, status badge, and issue/expiry dates -- tap a row to open that user's certification detail.
A certification's detail and history
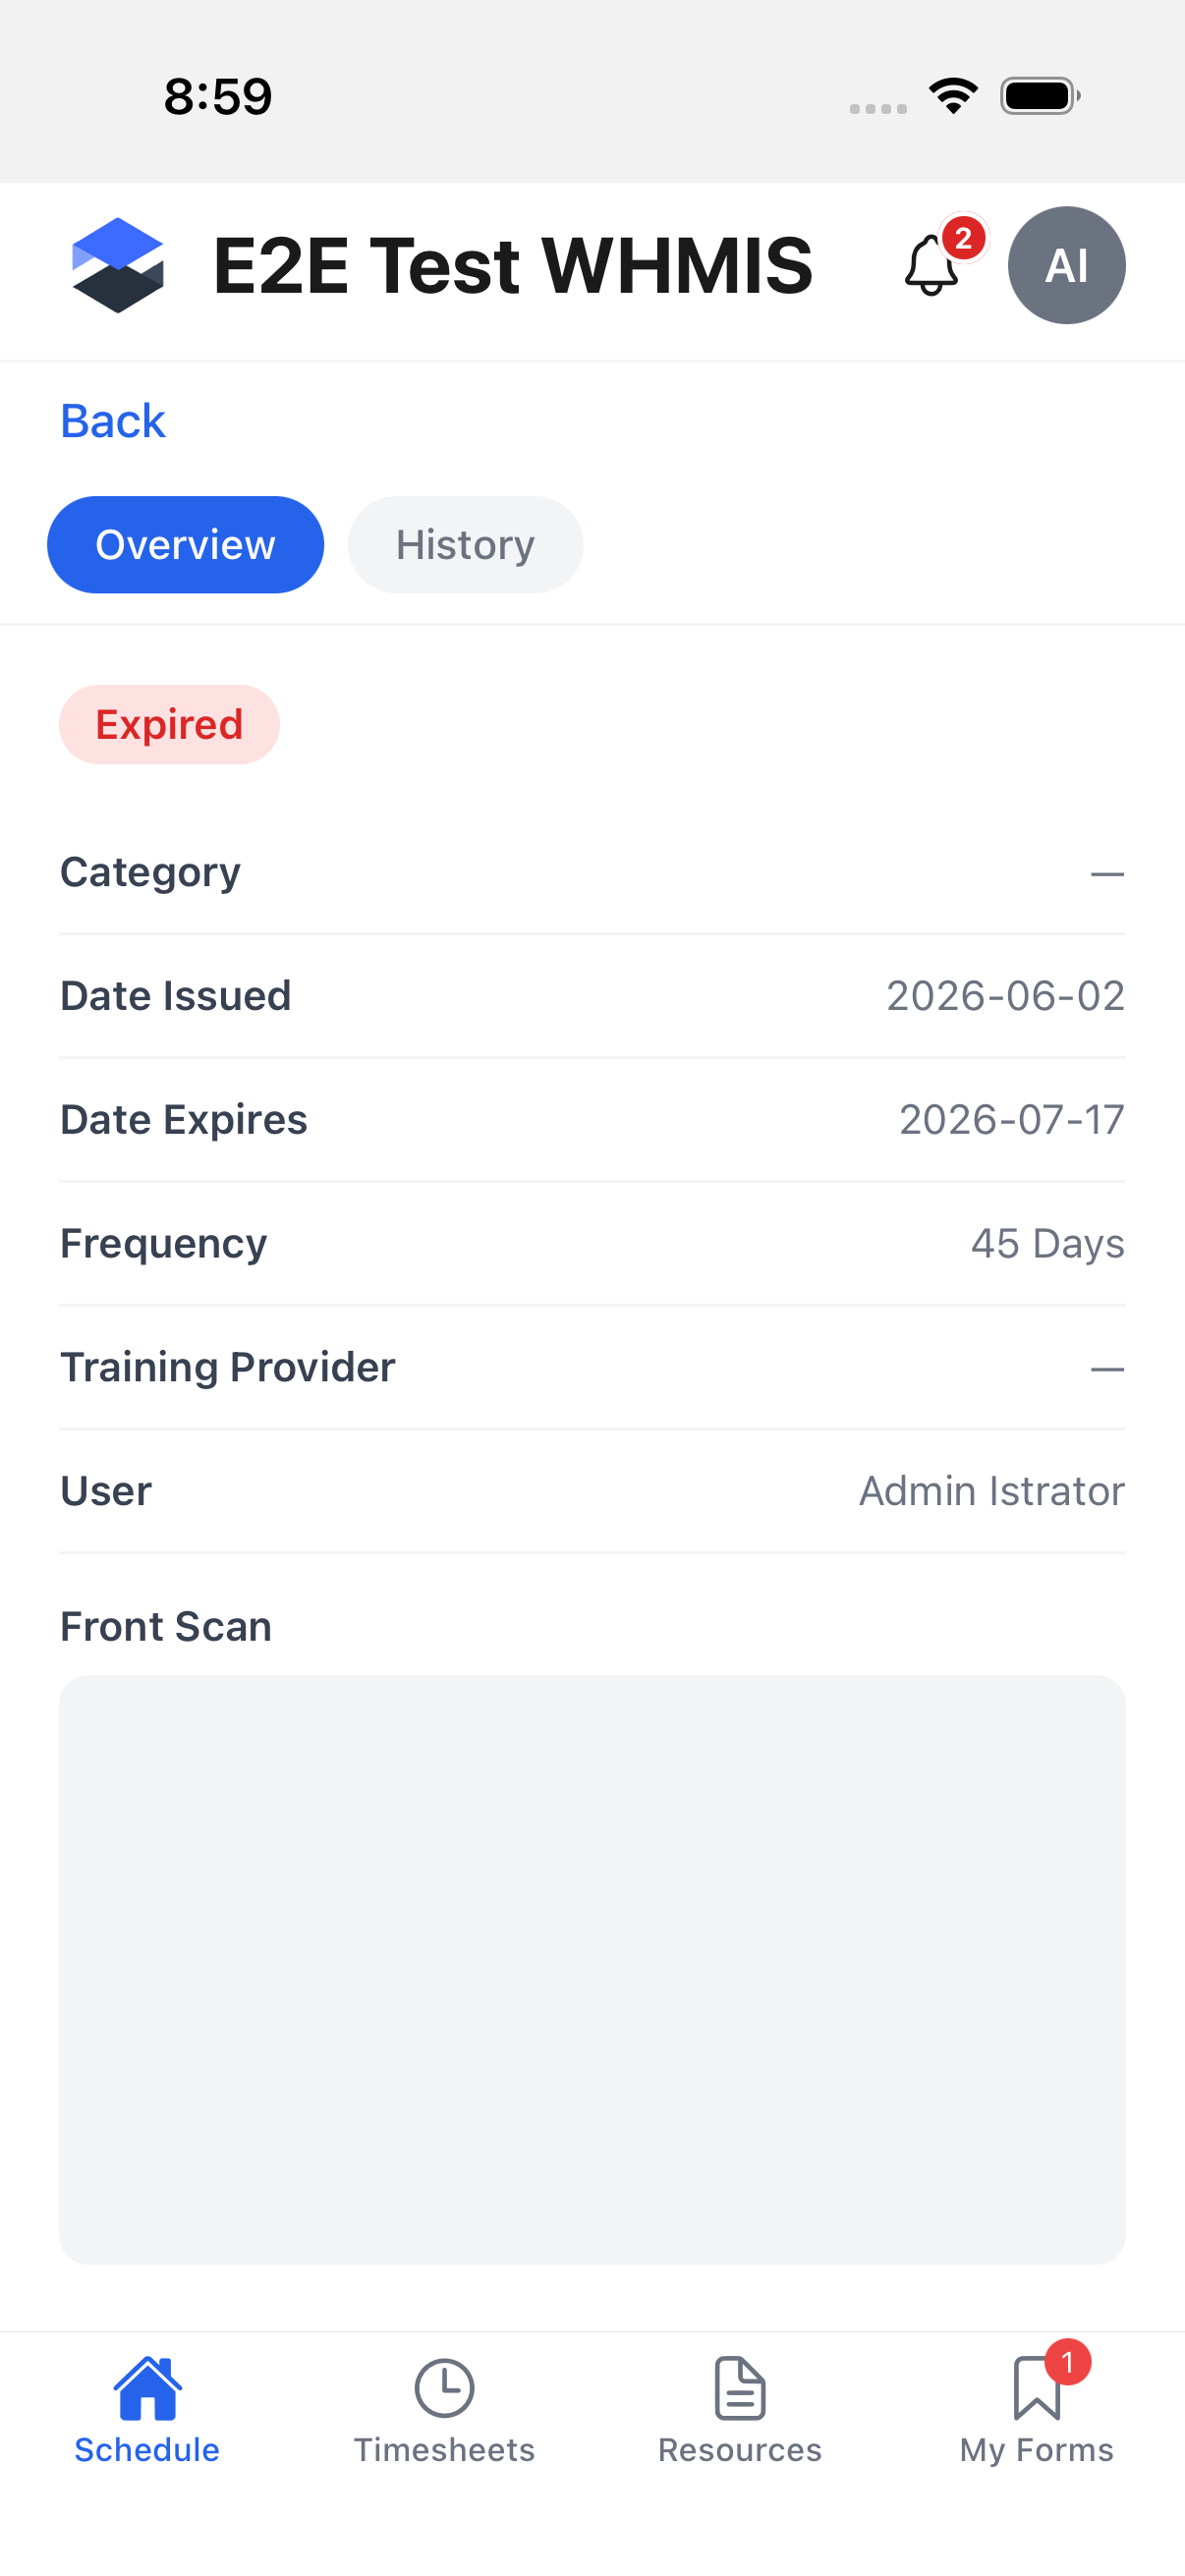
Tap any certification in the list to open its detail screen. The Overview tab shows its status, Category, Date Issued, Date Expires, Frequency, Training Provider, User, and the Front Scan / Back Scan images (with Replace and Delete actions).
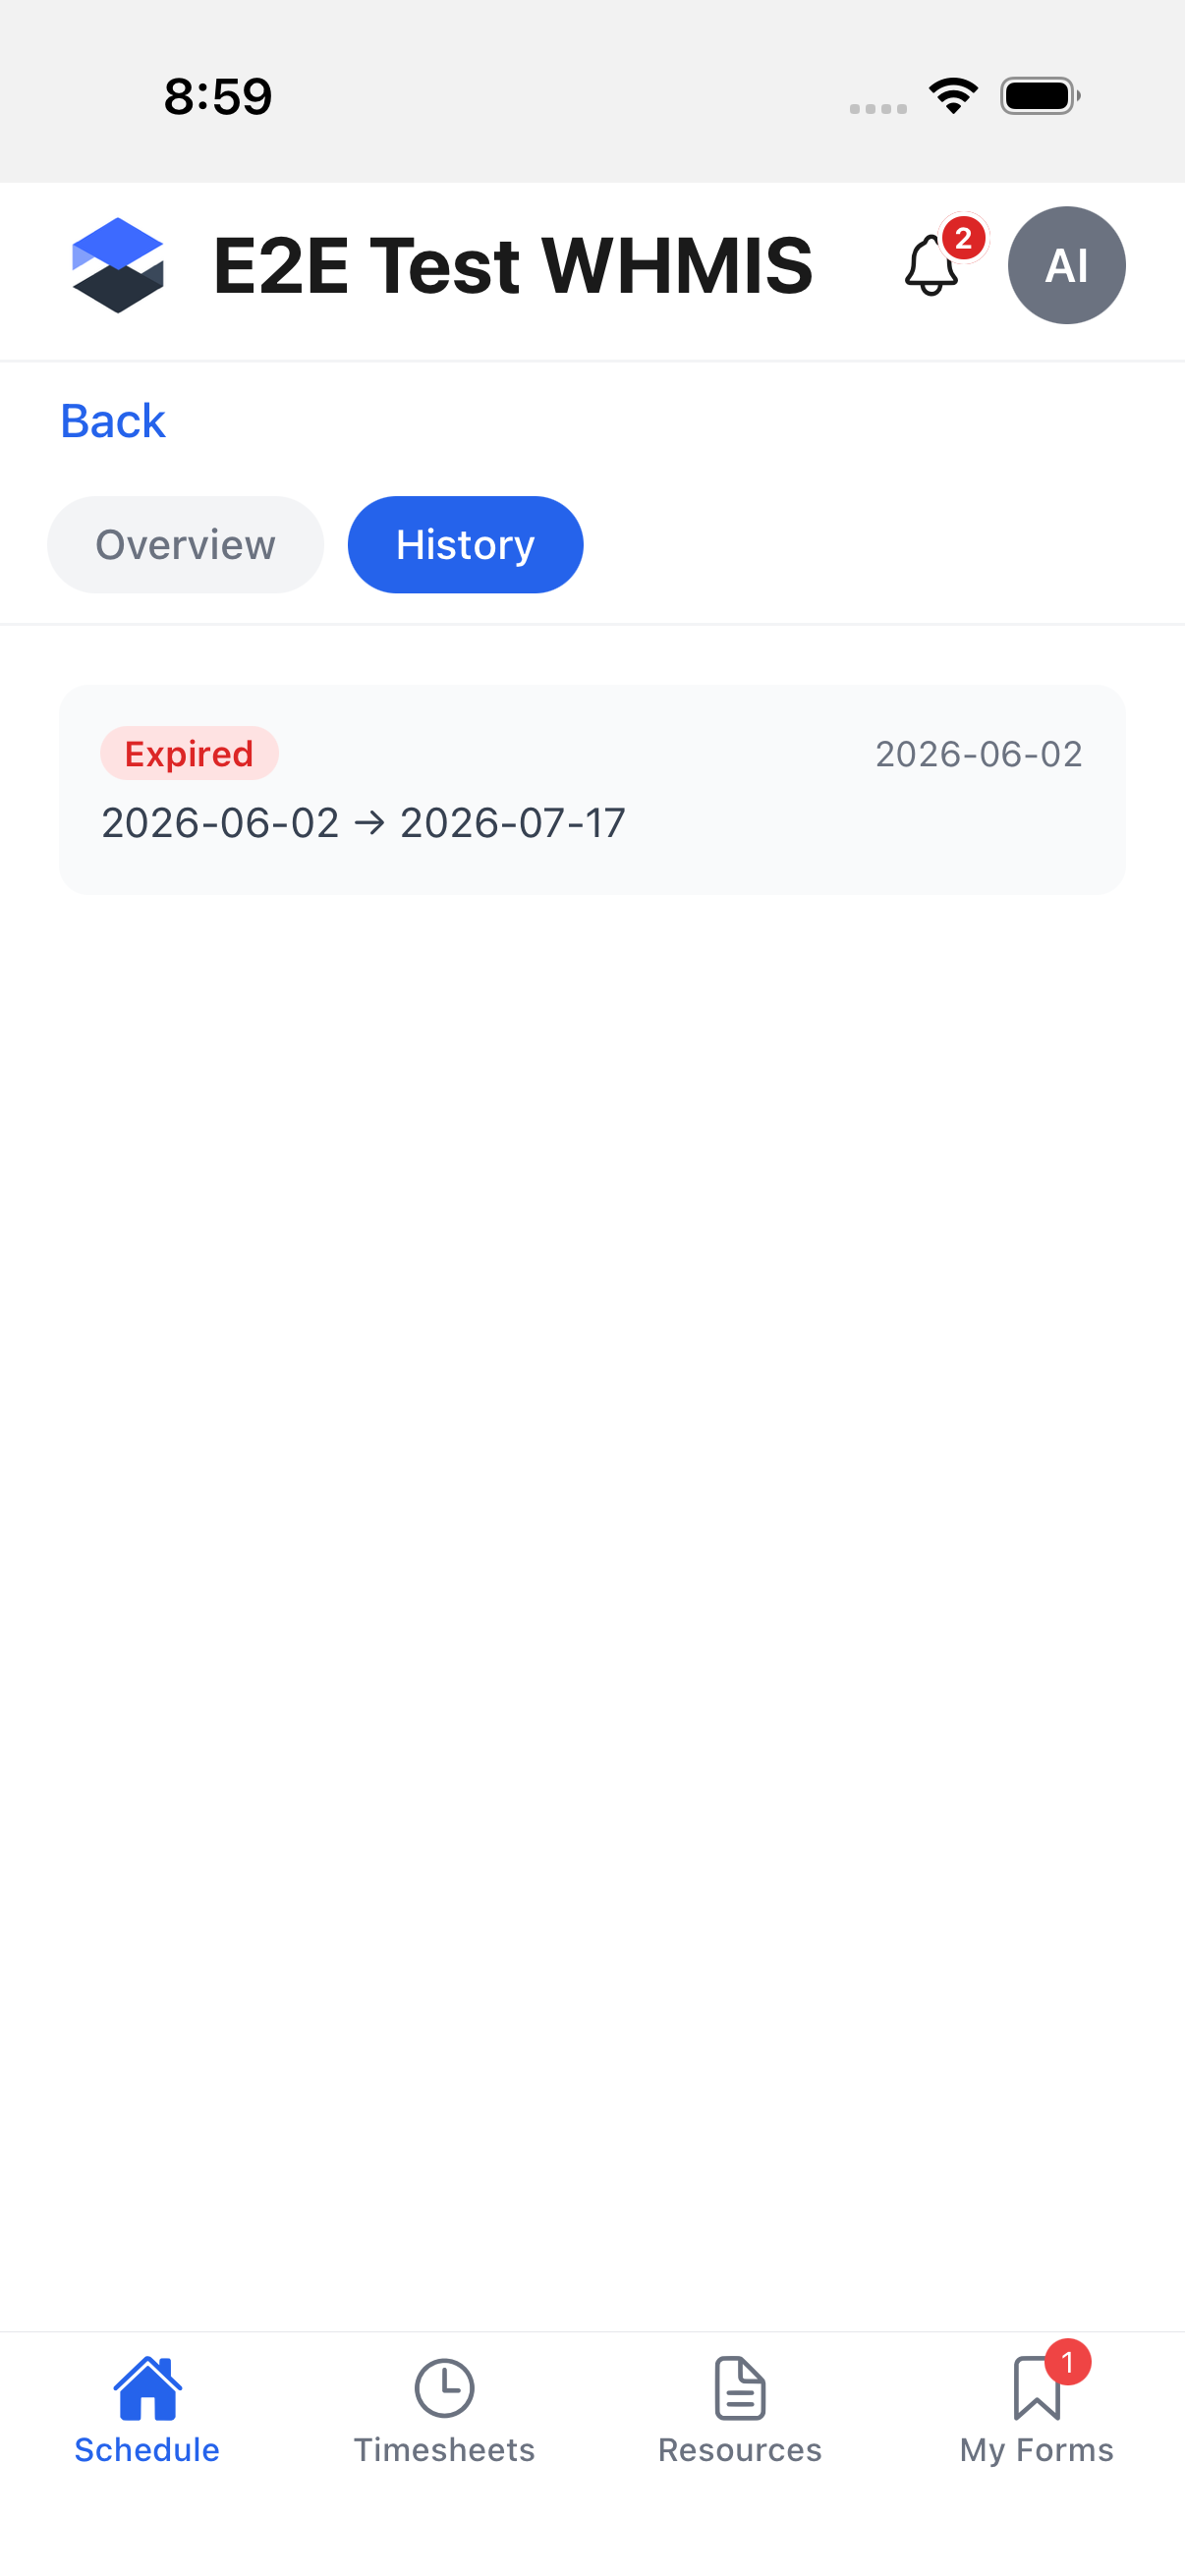
The History tab lists prior versions of the certification -- each with its status and the date range it covered. A certification that has never been replaced shows "This is the original certification" instead.
Deleting a certification record
With the User Certifications → Delete permission (and the device online), a Delete button appears on the Overview tab below Replace Certification. Tapping it opens a confirmation dialog titled Delete Certification? with the message "This will permanently remove this certification record." and two buttons, Cancel and Delete. Deleting returns you to the previous screen.
The demo admin account used for this page's screenshots does not have that permission, so the Delete button never appears for it and this dialog could not be screenshotted. It is described in writing instead.
On the desktop web application, this same history and the underlying certification types are managed from Certifications.
Adding a certification
Tap the + button on the certifications list to open the Add Certification form.
| Field | Required | Description |
|---|---|---|
| Select certification type | Yes | Searchable picker of certification types configured for your company. |
| Select training provider | No | Searchable picker of training providers. |
| Date Issued | Yes | Date picker. |
| Date Expires | Yes, unless the certification type never expires | Date picker. A warning appears if the date you pick doesn't match the certification type's renewal window. |
| Front Scan | Required or optional, depending on the certification type | See below. |
| Back Scan | No | Same control as Front Scan. |
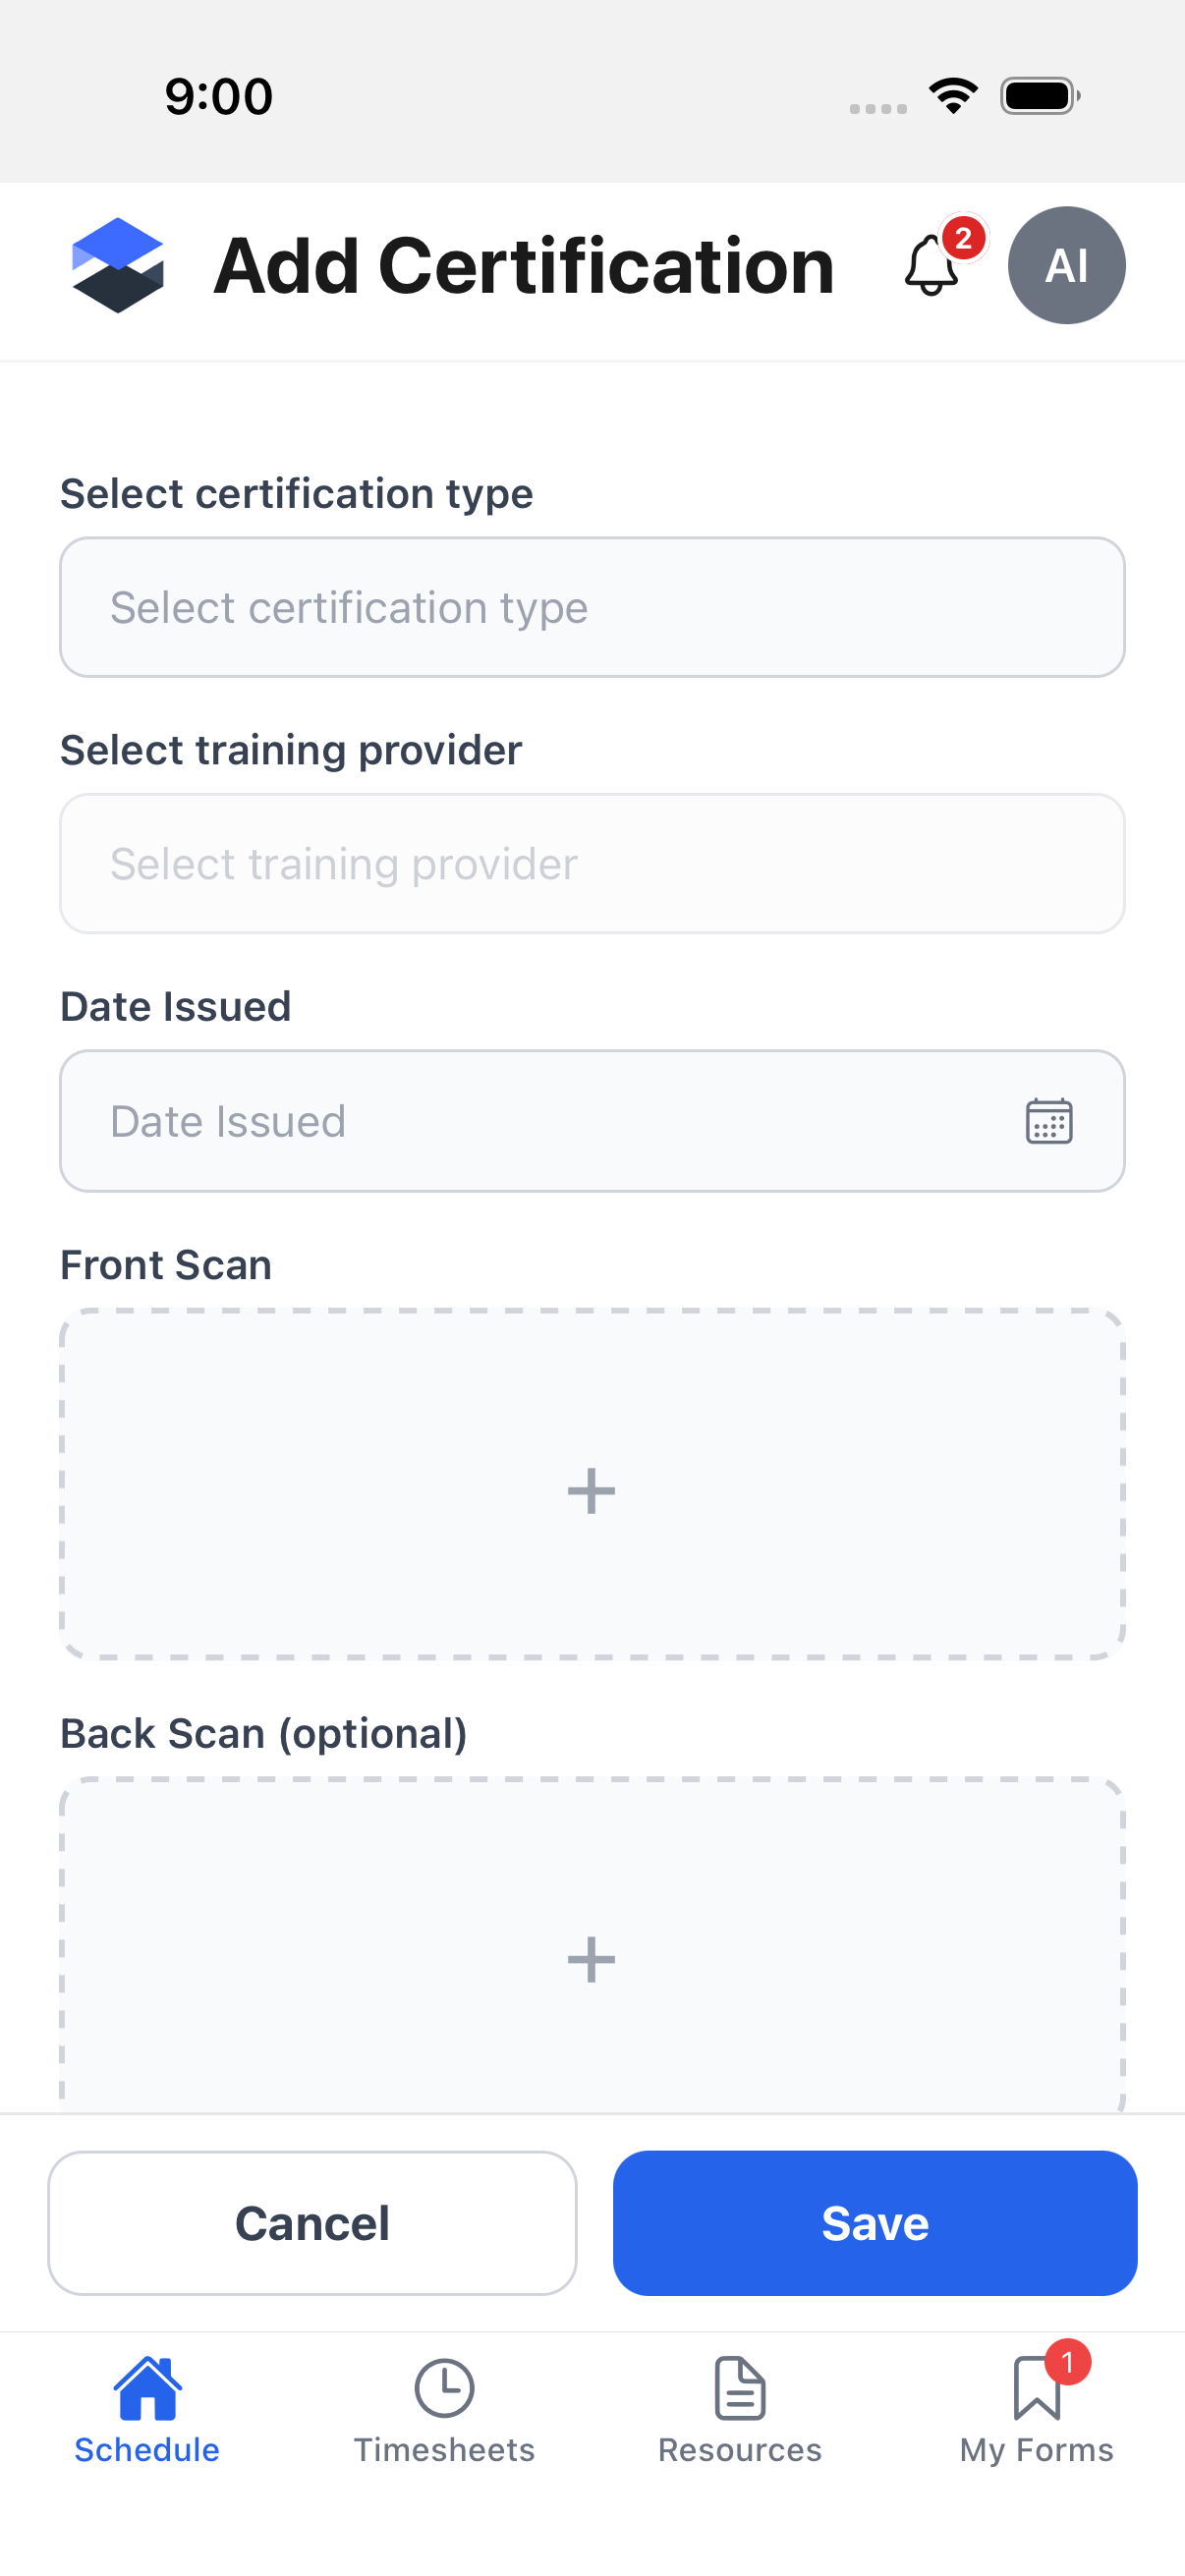
Front and back scan controls
Tap the + tile under Front Scan (or Back Scan) to open the device's native photo-source menu:
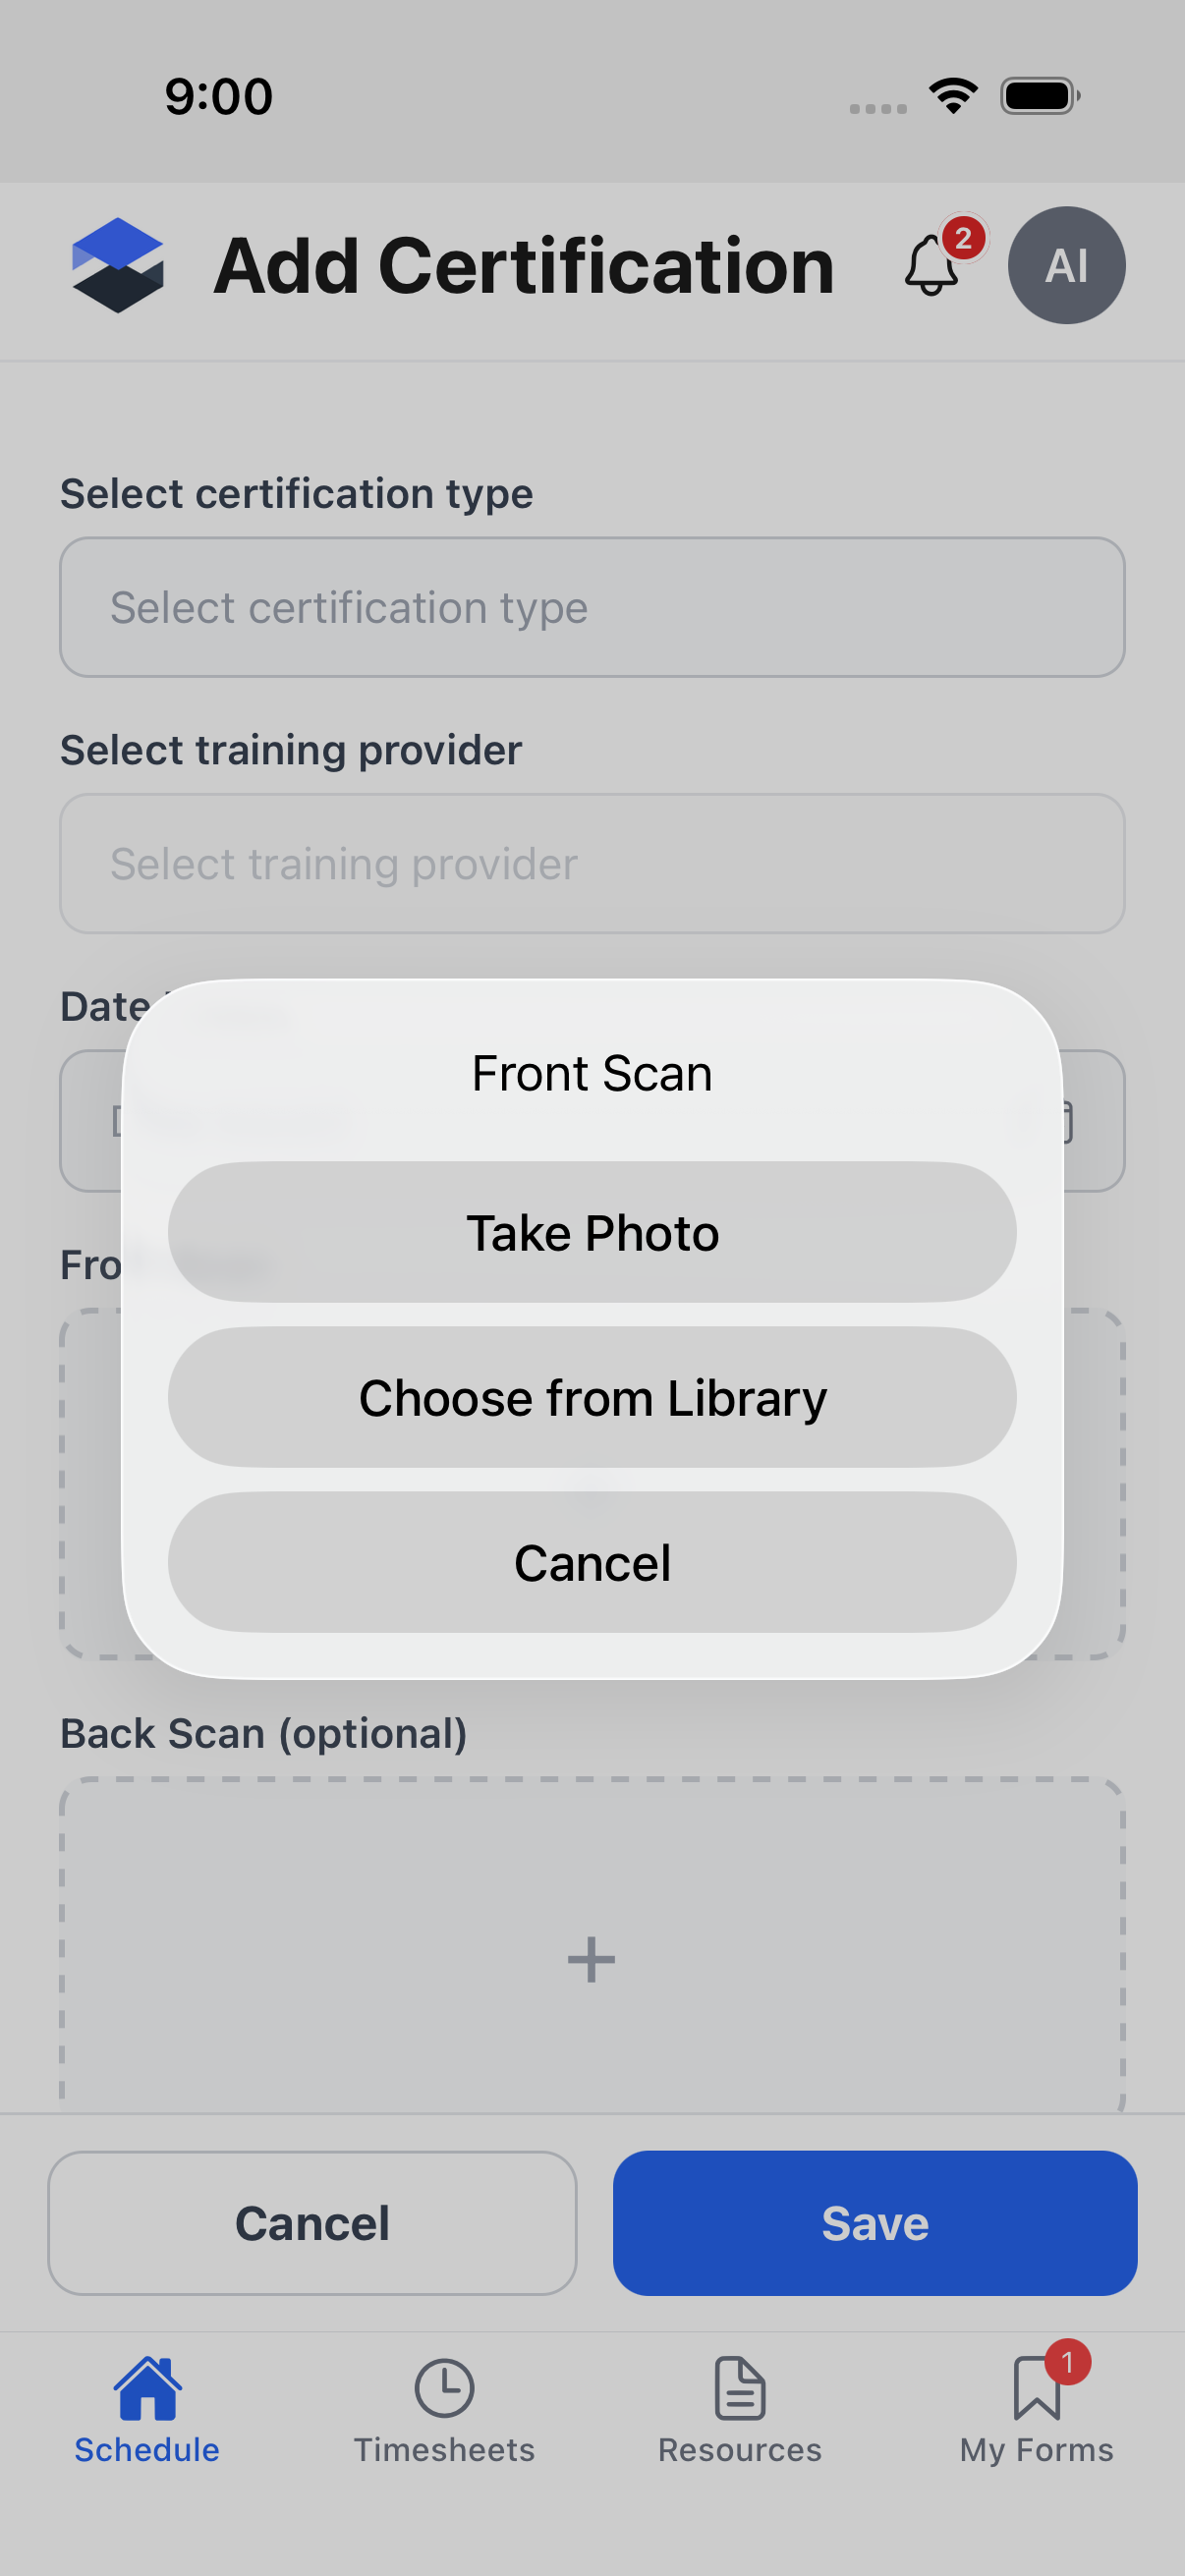
- Take Photo -- opens the camera.
- Choose from Library -- opens the device's photo library.
- Cancel -- dismisses the menu without attaching anything.
Once a scan is attached, its tile shows the image with a Remove button so you can replace it before saving.
Tap Save to add the certification, or Cancel to discard the form and return to the list.
Whether the front/back scan images have a file-size or format limit could not be confirmed from the mobile app's source in this pass.
Workflow: adding a certification
Adding a certification writes a new record. These are the steps, described rather than performed:
- Open My Certifications from the profile menu and tap +.
- Select a certification type from the searchable picker. If the type has a fixed renewal frequency, picking a Date Issued auto-calculates Date Expires.
- Optionally select a training provider.
- Attach a Front Scan (required when the certification type has upload marked mandatory) and optionally a Back Scan, each via the device's camera or photo library.
- Tap Save. Online, both scans upload in parallel before the record is created; if either upload fails, nothing is saved -- there is no half-created record with a missing photo -- and the picked images stay in the form so Save can be retried. Offline, the certification queues locally and syncs on reconnect.
- On success you land on the new certification's detail screen.
Replacing an existing certification (via Replace Certification on its detail screen) follows the same form, pre-filled with the old record's type and provider, and supersedes the old record instead of creating an unrelated one.
Statuses a certification record moves through: Active -> Expiring Soon (inside the
certification type's configured "expires soon" window) -> Expired; or Missing, if a required
certification was never added for a user. These are worked out from the record's expiry date
against today's date -- there is no submit/approve/reject workflow for a certification record
itself.
Who is notified: nobody. Unlike expenses and leave, certifications have no notification type in the mobile app and no Notification Settings category, so adding, replacing, or deleting a certification does not send a push or in-app notification.
Certifications permissions
| Permission | Governs |
|---|---|
| Certifications → View | Shows the Mine / All Types toggle and the All Types list. |
| Certifications → Create | Not used by the mobile certification screens. |
| Certifications → Edit | Not used by the mobile certification screens. |
| Certifications → Delete | Not used by the mobile certification screens. |
| Certifications → Archive | Not used by the mobile certification screens. |
| Certifications → Assign | Not used by the mobile certification screens. |
| User Certifications → View | Which certification records you can see -- not tied to a specific control on these screens. |
| User Certifications → Create | Not used by the mobile certification screens. |
| User Certifications → Edit | Not used by the mobile certification screens. |
| User Certifications → Delete | Shows the Delete button on a user certification's detail screen (also requires the device to be online). |
| User Certifications → Archive | Not used by the mobile certification screens. |
| User Certifications → Assign | Not used by the mobile certification screens. |
Only the permissions marked above actually control something on the mobile certification screens. The rest exist for parity with the desktop app but have no effect on these screens.