Create a Job
Jobs represent individual scopes of work within a project. They track financial details, crew assignments, scheduling, and progress for a specific piece of the project.
Prerequisites
- A project must already exist.
- You must be signed in with a role that has job creation permissions.
Steps
1. Open the project's Jobs tab
Navigate to the project, then click the Jobs tab in the project header.

2. Click Add Job
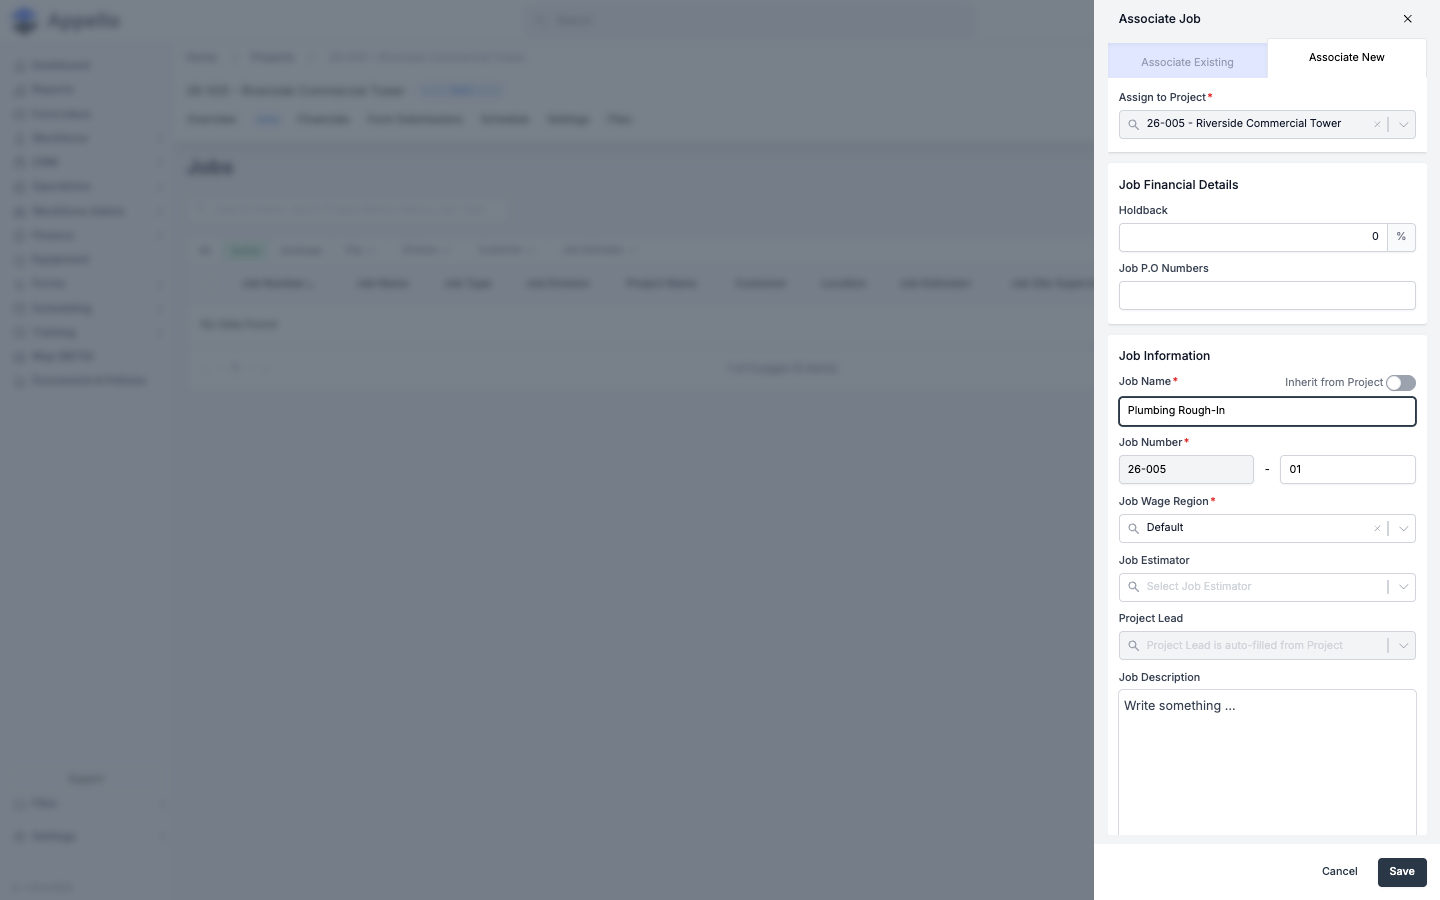
Click the + button in the top-right corner of the Jobs table. The Associate Job panel opens with two options:
- Associate Existing — link an already-created job to this project.
- Associate New — create a brand-new job (selected by default).

3. Fill in the job details
The form has several sections:
Assign to Project
Pre-filled and locked to the current project (e.g. 26-001 - Riverside Commercial Tower).
Job Financial Details
| Field | Required | Description |
|---|---|---|
| Holdback | No | Holdback percentage (default 0%). |
| Job P.O Numbers | No | Purchase order reference numbers. |
Job Information
| Field | Required | Description |
|---|---|---|
| Job Name | Yes | Descriptive name for this scope of work. |
| Job Number | Yes | Auto-generated from the project number (e.g. 26-001-01). The suffix is editable. |
| Job Wage Region | Yes | Defaults to Default. Select the applicable wage region. |
| Job Estimator | No | Select the estimator from the dropdown. |
| Project Lead | Auto | Inherited from the project — read-only. |
| Job Description | No | Rich-text description with formatting toolbar. |
| Job Type | No | Categorize the job (e.g. Service, T&M). |
| Job Rate Type | Yes | Defaults to Regular. |
| Division | No | Assign to a company division. |
Job Customer Information
Link customer and contact records via the Add buttons.
Job Coordination and Site Details
Configure geo-fencing radius, planned start/end dates, site supervisors, and timesheet submission type.
Job Status
| Field | Required | Description |
|---|---|---|
| Job Status | Yes | Select from: Quoting, Won, In Progress, On Hold, Complete, Closed, Lost. |
4. Save
Click Save. The job is created and appears in the project's Jobs table.
What's next?
- Open the job to add financials, crew assignments, or schedule entries.
- Use the Form Submissions tab to track field reports linked to this job.
- Navigate to Scheduling → Job Schedule to see this job on the company-wide calendar.