Notes on Mobile
Screenshots on this page are from app version 1.71.0 on an iPhone simulator.
The Appello mobile app has the same notes feature as desktop -- a running feed of typed updates,
photos, and files attached to a job (or equipment, or a project), with @ tagging and threaded
replies. This page covers where notes live in the mobile app, sorting and per-note actions,
creating a note, cross-entity association, attaching photos and files, drafts, tagging, comments,
editing and deleting a note, who gets notified, and the Rewrite with AI control. For the full
desktop-side walkthrough of the notes feature itself (visibility, printing, notifications, and
more), see Job Notes, Photos & Activity Feed.
Workflow at a Glance
- Open notes from a job's Notes tab (or a project's, or a piece of equipment's) for that record's own activity feed, or from My Note Feed in the user menu for an account-wide feed across every record you have access to.
- On a job/project/equipment Notes tab, tap the circular + button to start a note. (My Note Feed has no compose button -- see Where Notes Live.)
- Fill in a title, a rich-text body (with
@mentions), an optional cross-entity association, and attachments. Mark any attachment Sensitive if it shouldn't show in the normal feed. - Tap Send, or back out and keep or discard the local draft.
- Anyone you
@mention -- directly, through a group, or through Everyone -- gets notified, and stays subscribed to that note's thread going forward (see Who Gets Notified). - Add comments under a note the same way, with the same
@mention support. - A note's author can Edit, Pin, or Delete it (and their own comments) from the ... actions menu, subject to the note permissions on their role (see Permissions Reference).
- Tapping a note-related push notification usually lands you back in context -- on the relevant job/project/equipment's Notes tab, with the note highlighted -- rather than on a standalone note screen. See Note Detail and the Standalone Note Screen.
Where Notes Live
Mobile surfaces notes in two places:
-
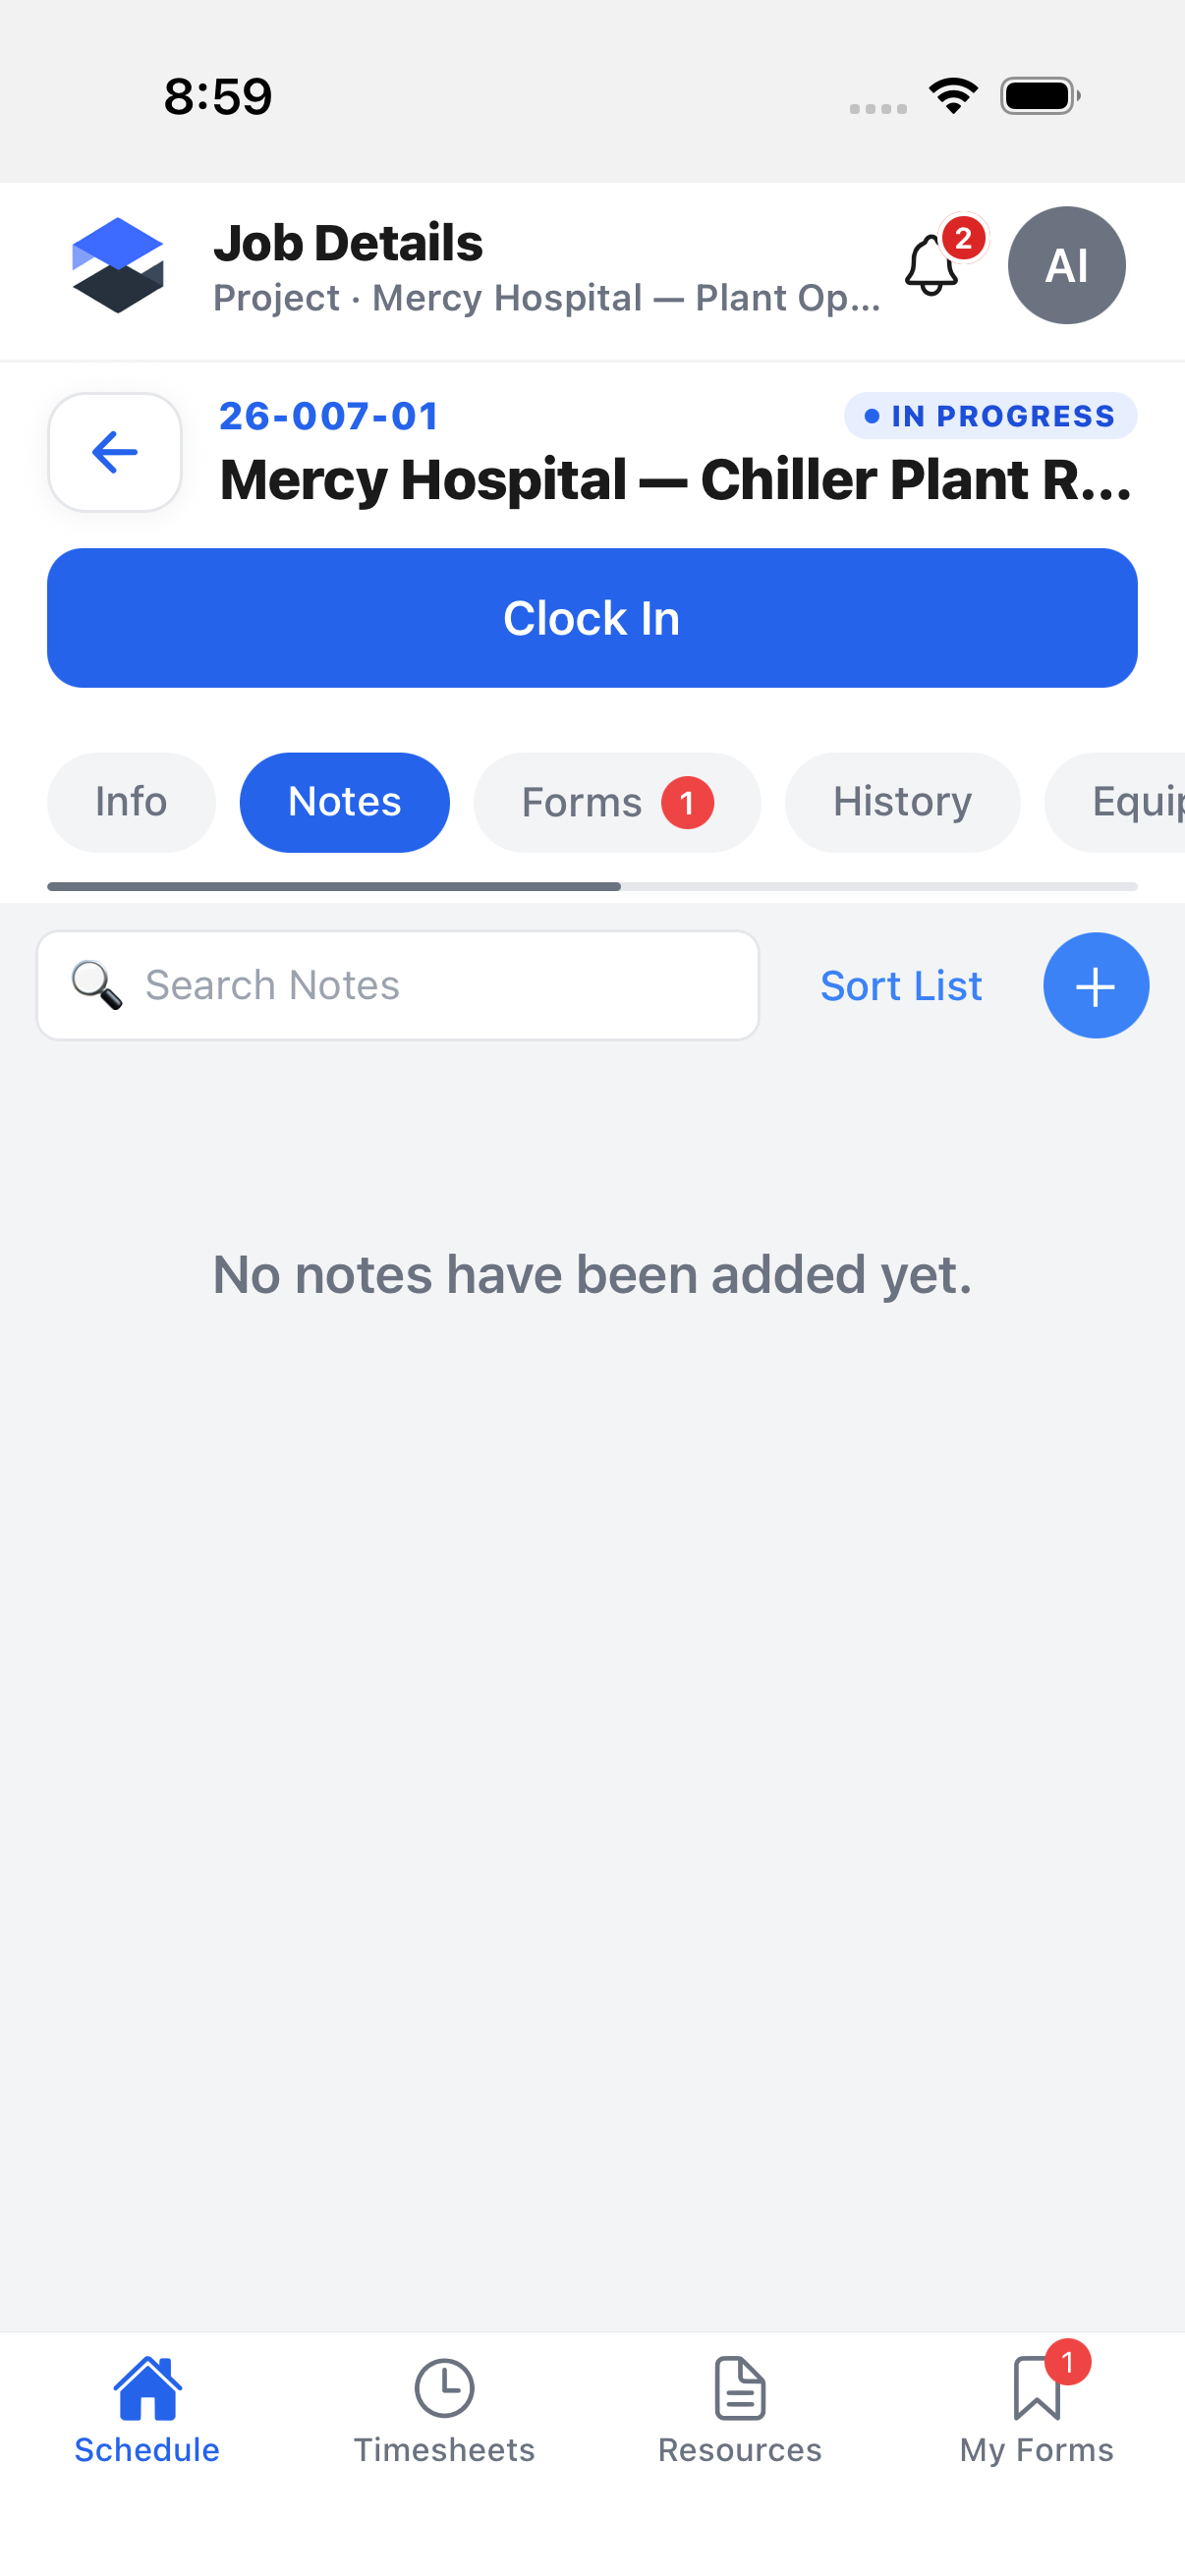
A job's Notes tab -- open a job and tap Notes in the tab row (alongside Info, Forms, History, and Equipment). This is the job's own activity feed -- every note tied to that job, newest first.
-
My Note Feed -- an account-wide feed across every job (and other record types) you have access to. Open it from the user menu (tap your avatar, top right) and tap My Note Feed.
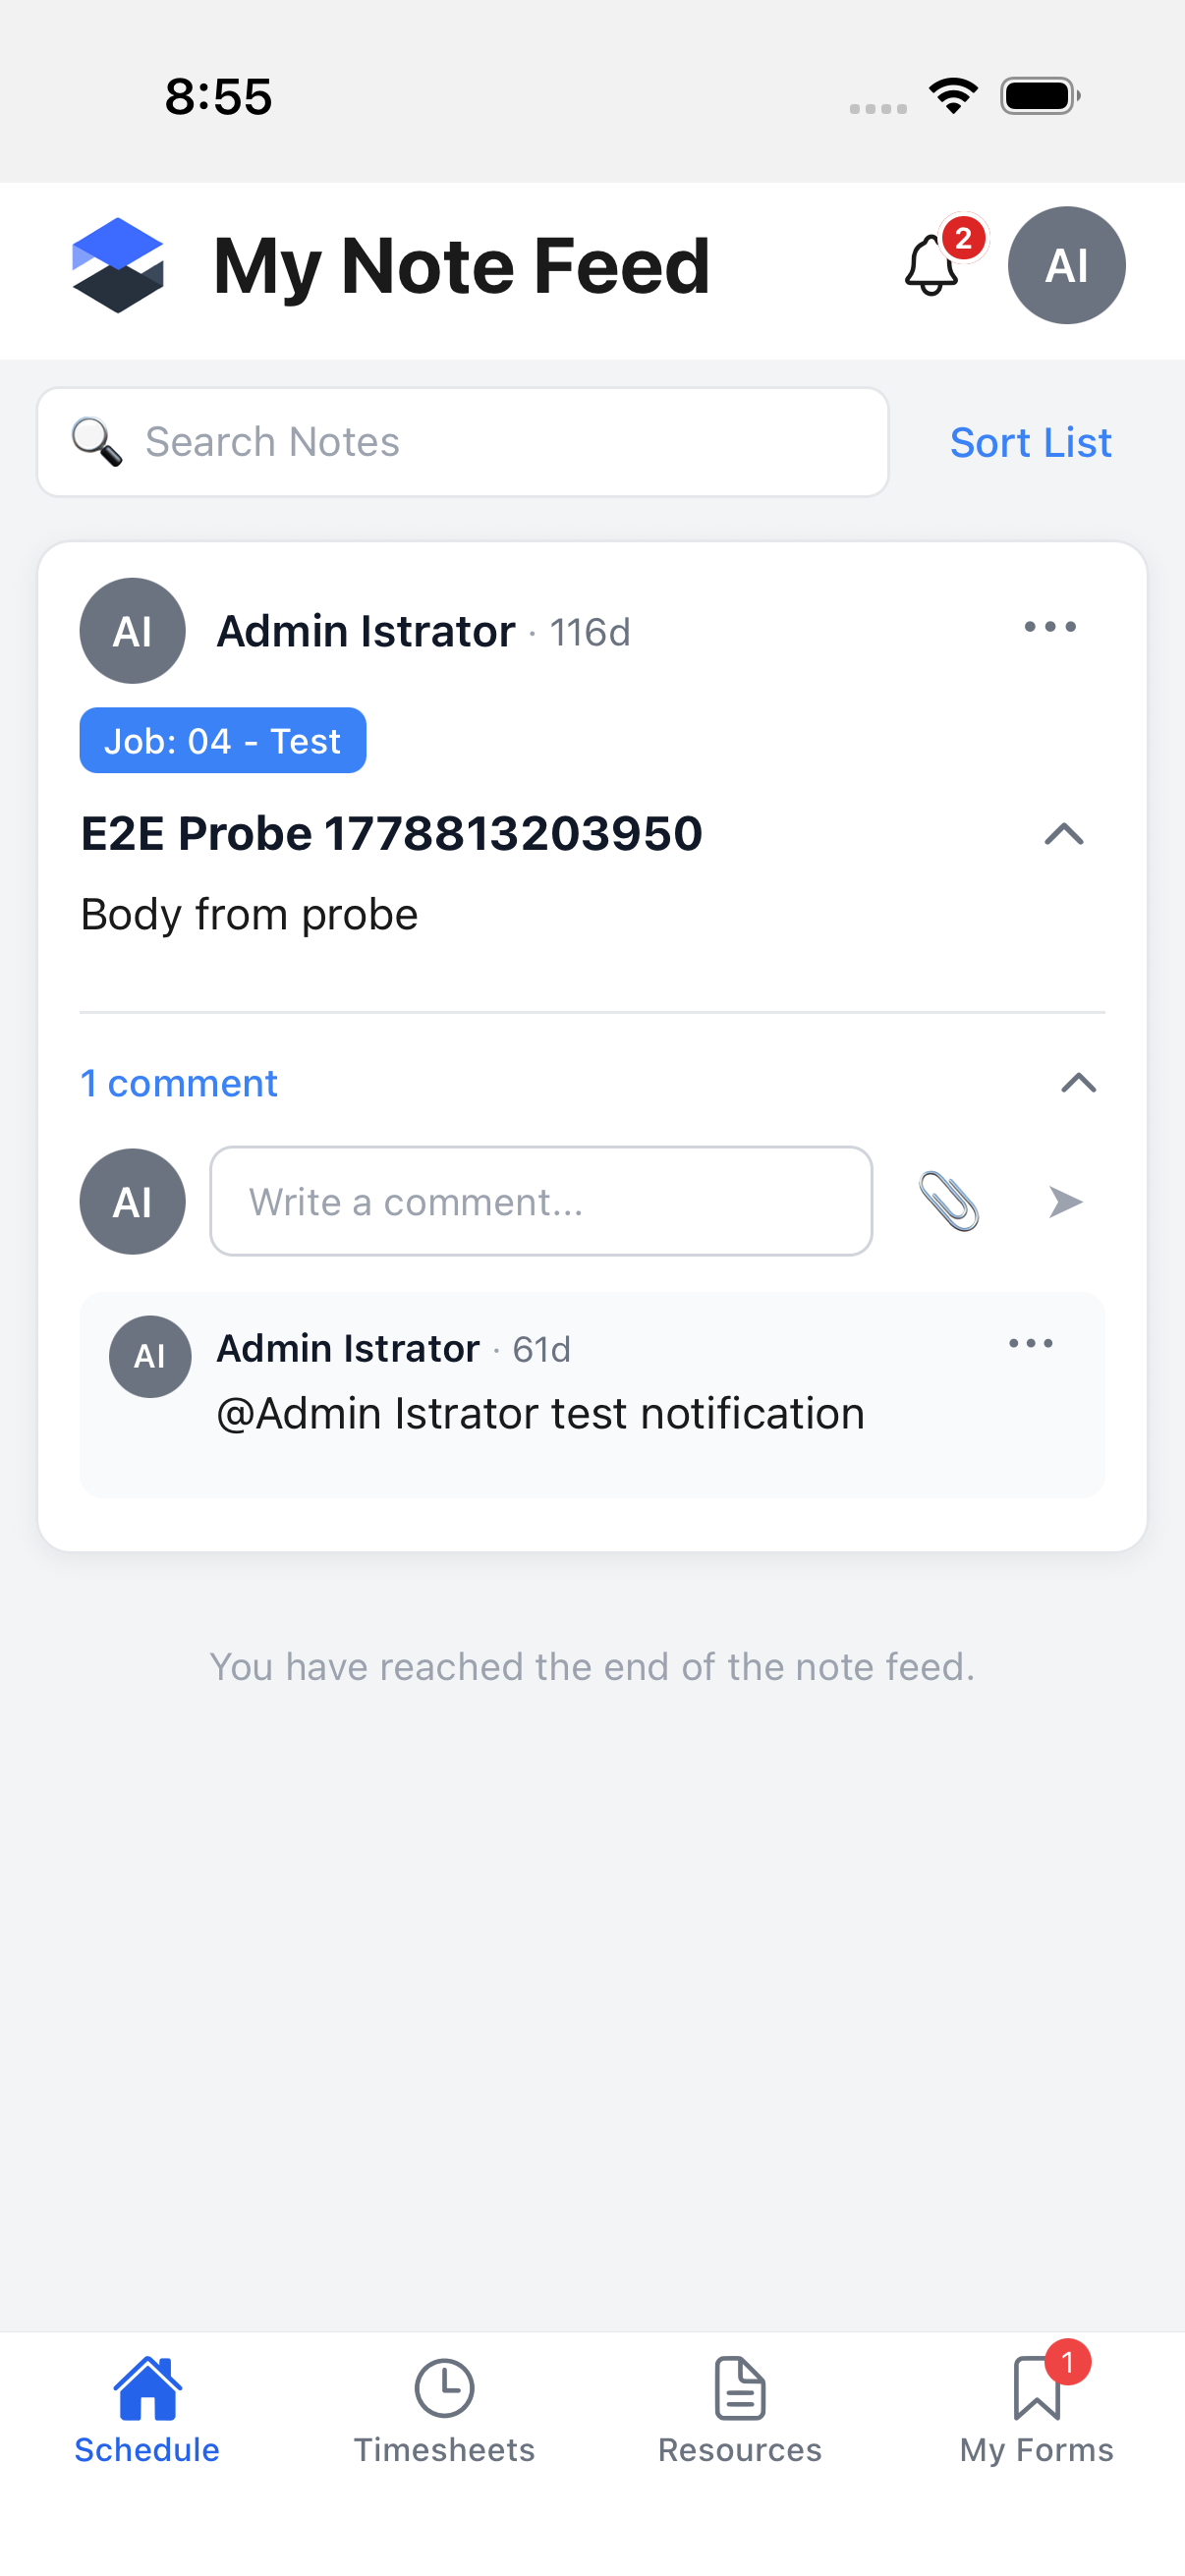
Both feeds use the same note card, the same + Add Comment reply box, and the same @ mention
picker described on the desktop page linked above.
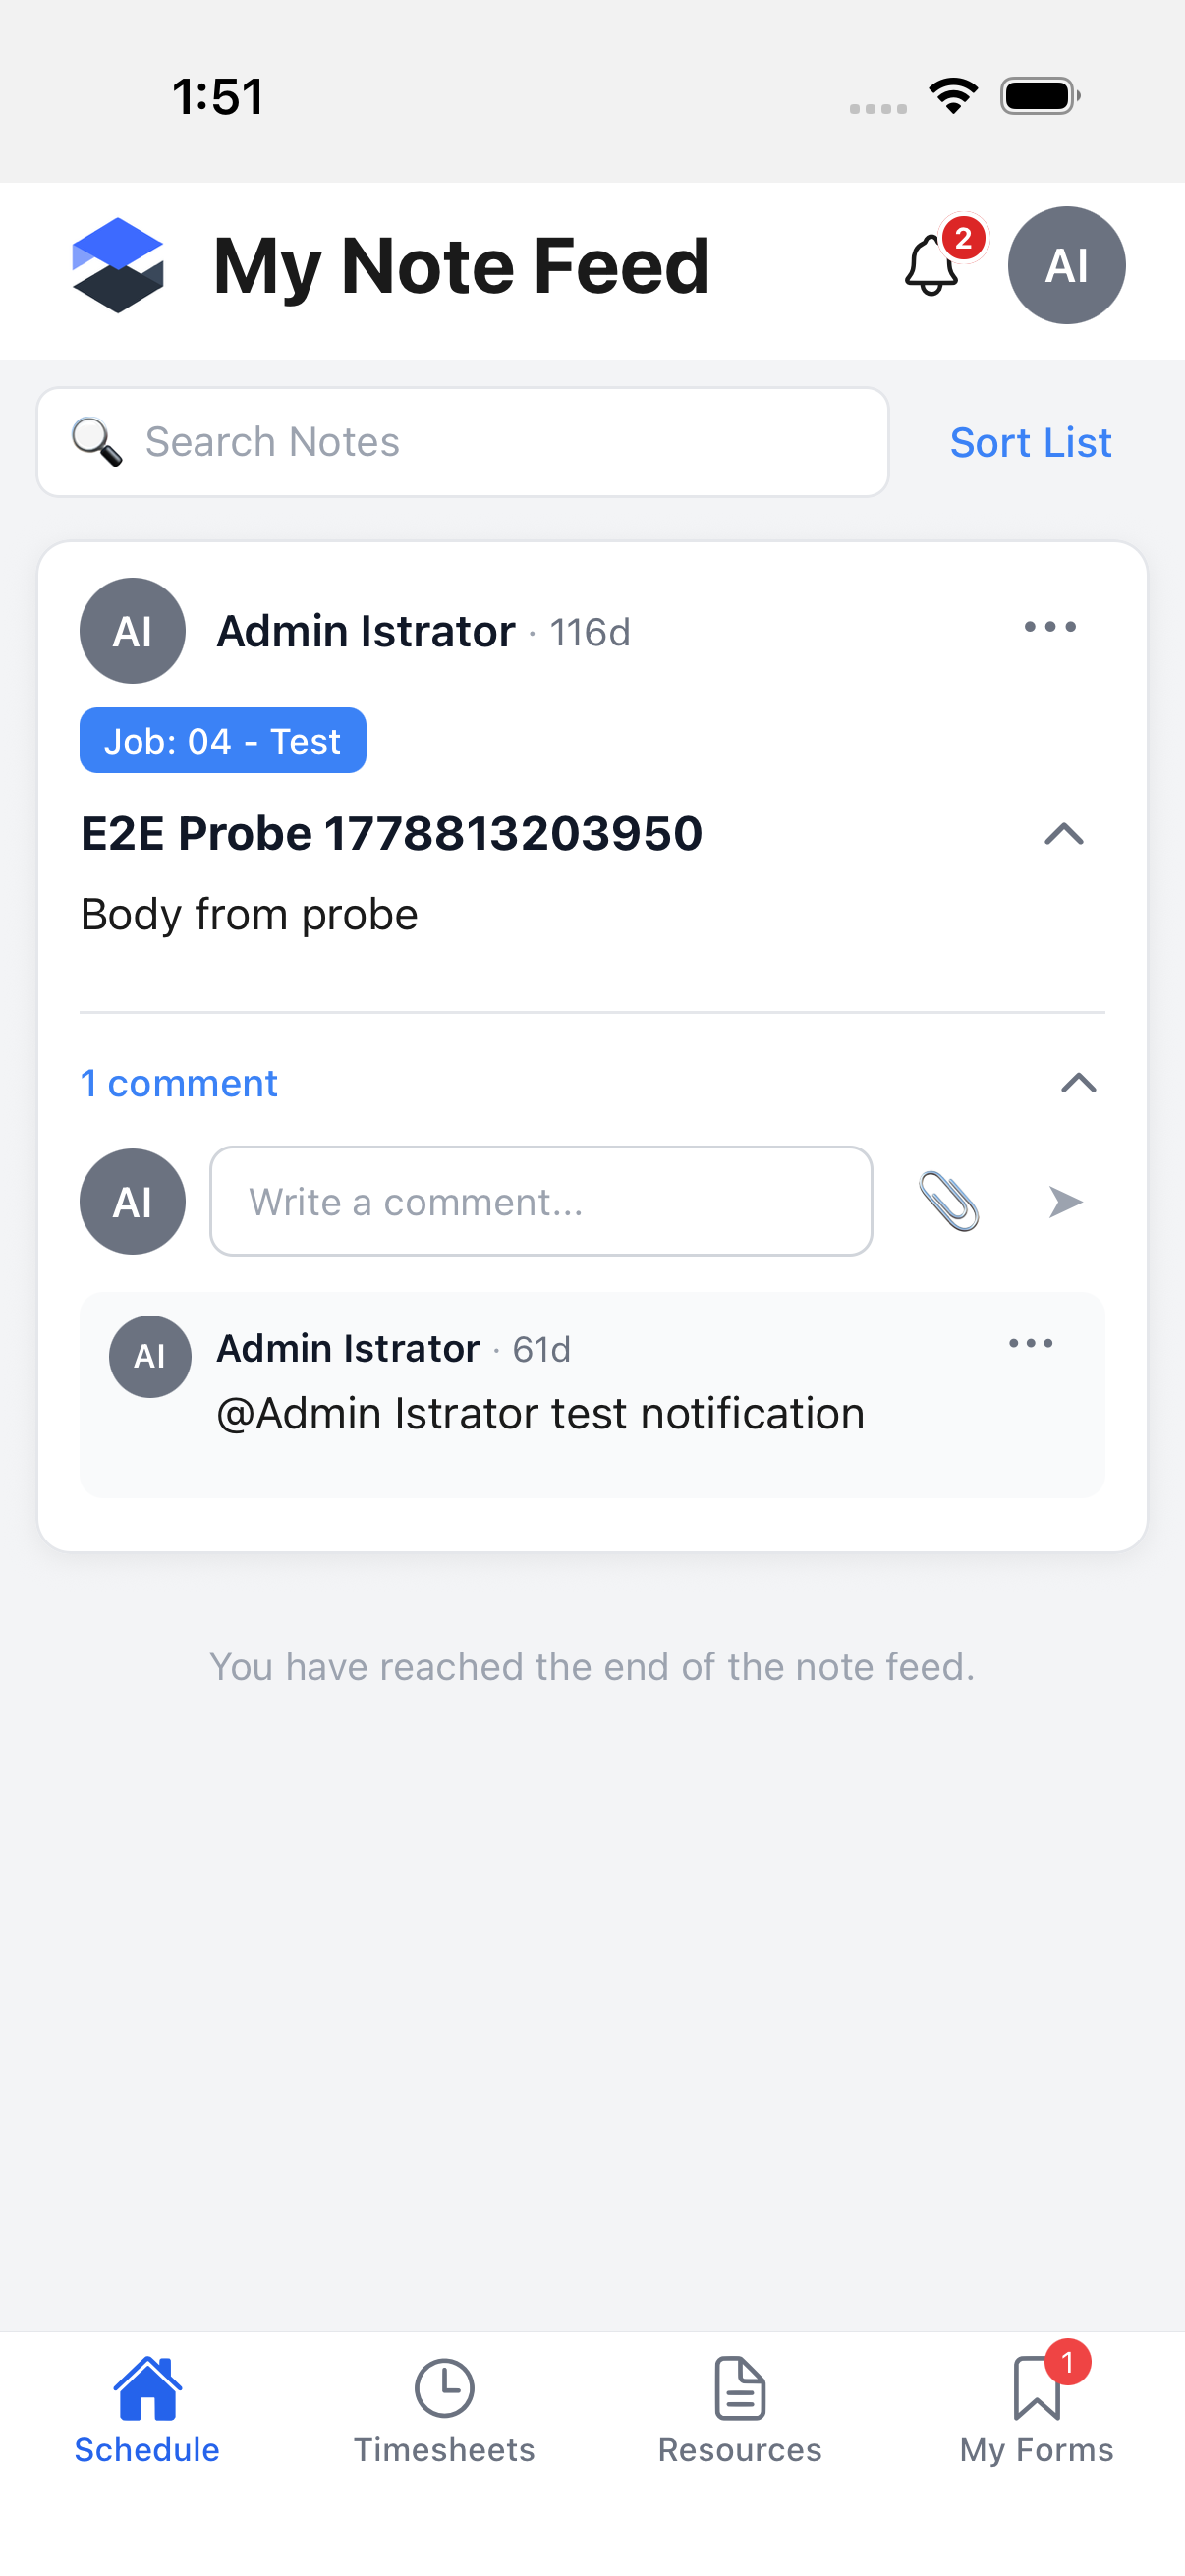
My Note Feed has no compose button. The circular new-note button only appears on a job/project/equipment Notes tab -- never on the account-wide feed. To start a note you have to go through a specific record's own Notes tab.
Sorting and the Per-Note Actions Menu
Both feeds share a toolbar with a search box and a Sort List control (top-right, next to the compose button where one exists).
-
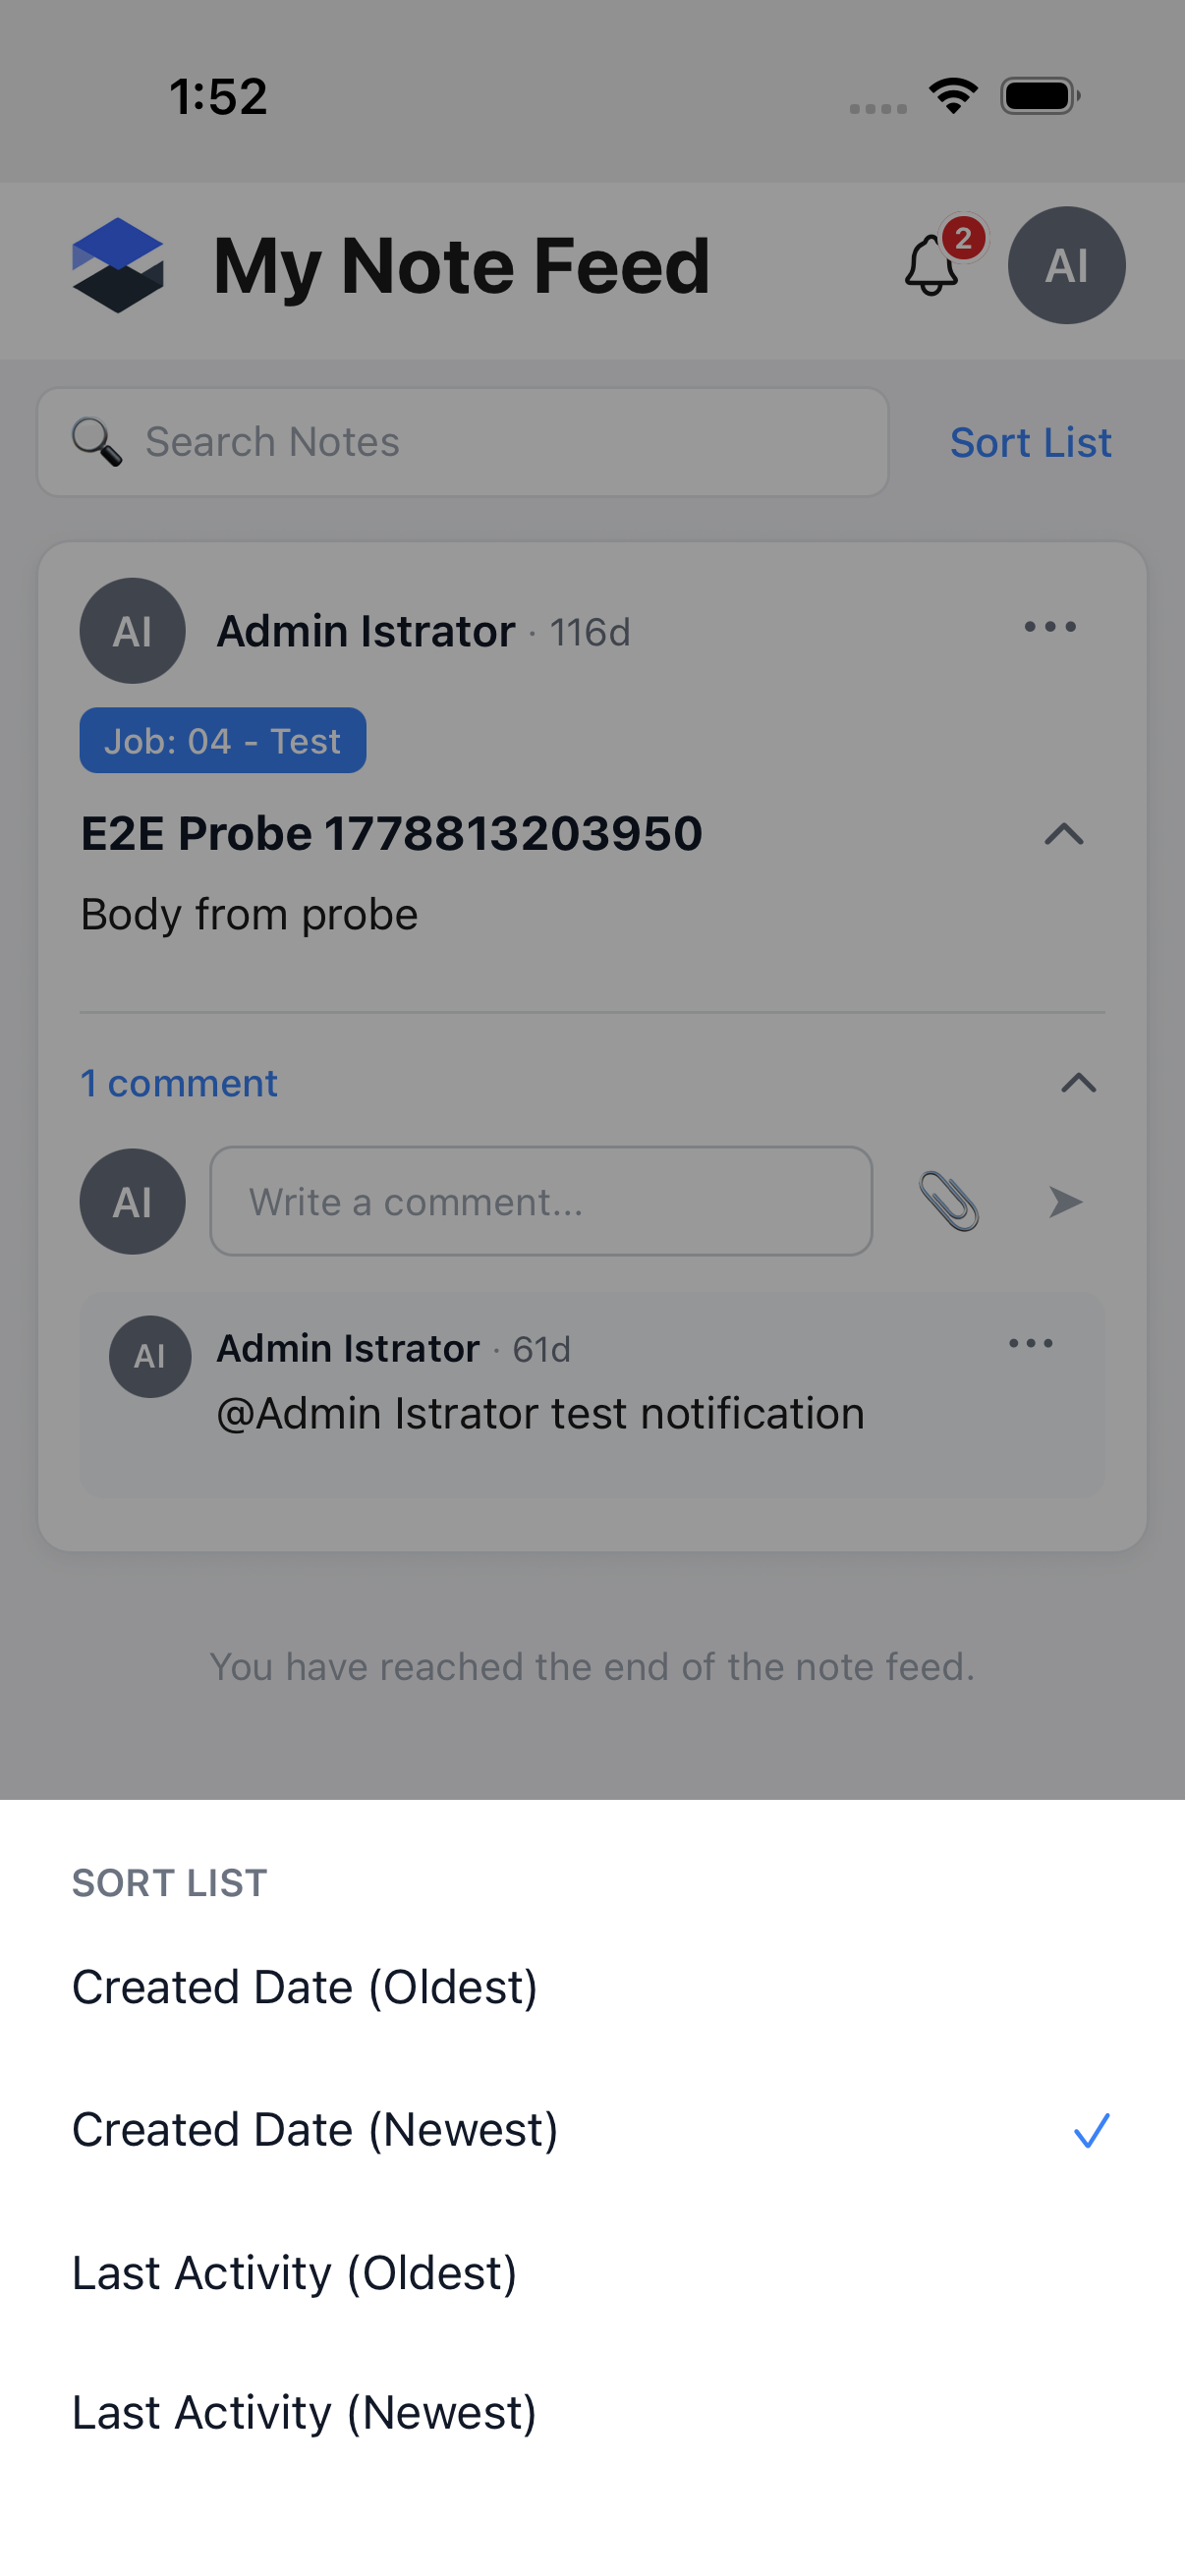
Tap Sort List to open the sort picker.
-
Choose one of four orderings: Created Date (Oldest), Created Date (Newest), Last Activity (Oldest), or Last Activity (Newest). The default is Created Date (Newest). Pinned notes always appear first regardless of sort.
Each note card also has a ... (Note actions) button in its header. What it offers depends on whether you authored that note:
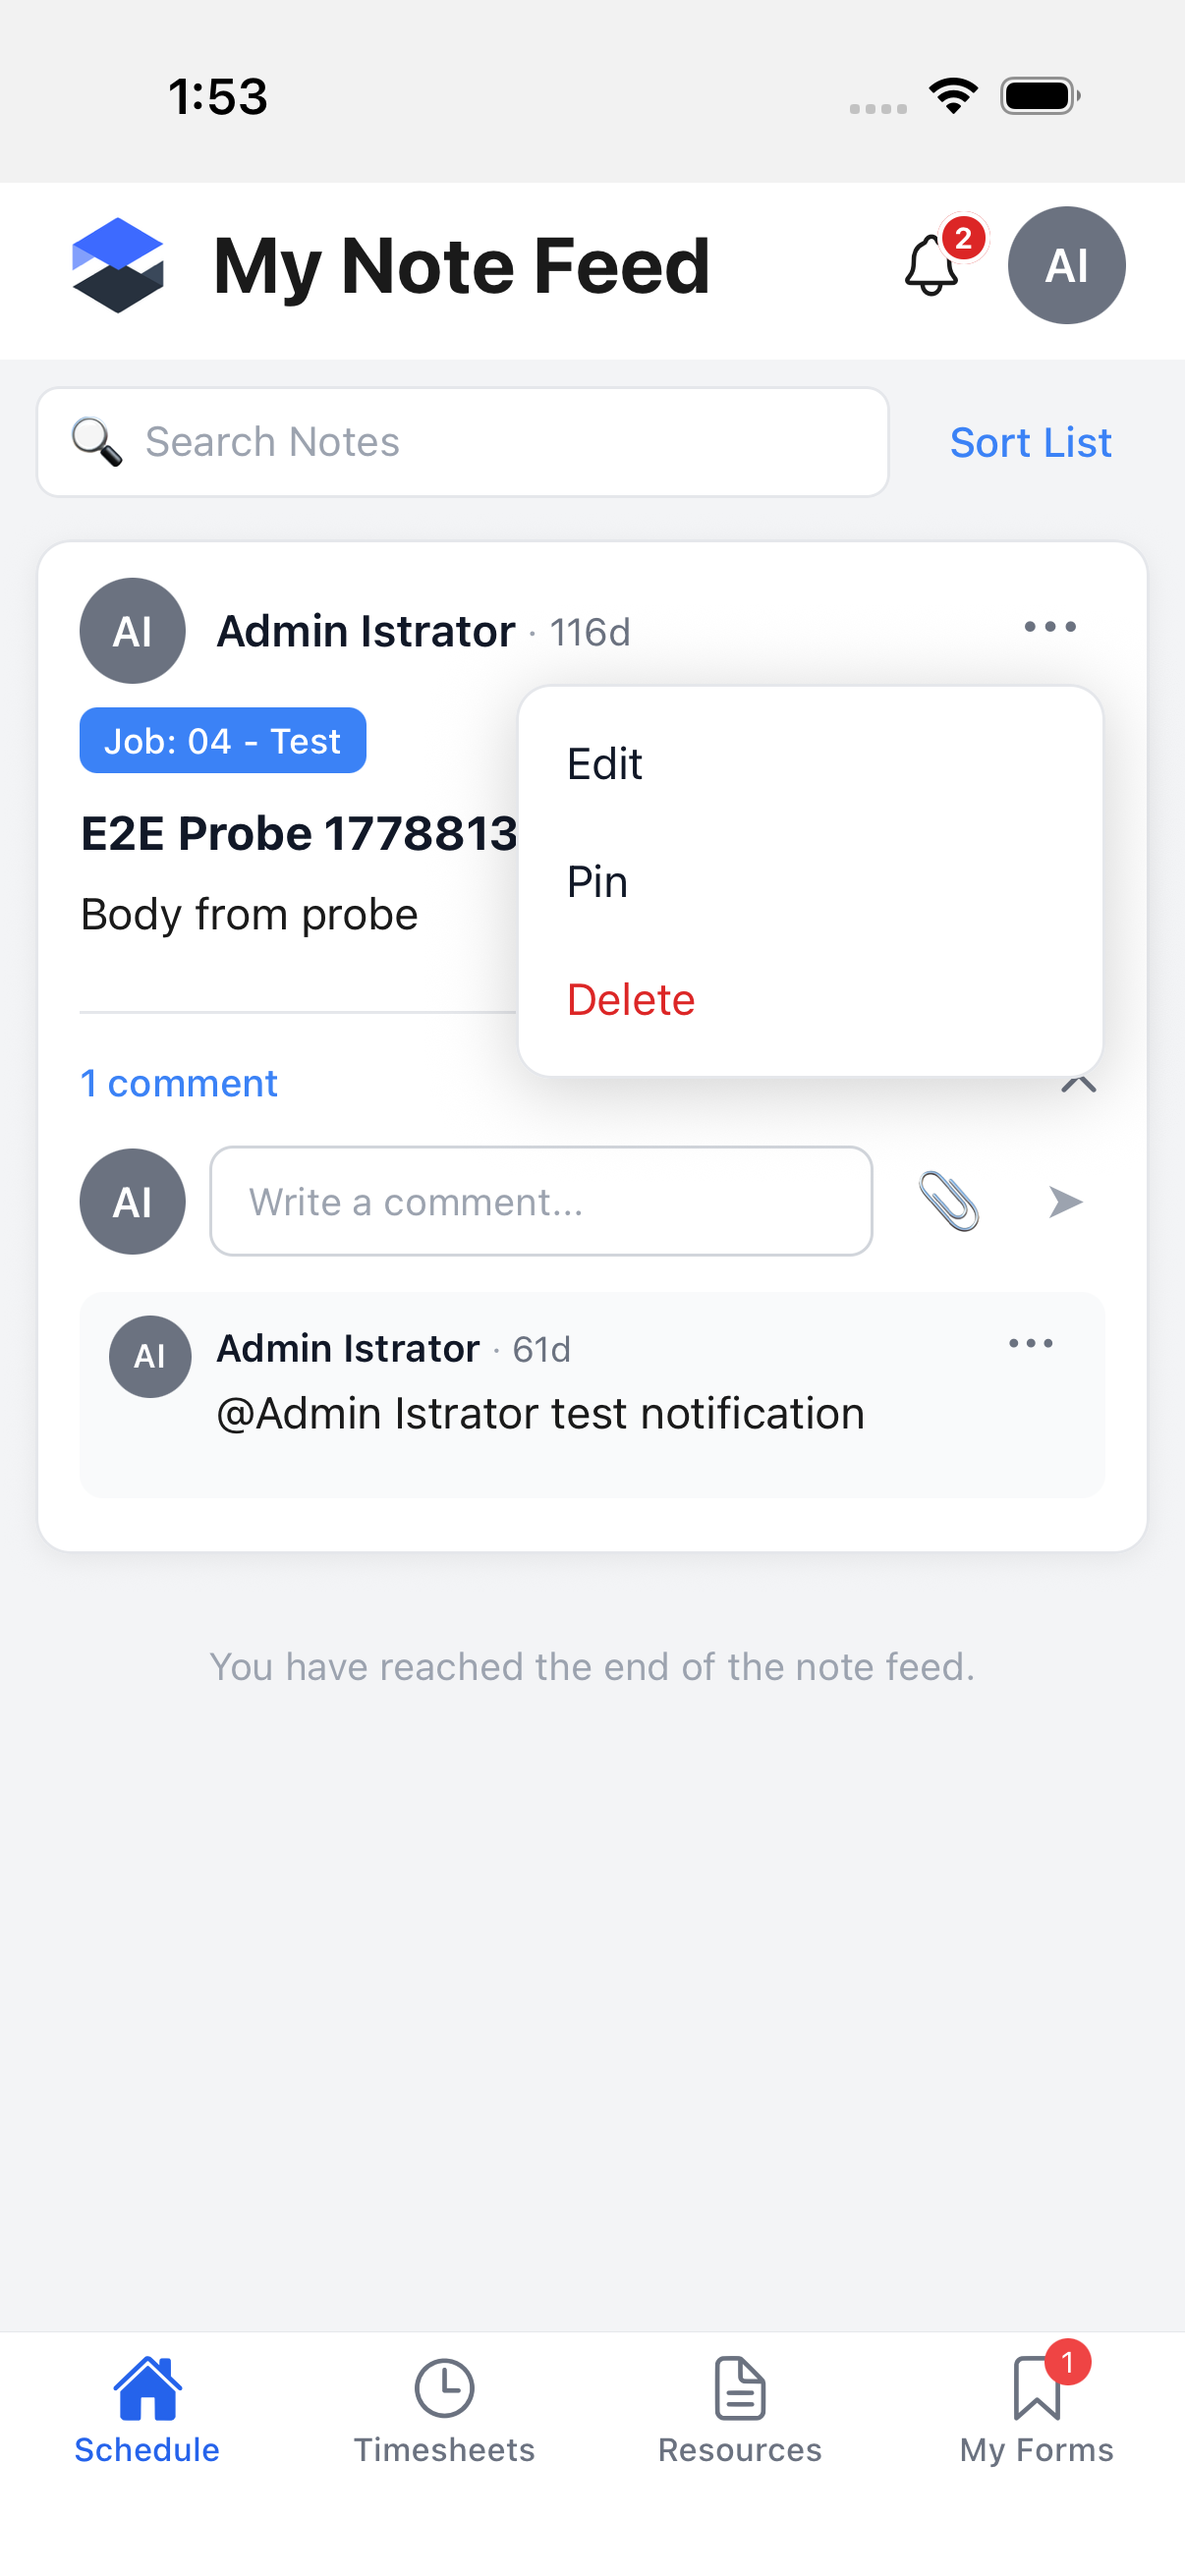
- If you're the author and hold the matching permission, you see Edit, Pin/Unpin, and Delete.
- Otherwise the menu shows No actions available. The ... button appears on every note in the list, but its contents depend on both the matching permission and your being the note's author. See Permissions Reference for the permissions involved.
Tapping a note's title or body (rather than the ... button) only expands or collapses that note's body in place -- it never navigates anywhere. There is no way to open a dedicated note screen by tapping a card in either feed; see Note Detail and the Standalone Note Screen for the one route that does reach a standalone screen.
Creating a Note (Typed)
-
Open a job (or project, or equipment record) and tap the Notes tab.
-
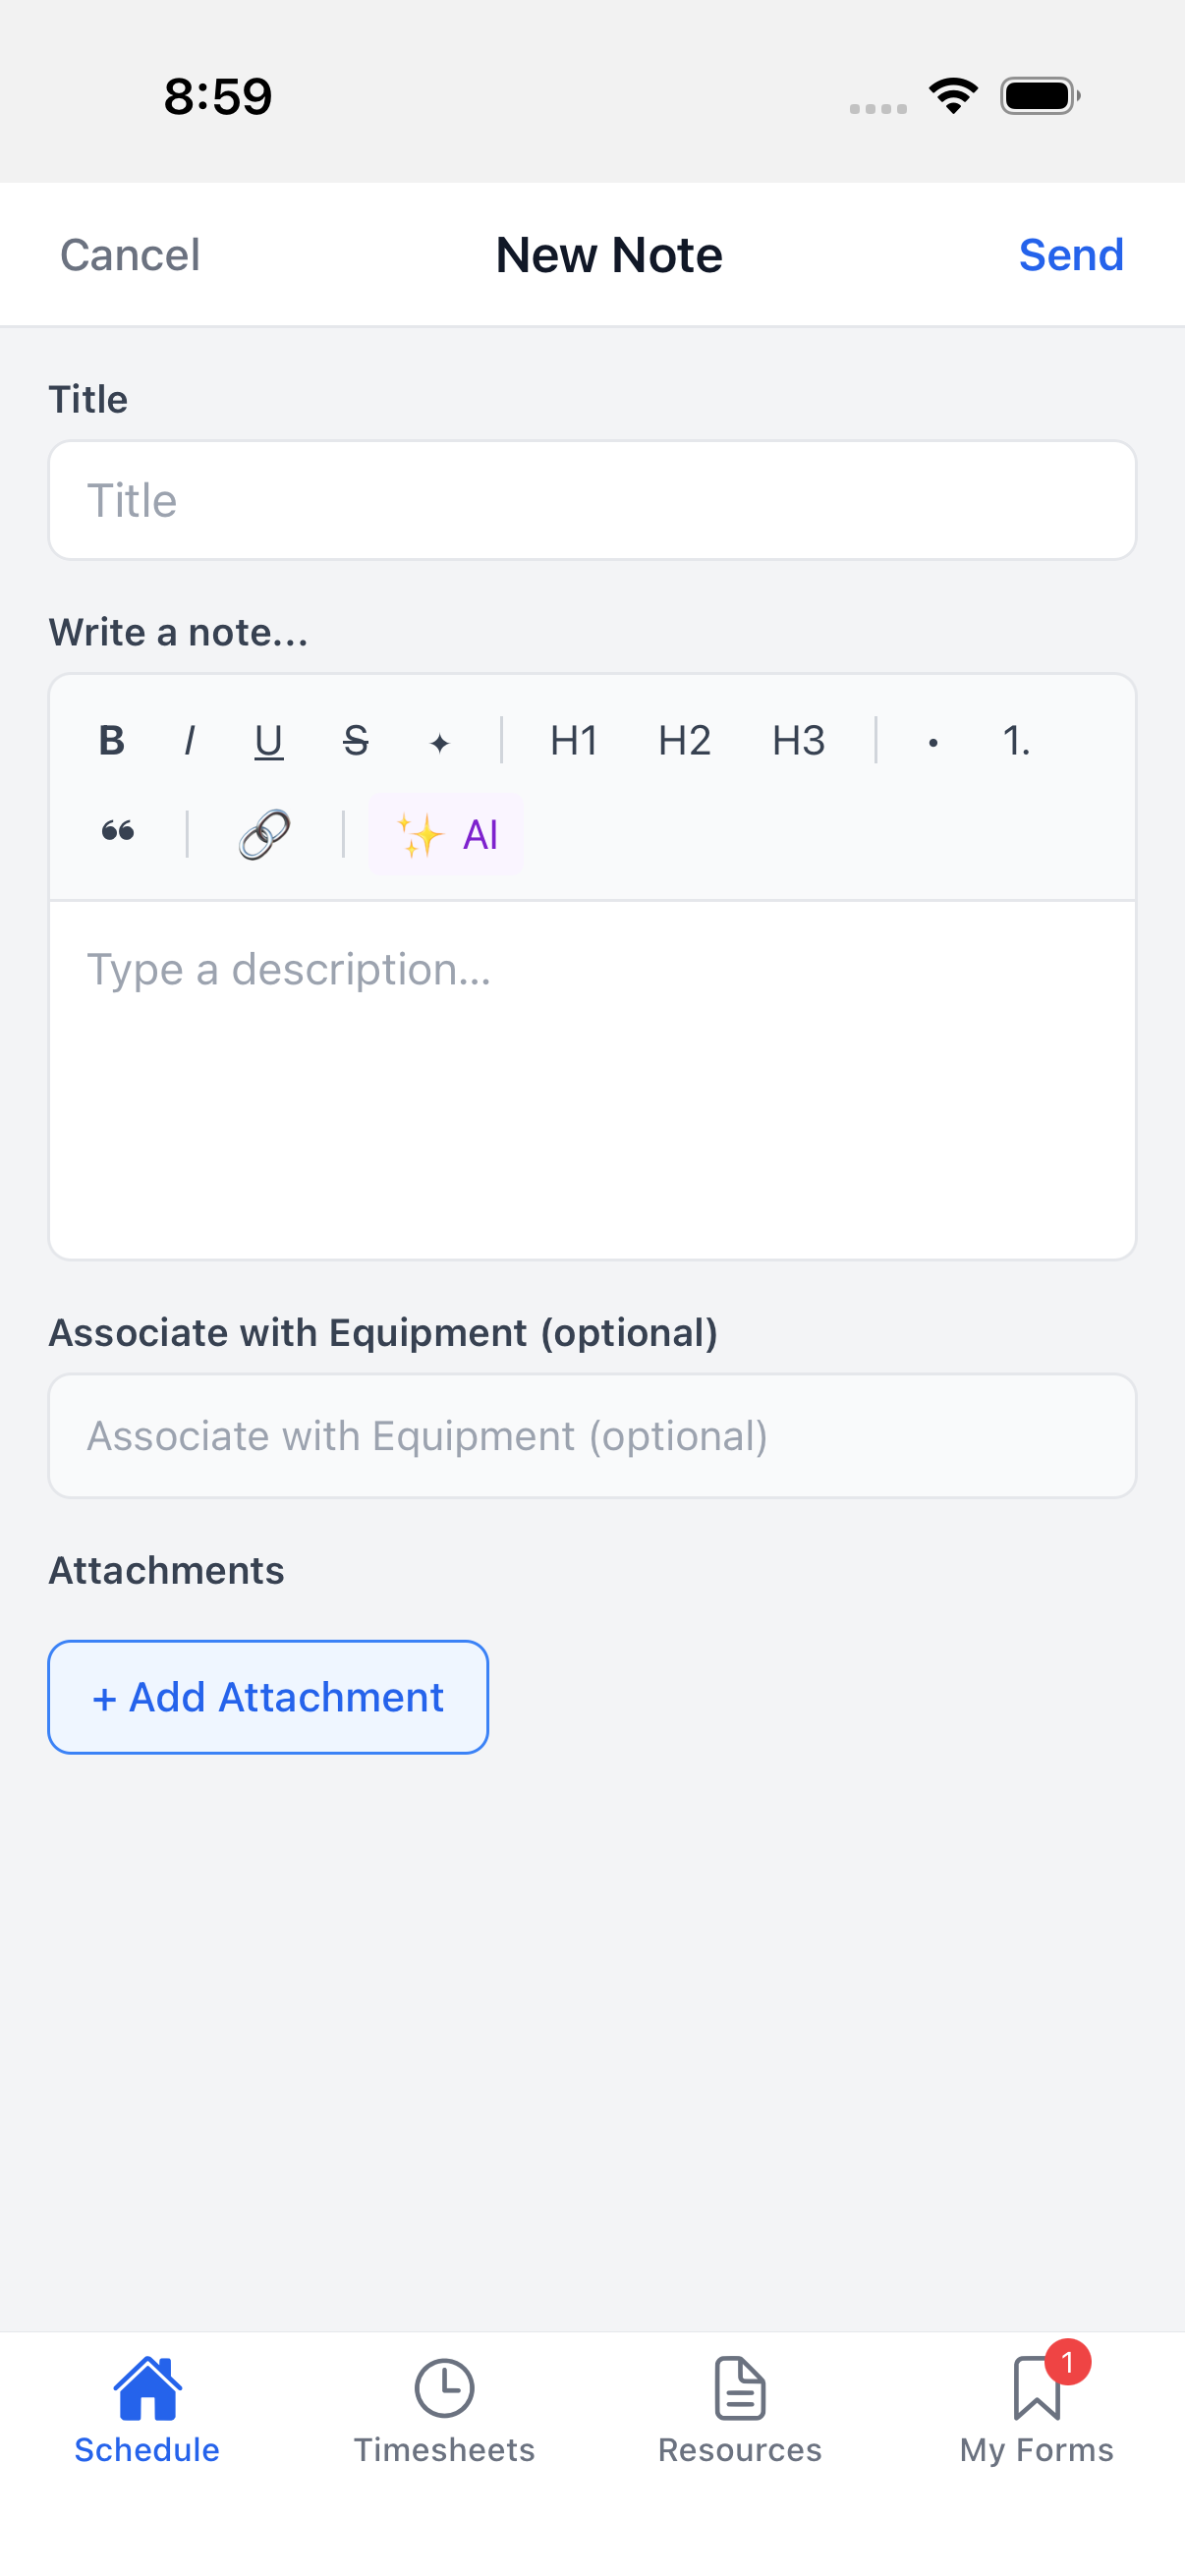
Tap the circular + button in the top-right of the Notes panel. This opens the New Note composer.
-
Fill in the fields:
- Title -- a plain-text field.
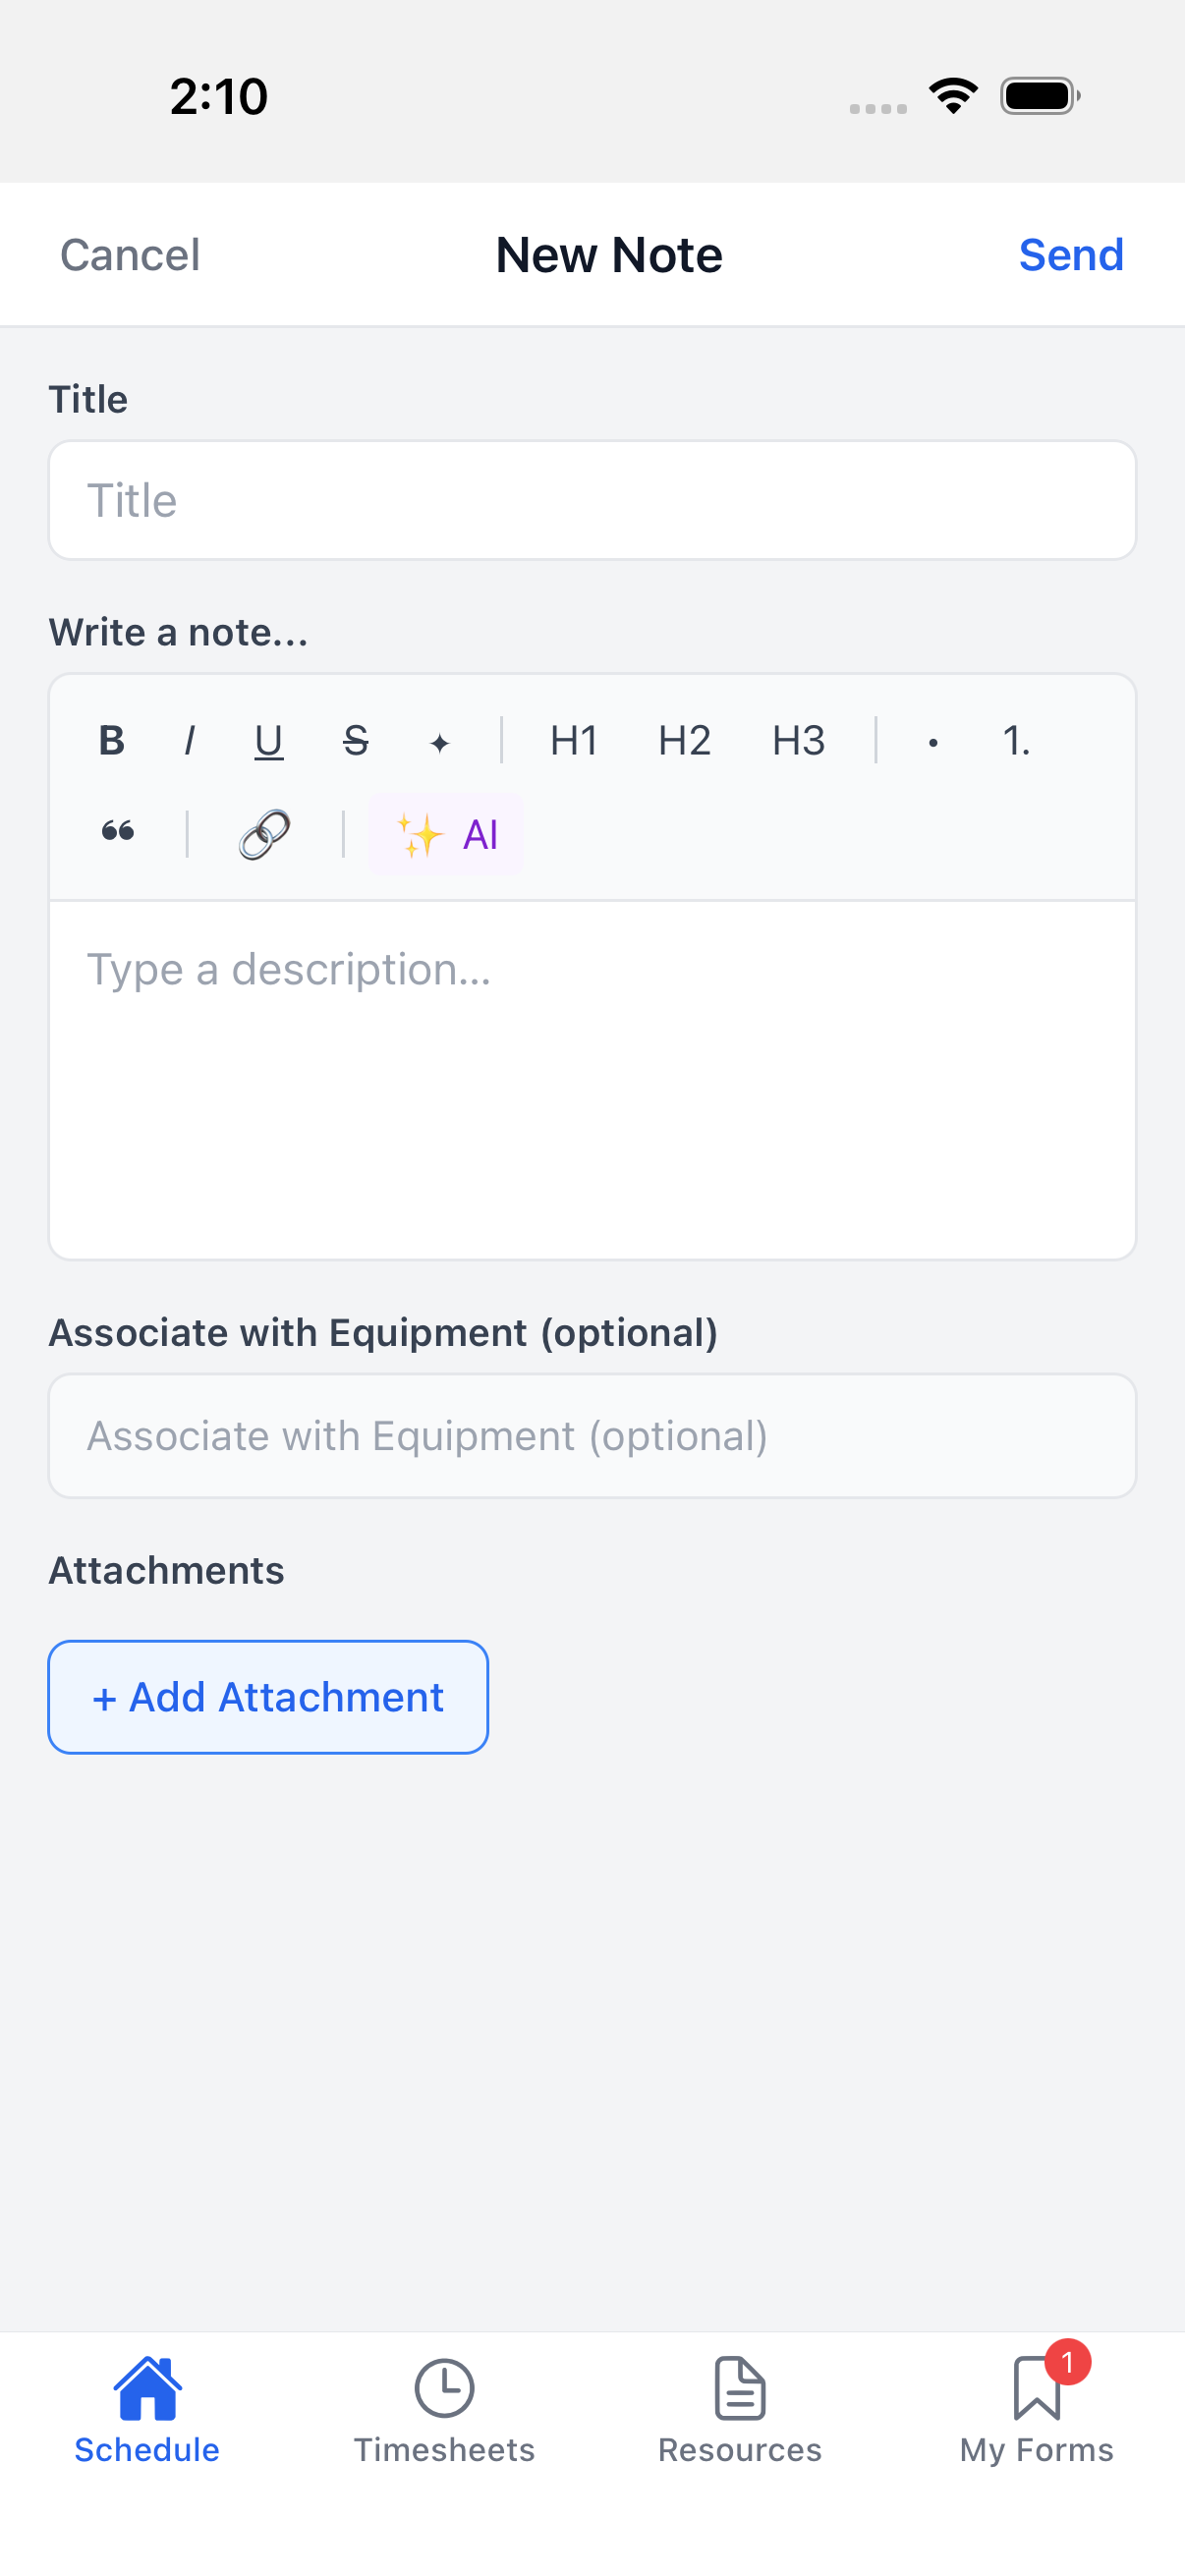
- Write a note... -- the rich-text body, with the same bold/italic/underline/strikethrough, headings, lists, quote, and link controls as desktop, plus the ✨ AI control (see Rewrite with AI on Mobile below).
- Associate with Equipment (optional) / Associate with Job (optional) -- see Cross-Entity Association below.
- Attachments -- see Adding Photos and Files below.
-
Tap Send (top right) to post the note, or Cancel to back out.
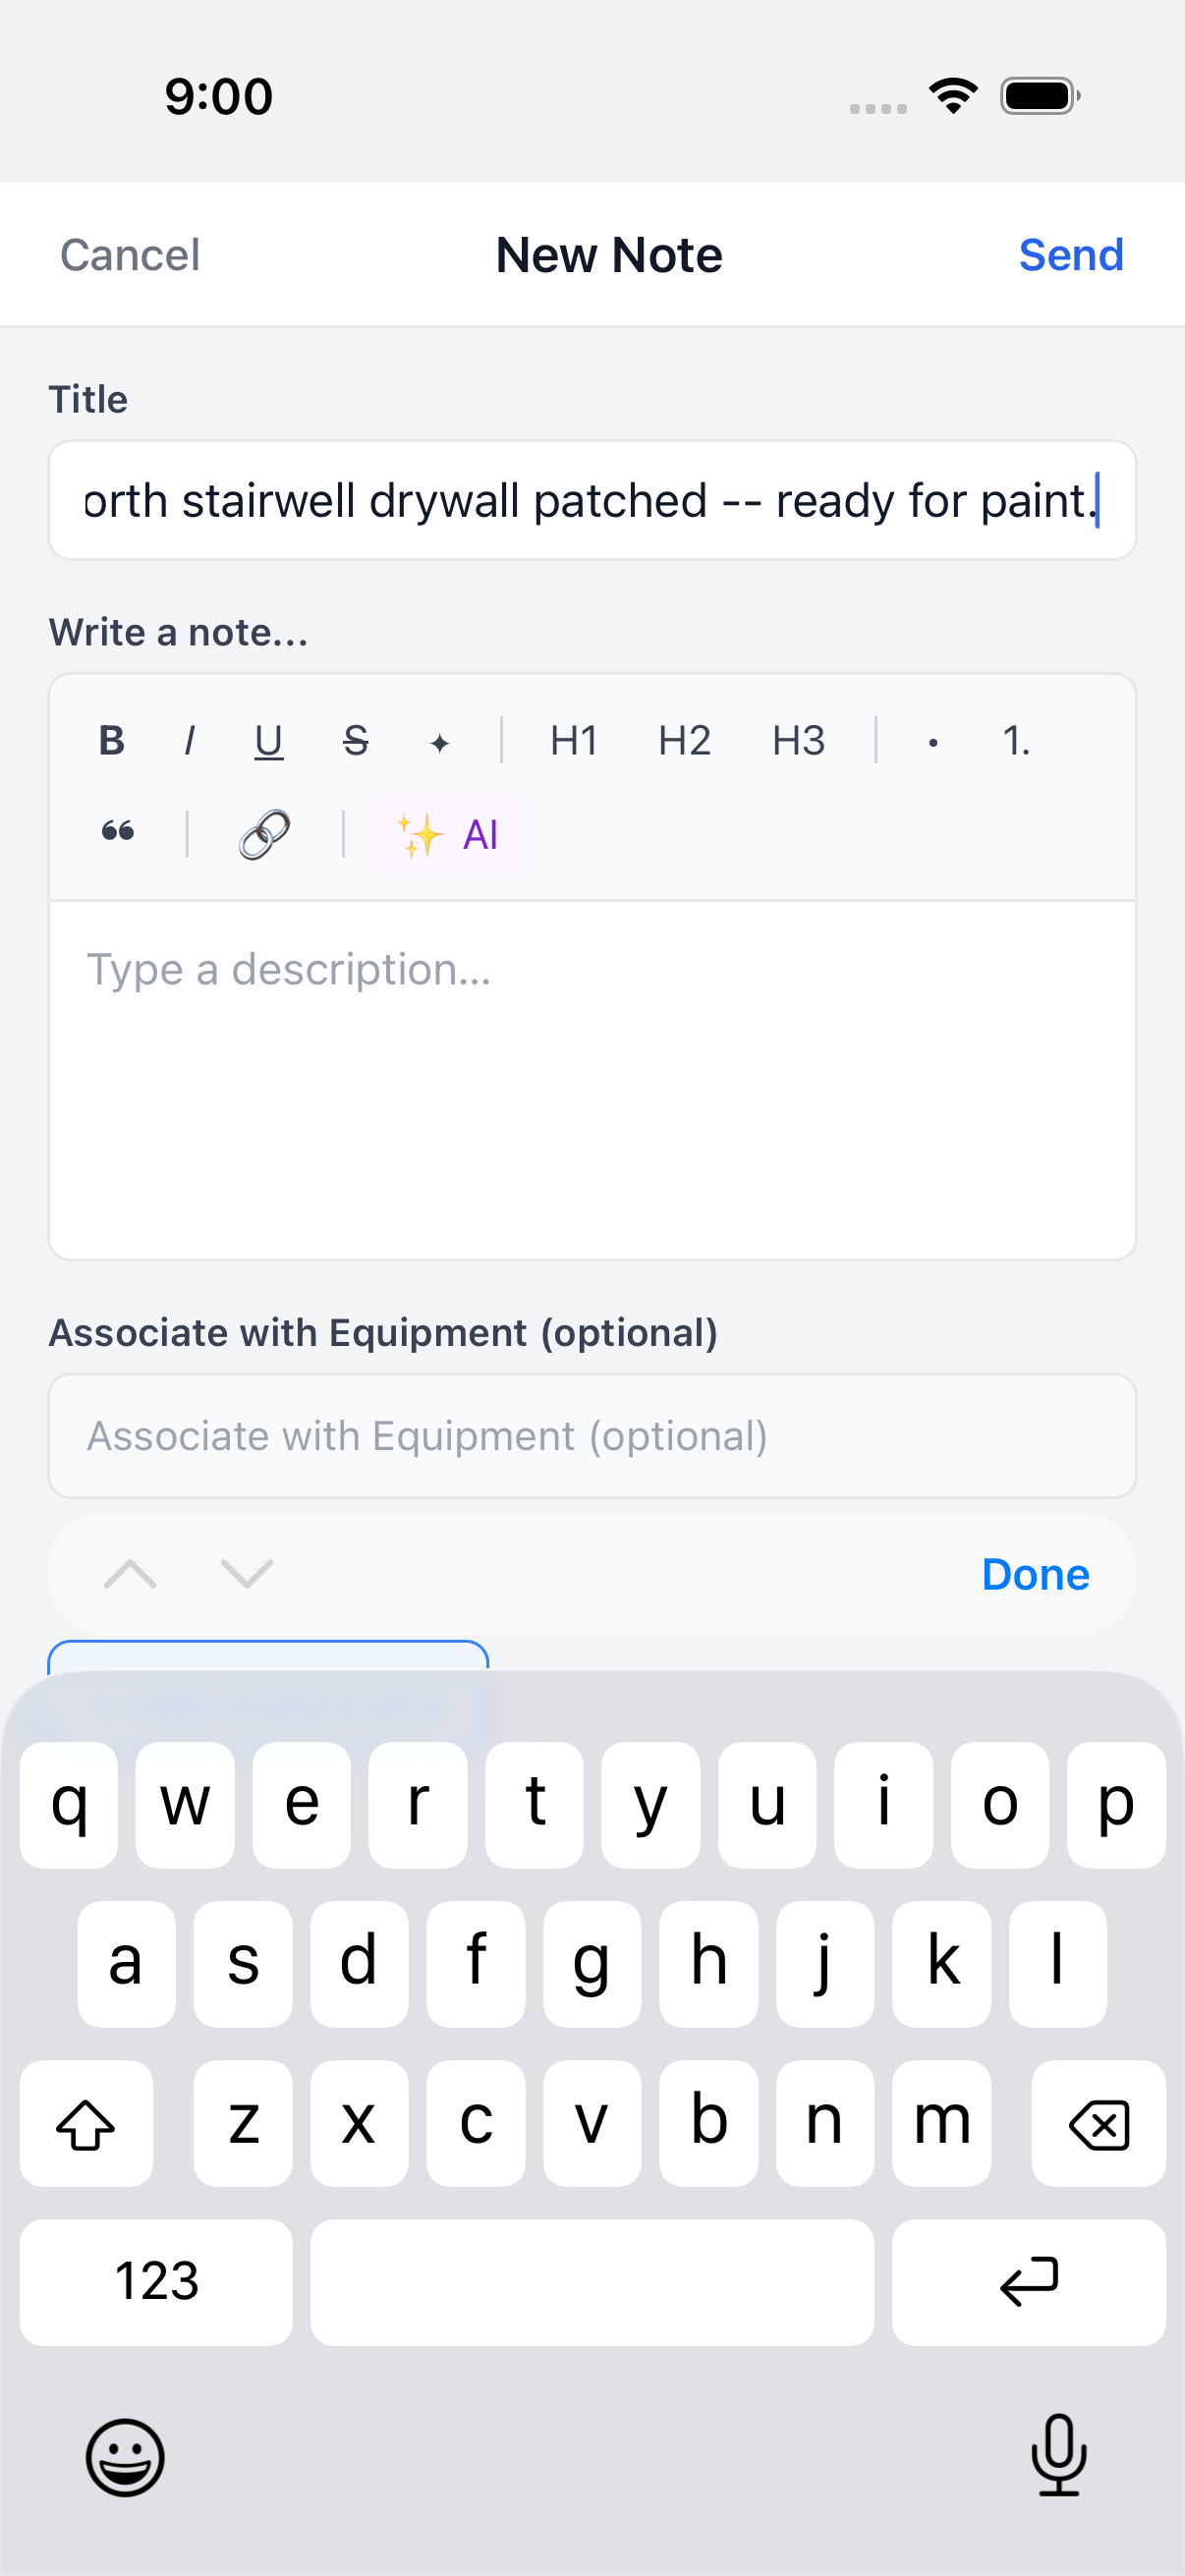
This page's screenshots stop short of tapping Send -- the demo instance used to shoot them was treated as read-only. Every screenshot of typed text on this page was backed out with Discard (see Drafts and Auto-Save below), so nothing shown here was actually posted.
Cross-Entity Association
A note can optionally be cross-linked to a second record while you're composing it:
- On a Job-scoped note, the composer shows Associate with Equipment (optional).
- On an Equipment-scoped note, it shows Associate with Job (optional) instead.
- On a Project-scoped note, there is no cross-entity field at all -- the picker is only offered on job- and equipment-scoped notes.
-
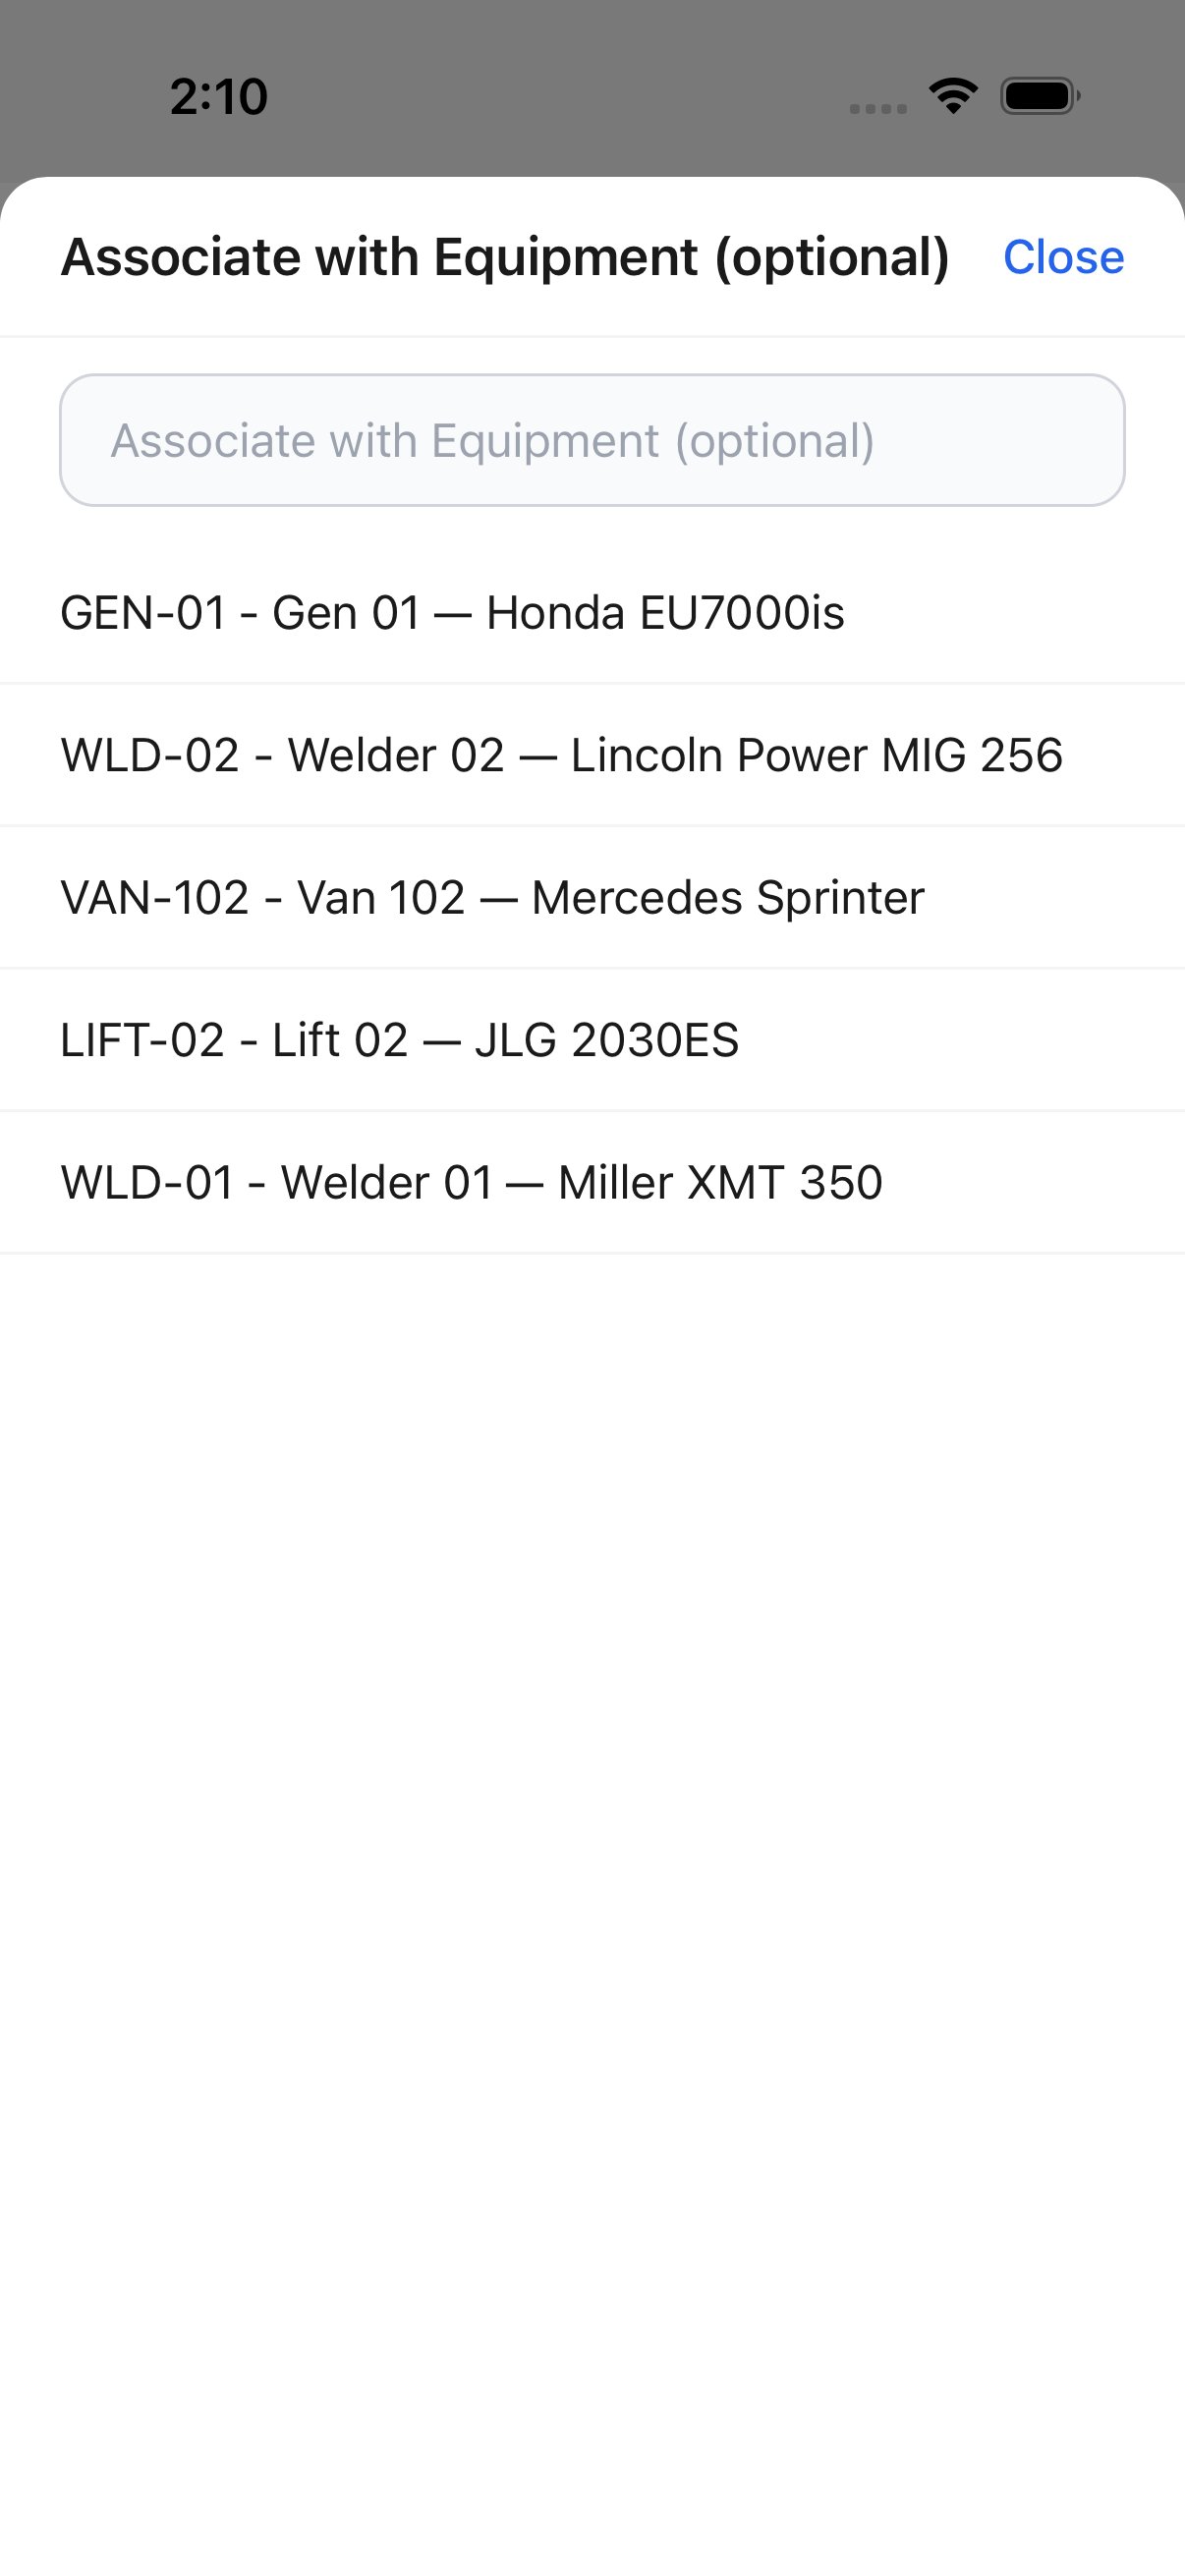
Tap the field to open the picker.
-
Search or scroll, then tap a result to select it, or tap Close to back out without choosing anything.
This field is only offered when creating a note. Editing an existing note hides the cross-entity picker, matching the mobile web app's behavior -- to change the cross-link you have to recreate the note.
Adding Photos and Files
Tap + Add Attachment below the note body to open the attach sheet. It offers three options:
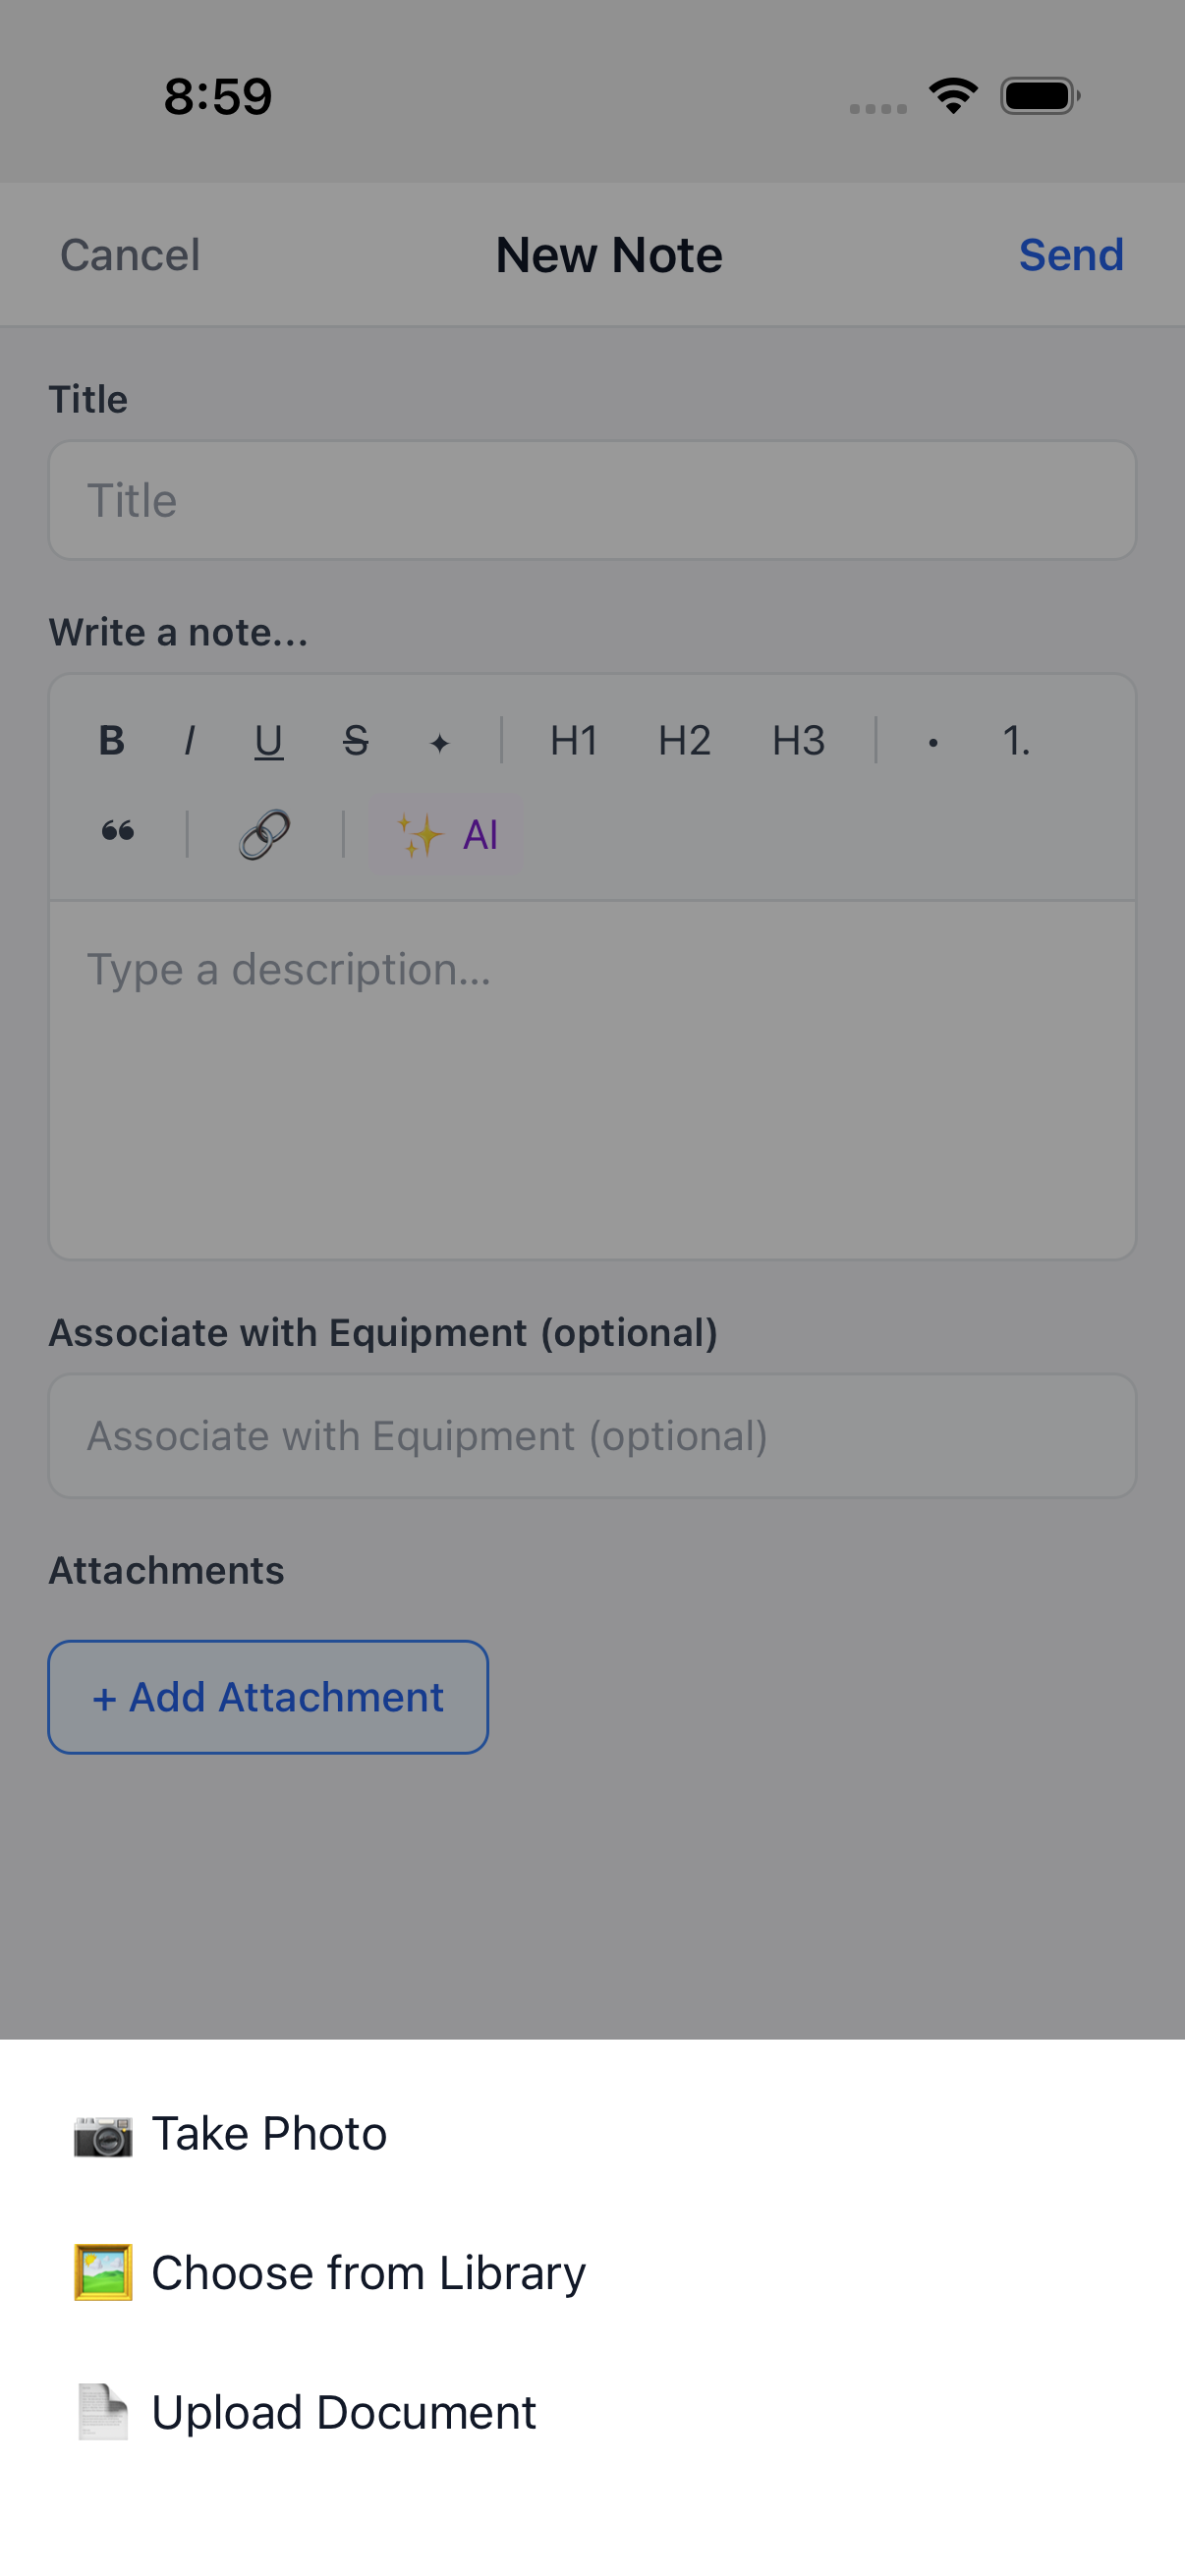
- Take Photo -- opens the device camera (after a one-time camera-permission prompt) and attaches the photo taken.
- Choose from Library -- opens the device's photo library (after a one-time photo-permission prompt) so you can pick an existing photo.
- Upload Document -- opens the iOS/Android document picker for any file type, not just images.
The limits are up to 15 attachments per note, uploading 3 at a time in the background while you keep composing -- each tile shows its own upload progress, and a failed upload can be retried without losing the others. Every attachment also has a Sensitive toggle and a remove control on its tile. These numbers match the desktop composer's "Add Attachments (max 15 concurrent)" control described in Job Notes, Photos & Activity Feed.
This pass tried again to pick a real photo (to screenshot a filled attachment tile and its Sensitive toggle), but photo-library access was denied on the test device, so the picker returns to the composer with nothing attached. No attachment-tile screenshot could be added; the sheet above and the limits above still apply.
Picked photos and files upload in the background as soon as you attach them -- you don't need to wait for the upload to finish before tapping Send, and a photo/file picked while offline is held as a pending attachment and uploaded once you're back online.
Create a Note with Voice-to-Text
The mobile app has no speech-to-text or voice-to-text feature. Note creation is typed text only -- there is no dedicated voice-to-text control, and no voice-to-text-plus-AI flow. The iPhone/Android on-screen keyboard's own dictation button (the microphone icon next to the spacebar) still works inside the Title and note-body fields like it does in any other text field on the device, but that is a feature of the phone's keyboard, not something the Appello app builds, wires up, or sends to AI cleanup.
Tagging People in a Note
Typing @ inside the rich-text body (or a comment reply) opens the same mention picker as desktop:
a dropdown of matching users and user groups, plus an Everyone option. The note composer and
the comment box both use the same editor, so the behavior matches desktop's @ tagging exactly --
see
Tagging People in Notes for what
a tagged person receives. The account-wide My Note Feed screenshot above shows a posted
@mention rendered as a link inside a comment. See Who Gets Notified below
for exactly who is notified when you tag someone.
The note body and comment body use an embedded rich-text editor, and the @ mention dropdown opens
inside it. The automated tooling used to shoot this page's screenshots cannot reach inside that
editor, so no screenshot of the live mention dropdown on mobile could be added. The behavior above
is described in writing instead.
Drafts and Auto-Save
The note composer autosaves your work-in-progress locally on the device as you type -- title, body, mentions, cross-entity selections, and attachments all persist, debounced about 1.5 seconds after your last change. This draft is not sent to the server; it lives only on that device until you tap Send.
-
Where a draft is scoped -- one draft per job/project/equipment you were composing for (or per note, if you were editing an existing one). Reopening the New Note composer for that same job restores the draft automatically, with a yellow "A draft was recovered." banner and a Discard link at the top.
-
How long it lasts -- drafts are pruned after 7 days.
-
Backing out with unsaved changes -- tapping Cancel (or swiping/navigating back) with unsaved text shows a "Save your changes?" prompt with three options:
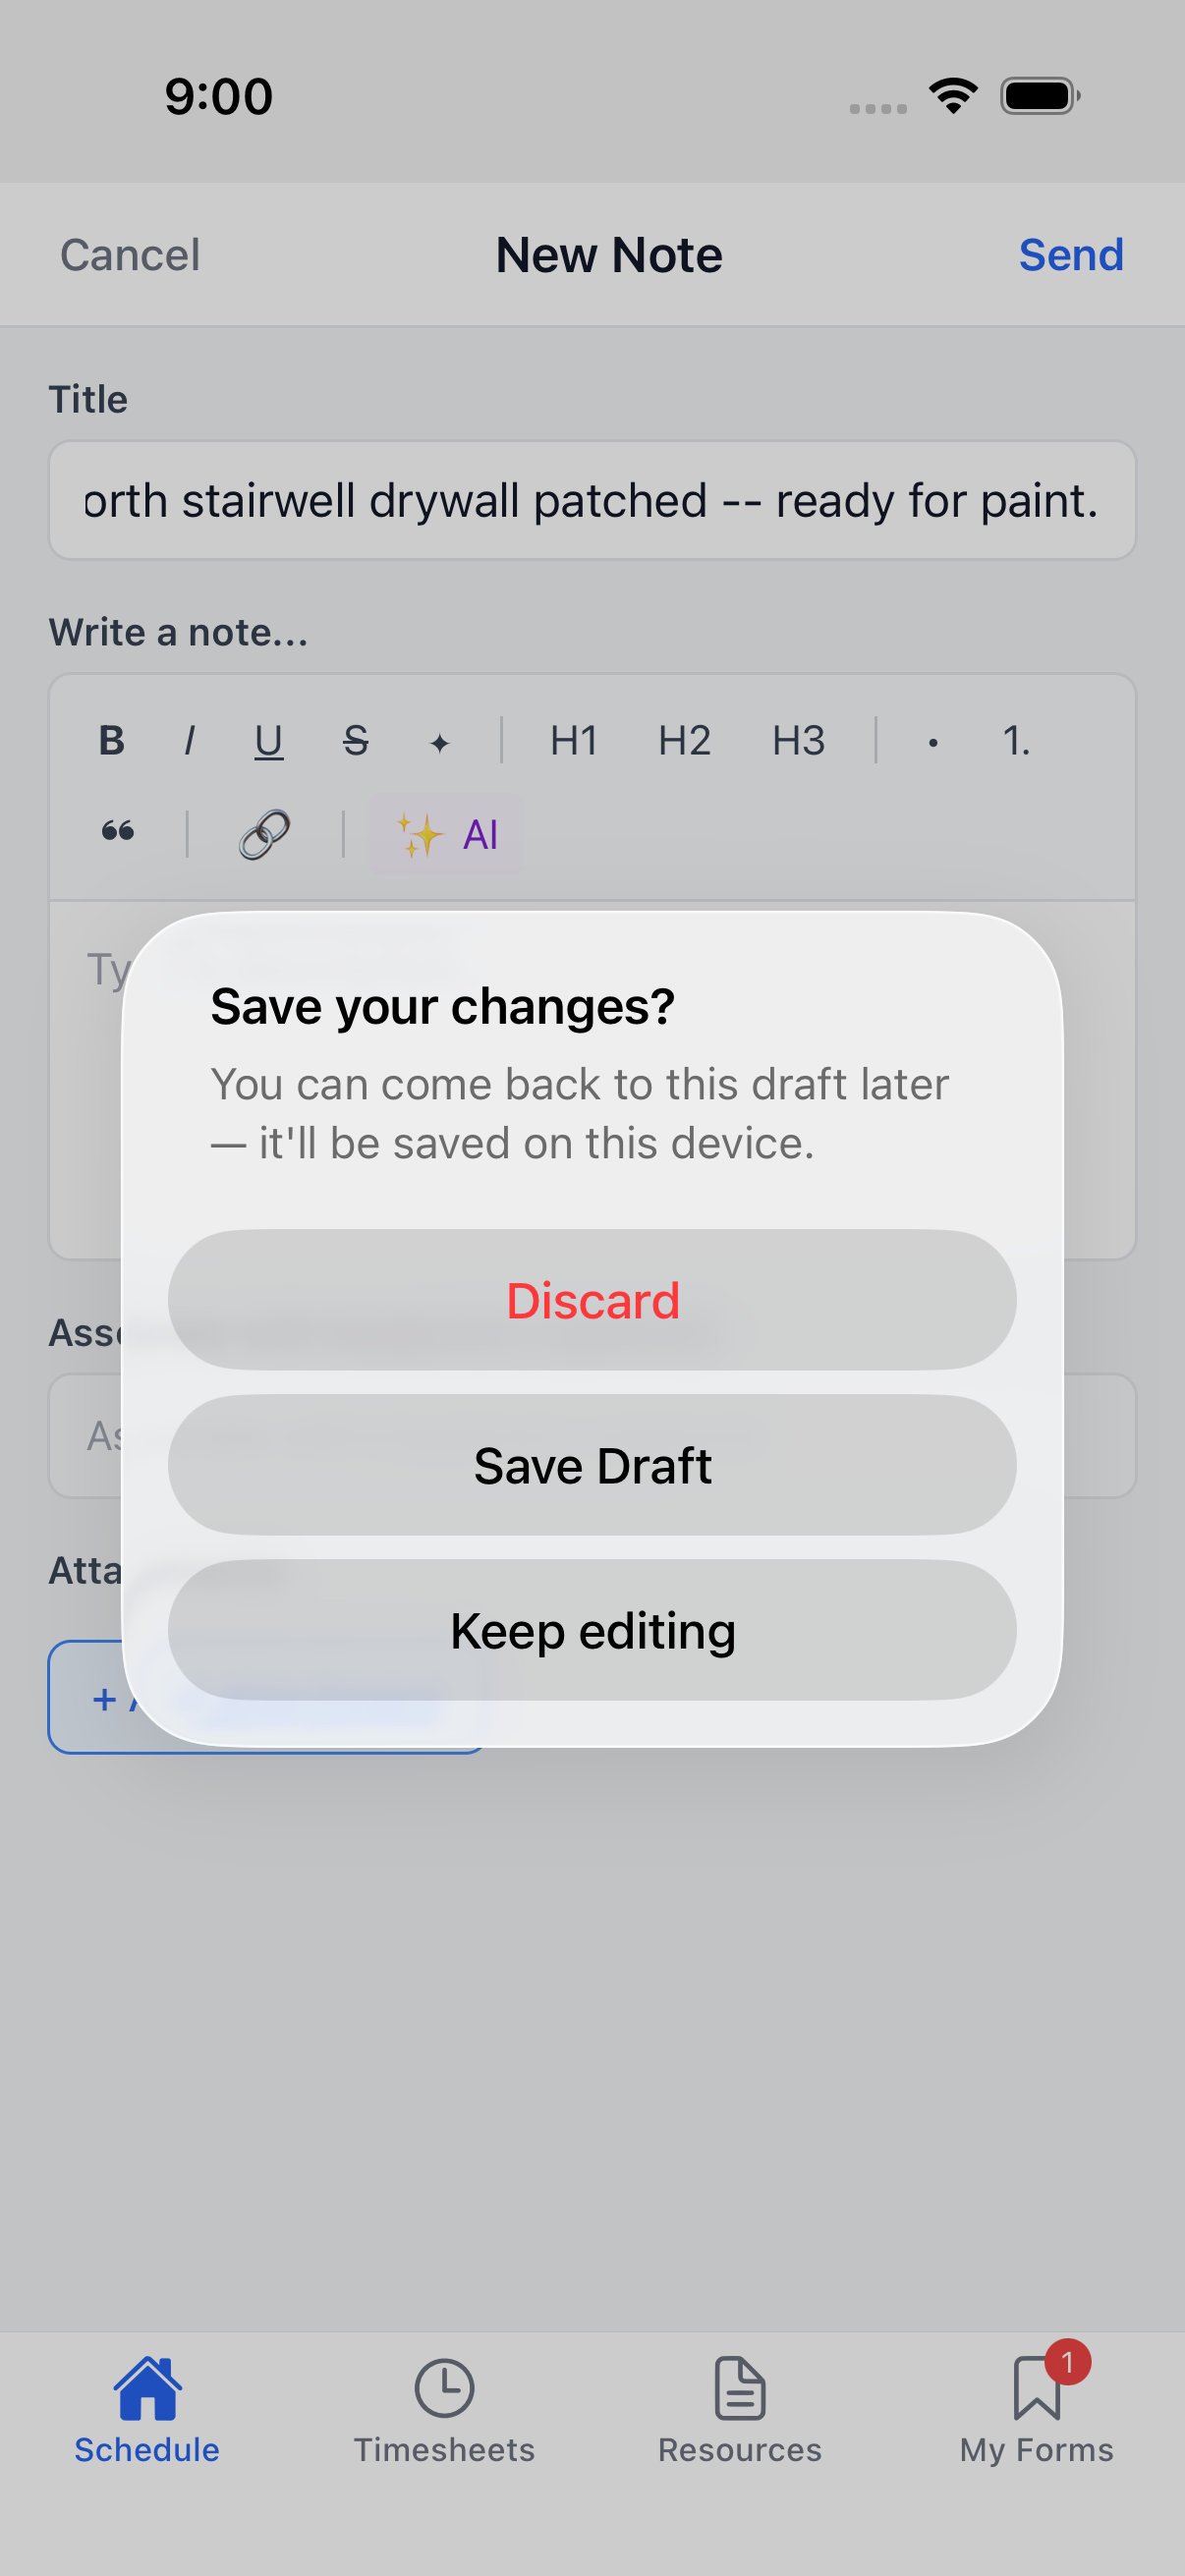
- Discard -- throws away the draft and any attached files.
- Save Draft -- keeps the draft on the device (this is the local autosave described above; the dialog offers it explicitly so a mid-thought exit isn't lost).
- Keep editing -- dismisses the prompt and returns to the composer.
If the form has no unsaved changes (an empty title, empty body, and no attachments), tapping Cancel skips this prompt entirely and exits immediately.
Note Detail and the Standalone Note Screen
There is a standalone note-detail screen in the app, separate from the note cards inside the two feeds. It shows one note, its attachments, and its full comment thread, fully expanded.
The only way into this screen is by tapping a push notification. Even then, most note notifications don't land here -- the app prefers opening the note in context: if the notification's note is tied to a job (and you can access that job) it opens the job's Notes tab instead, scrolled to and highlighting the note; the same applies to project- and equipment-linked notes. The standalone note screen is the fallback, used only when no in-context destination can be worked out.
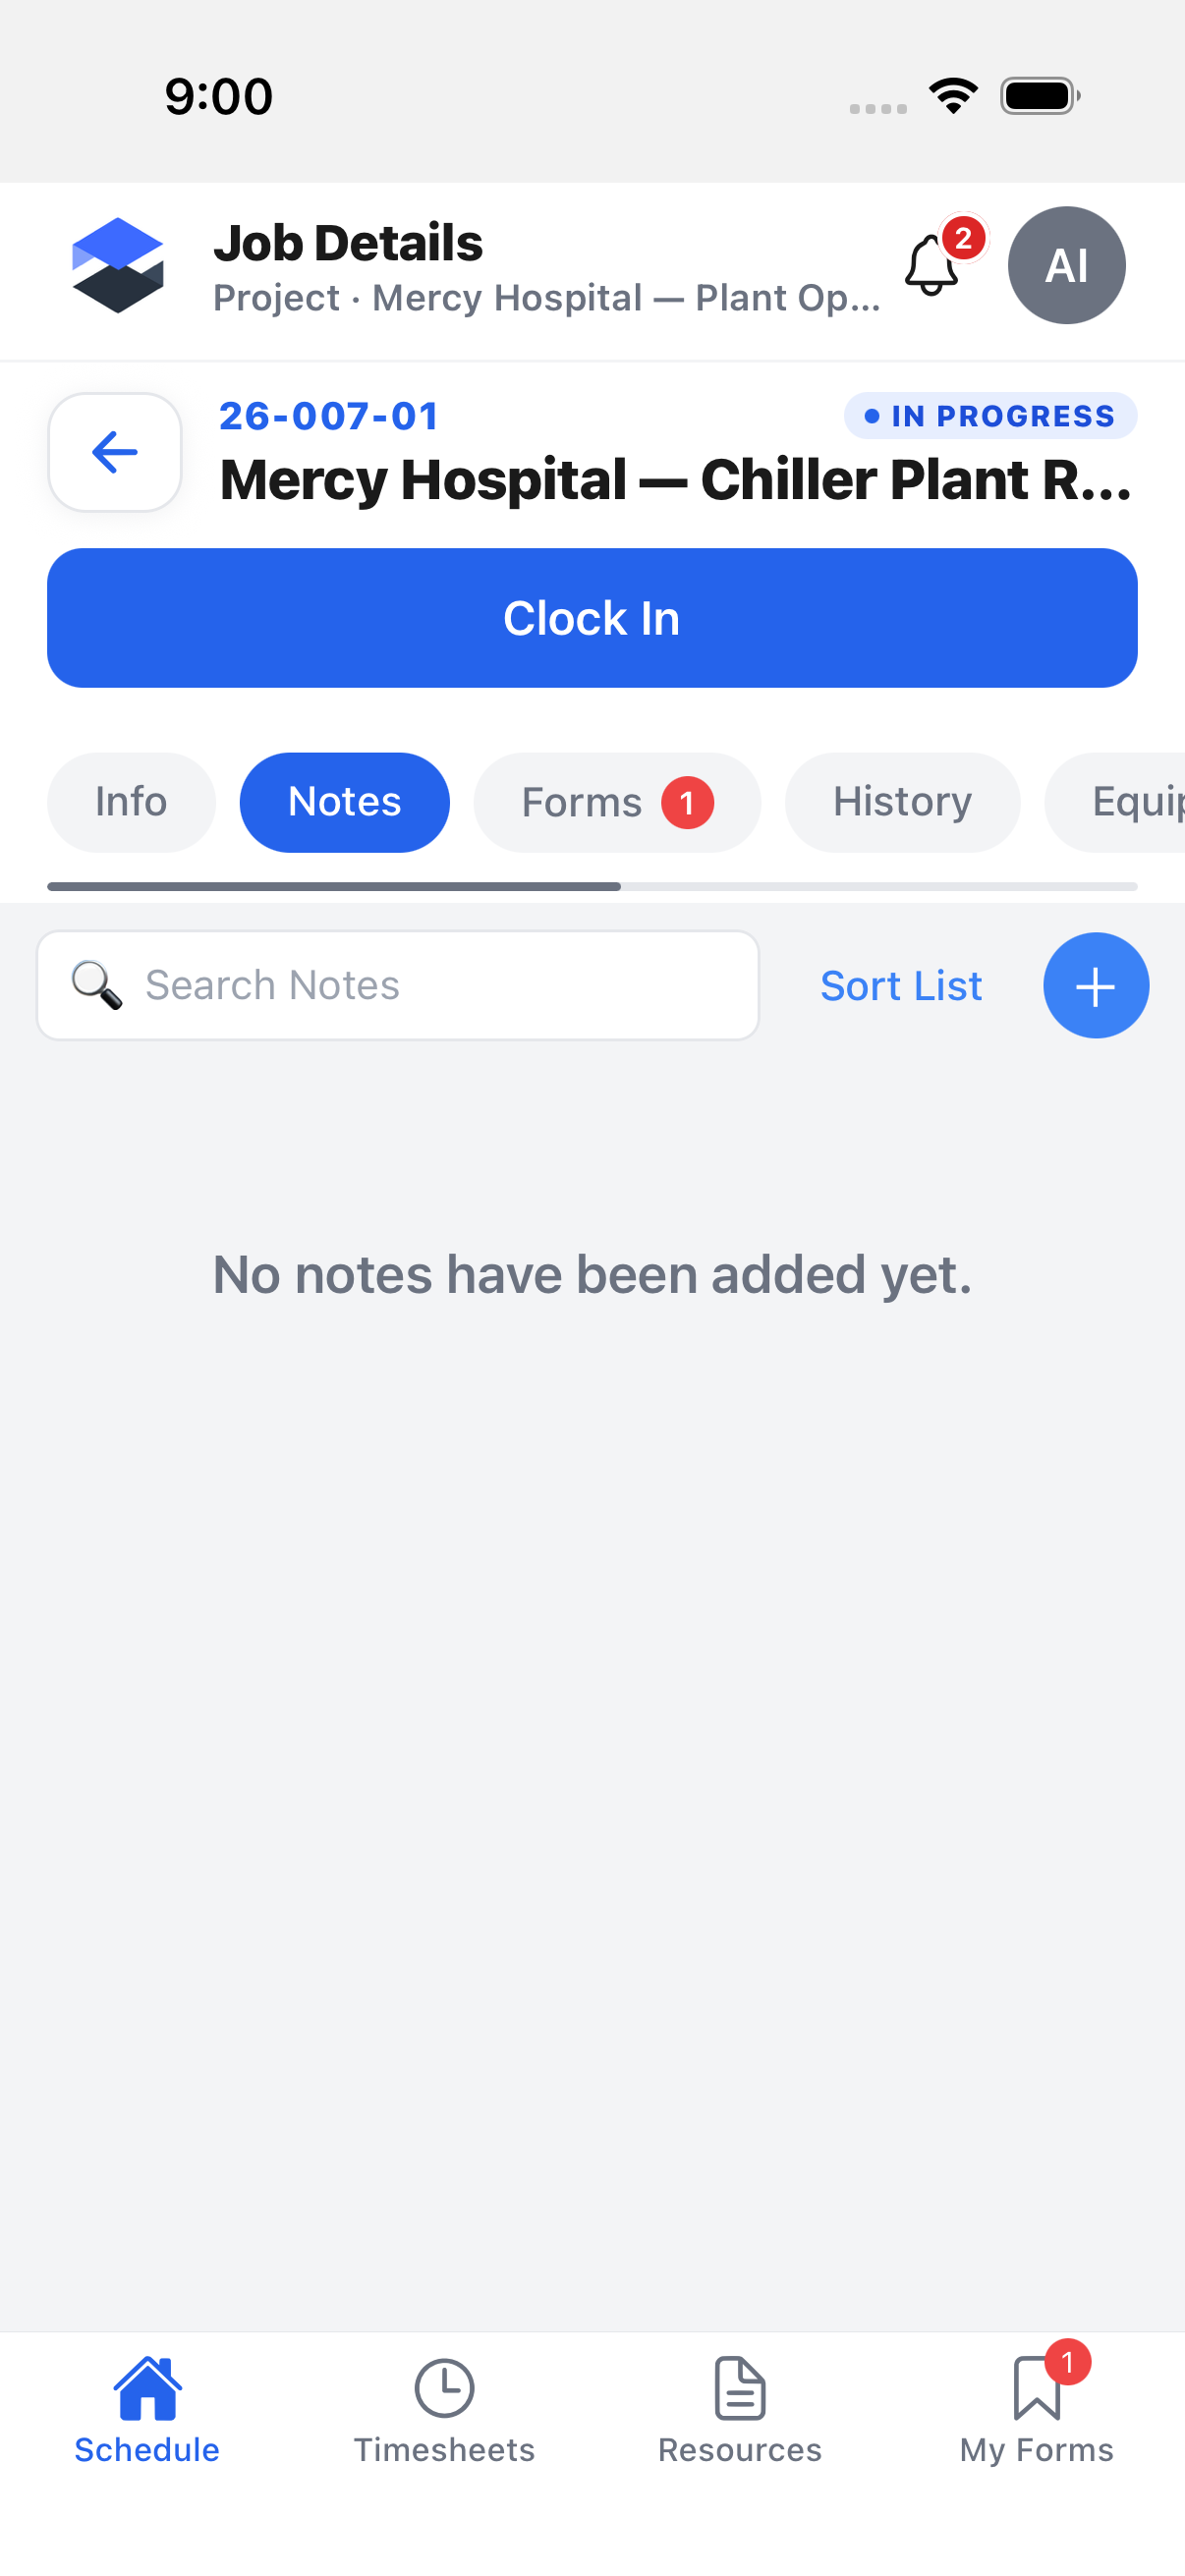
This was confirmed on-device this pass: tapping an actual "... tagged you in a comment" notification for a Job-linked note landed on that job's Notes tab, not the standalone screen, with the note's card at the top and highlighted:
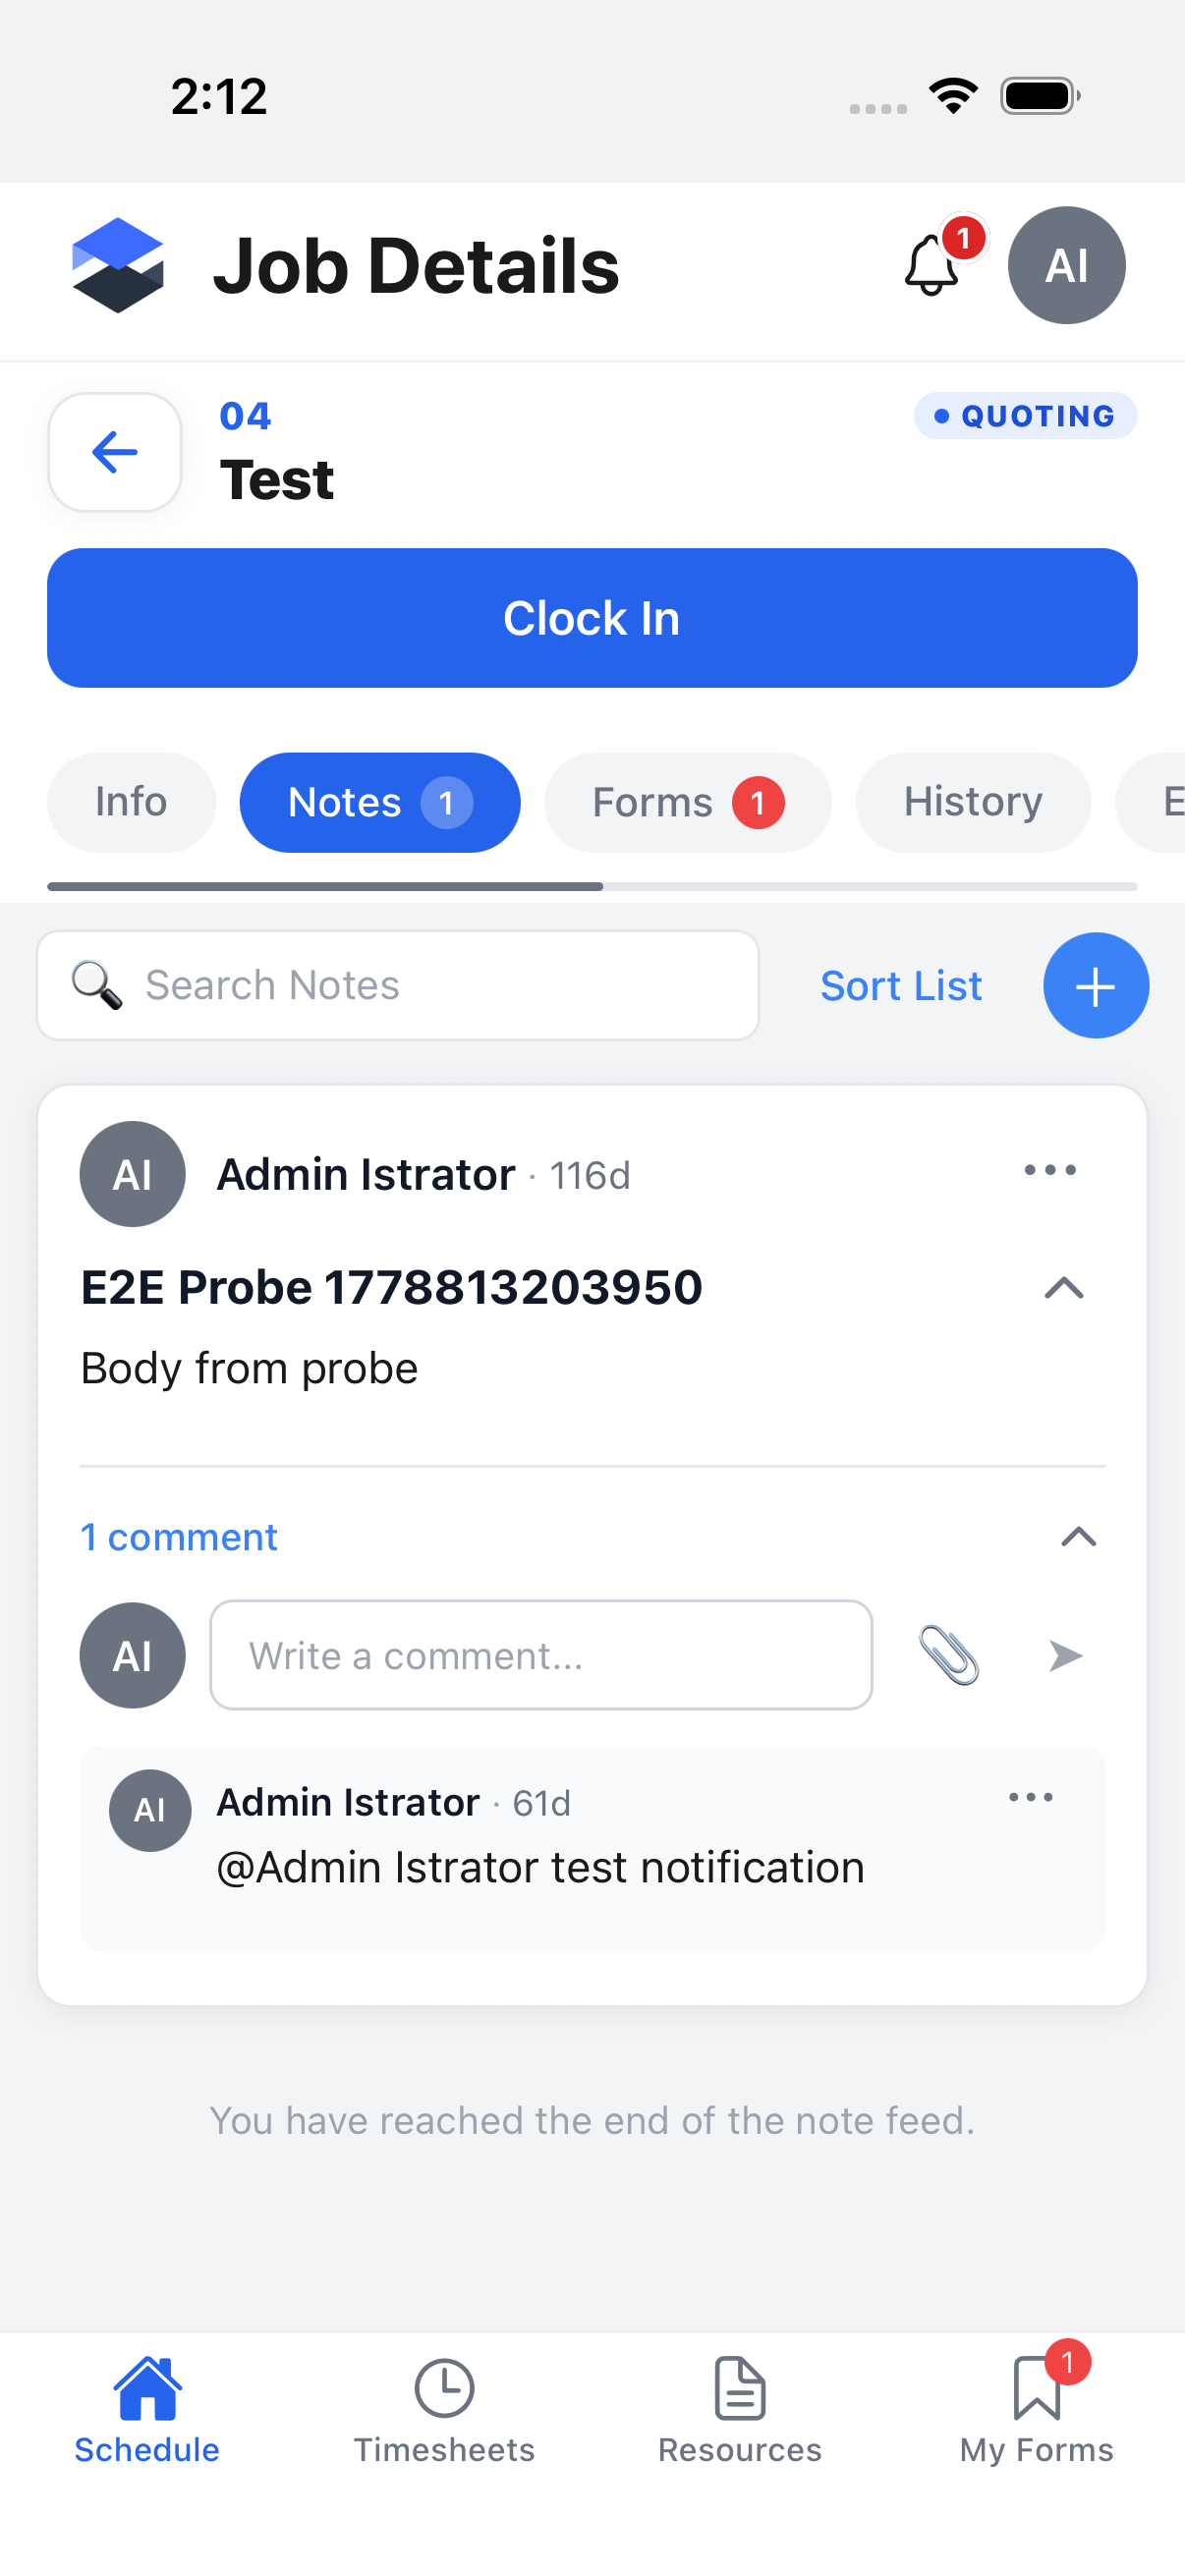
Because every note-related notification on the instance used here resolved in context, this pass could not produce a screenshot of the standalone note screen itself. Its layout -- one note, fully expanded, with a Back to feed link at the top -- is described in writing instead.
Attachments on the Detail Screen
Attachments show as a collapsible View N attachments row above the comments. When a note has no non-sensitive attachments, the whole section disappears rather than showing an empty state. The only note reachable on the demo instance has no attachments, so no attachments row appears for it.
Comments
Every note -- in either feed, and on the detail screen -- has a comments section with the same Add comment entry point:
-
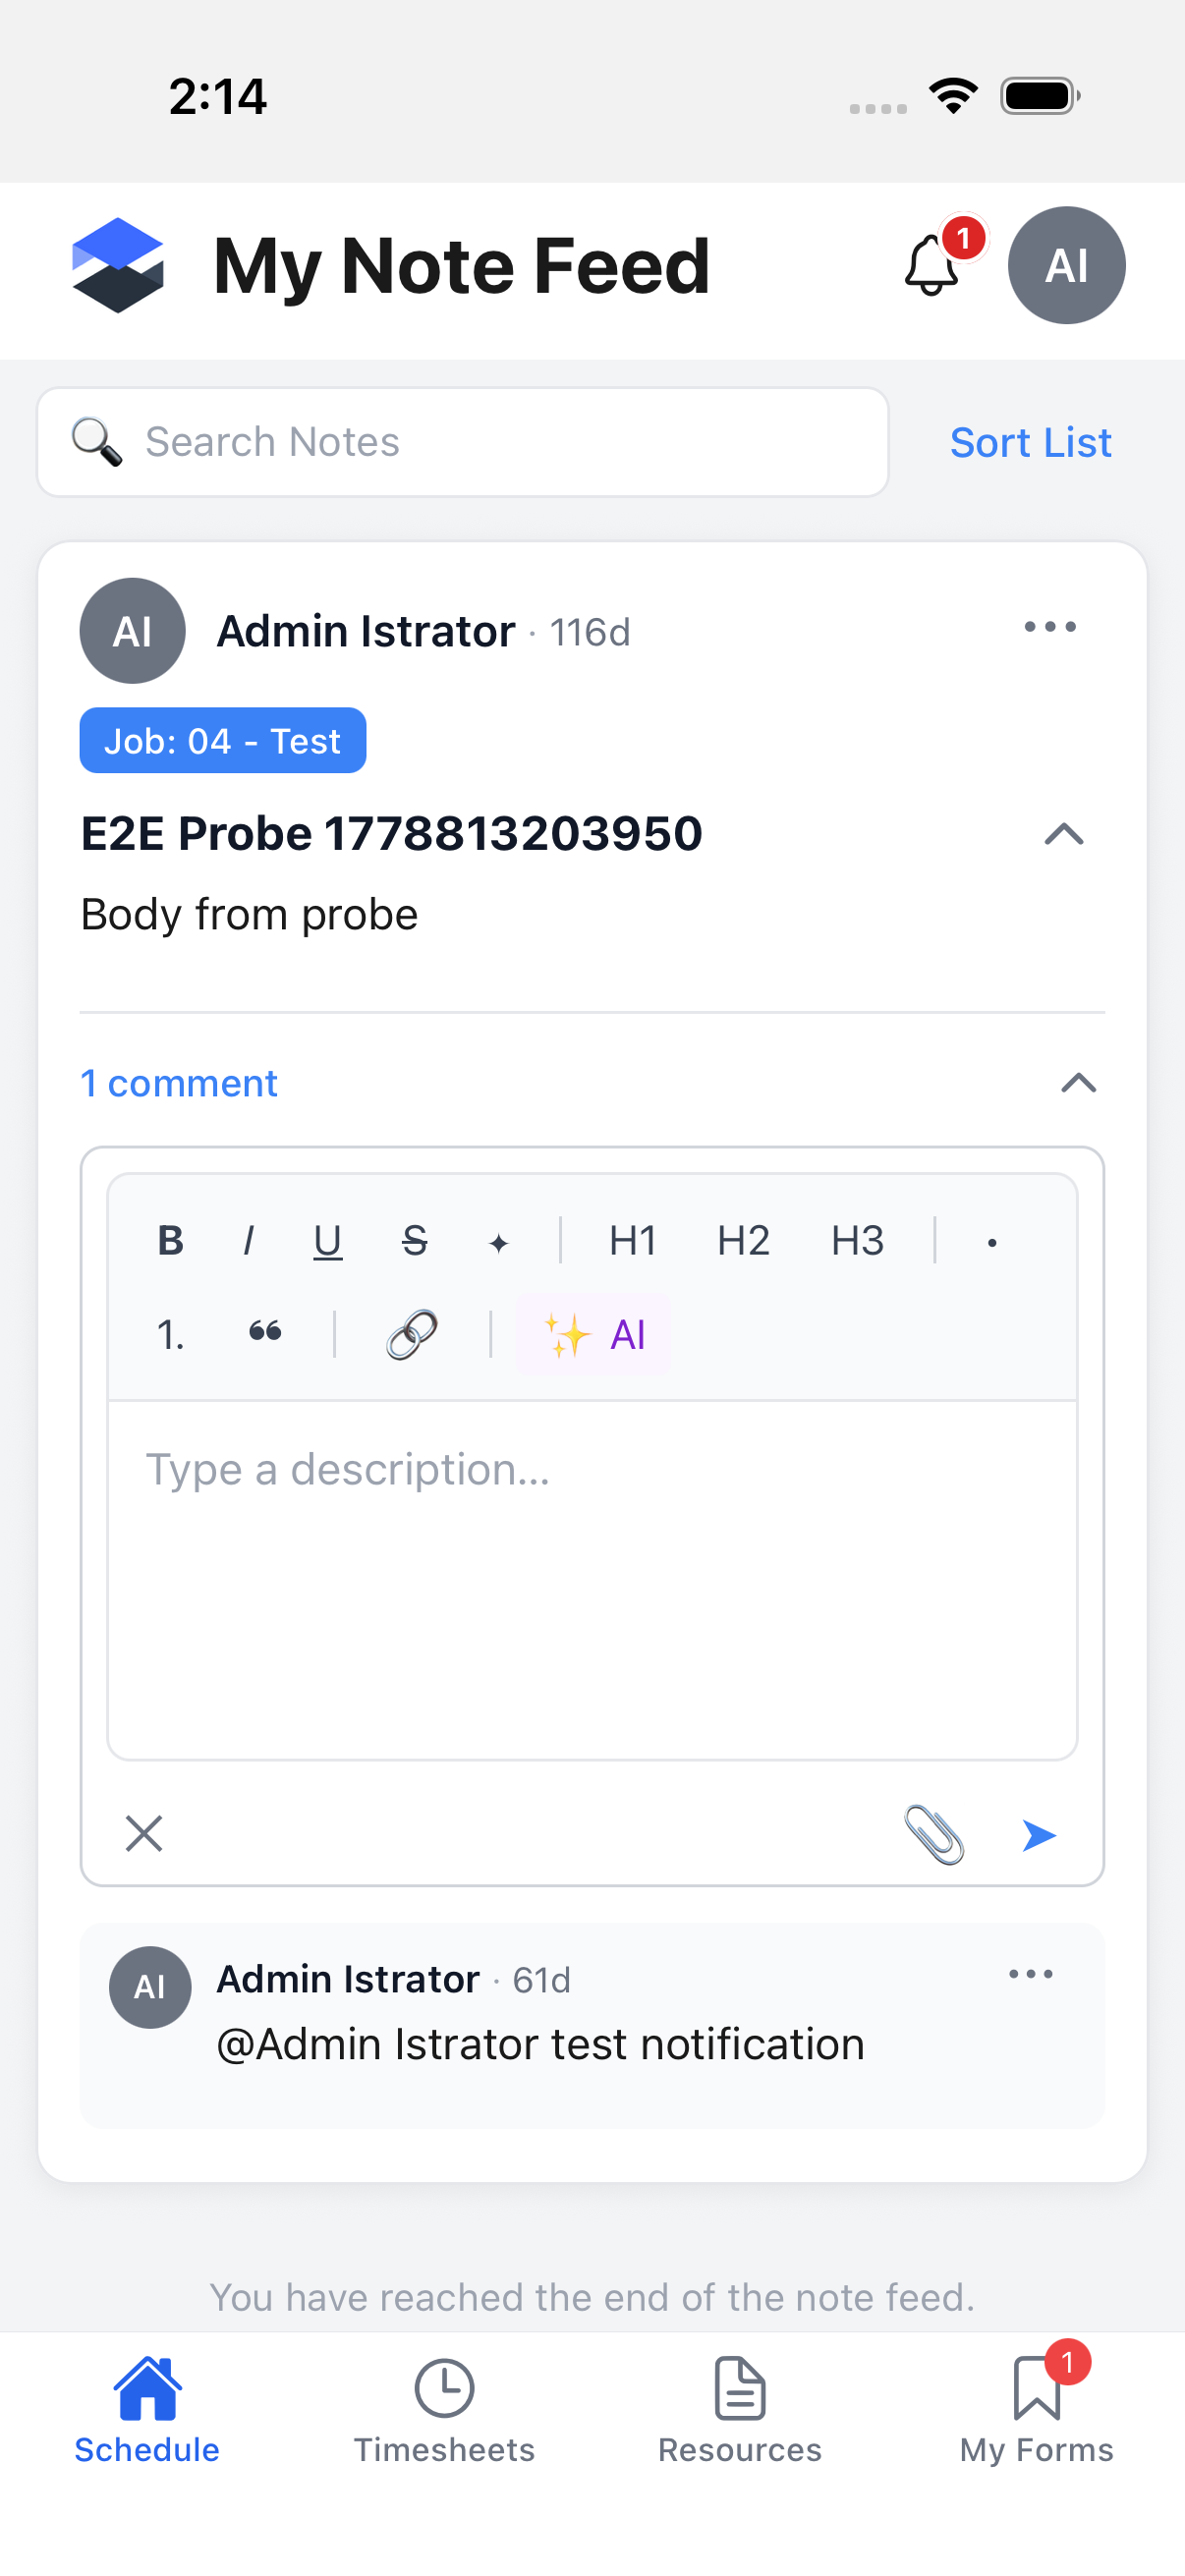
Tap the collapsed Write a comment... row to expand it into the real composer -- the same rich-text editor as the note body (bold/italic/headings/lists/✨ AI), plus an attachment icon and a send arrow.
-
Type your reply (with the same
@mention support as the note body -- see Tagging People in a Note), optionally attach a file, then tap the send arrow, or the ✕ to collapse the composer without submitting.
Each existing comment has its own ... (Comment actions) menu, gated the same way as the note-level menu:
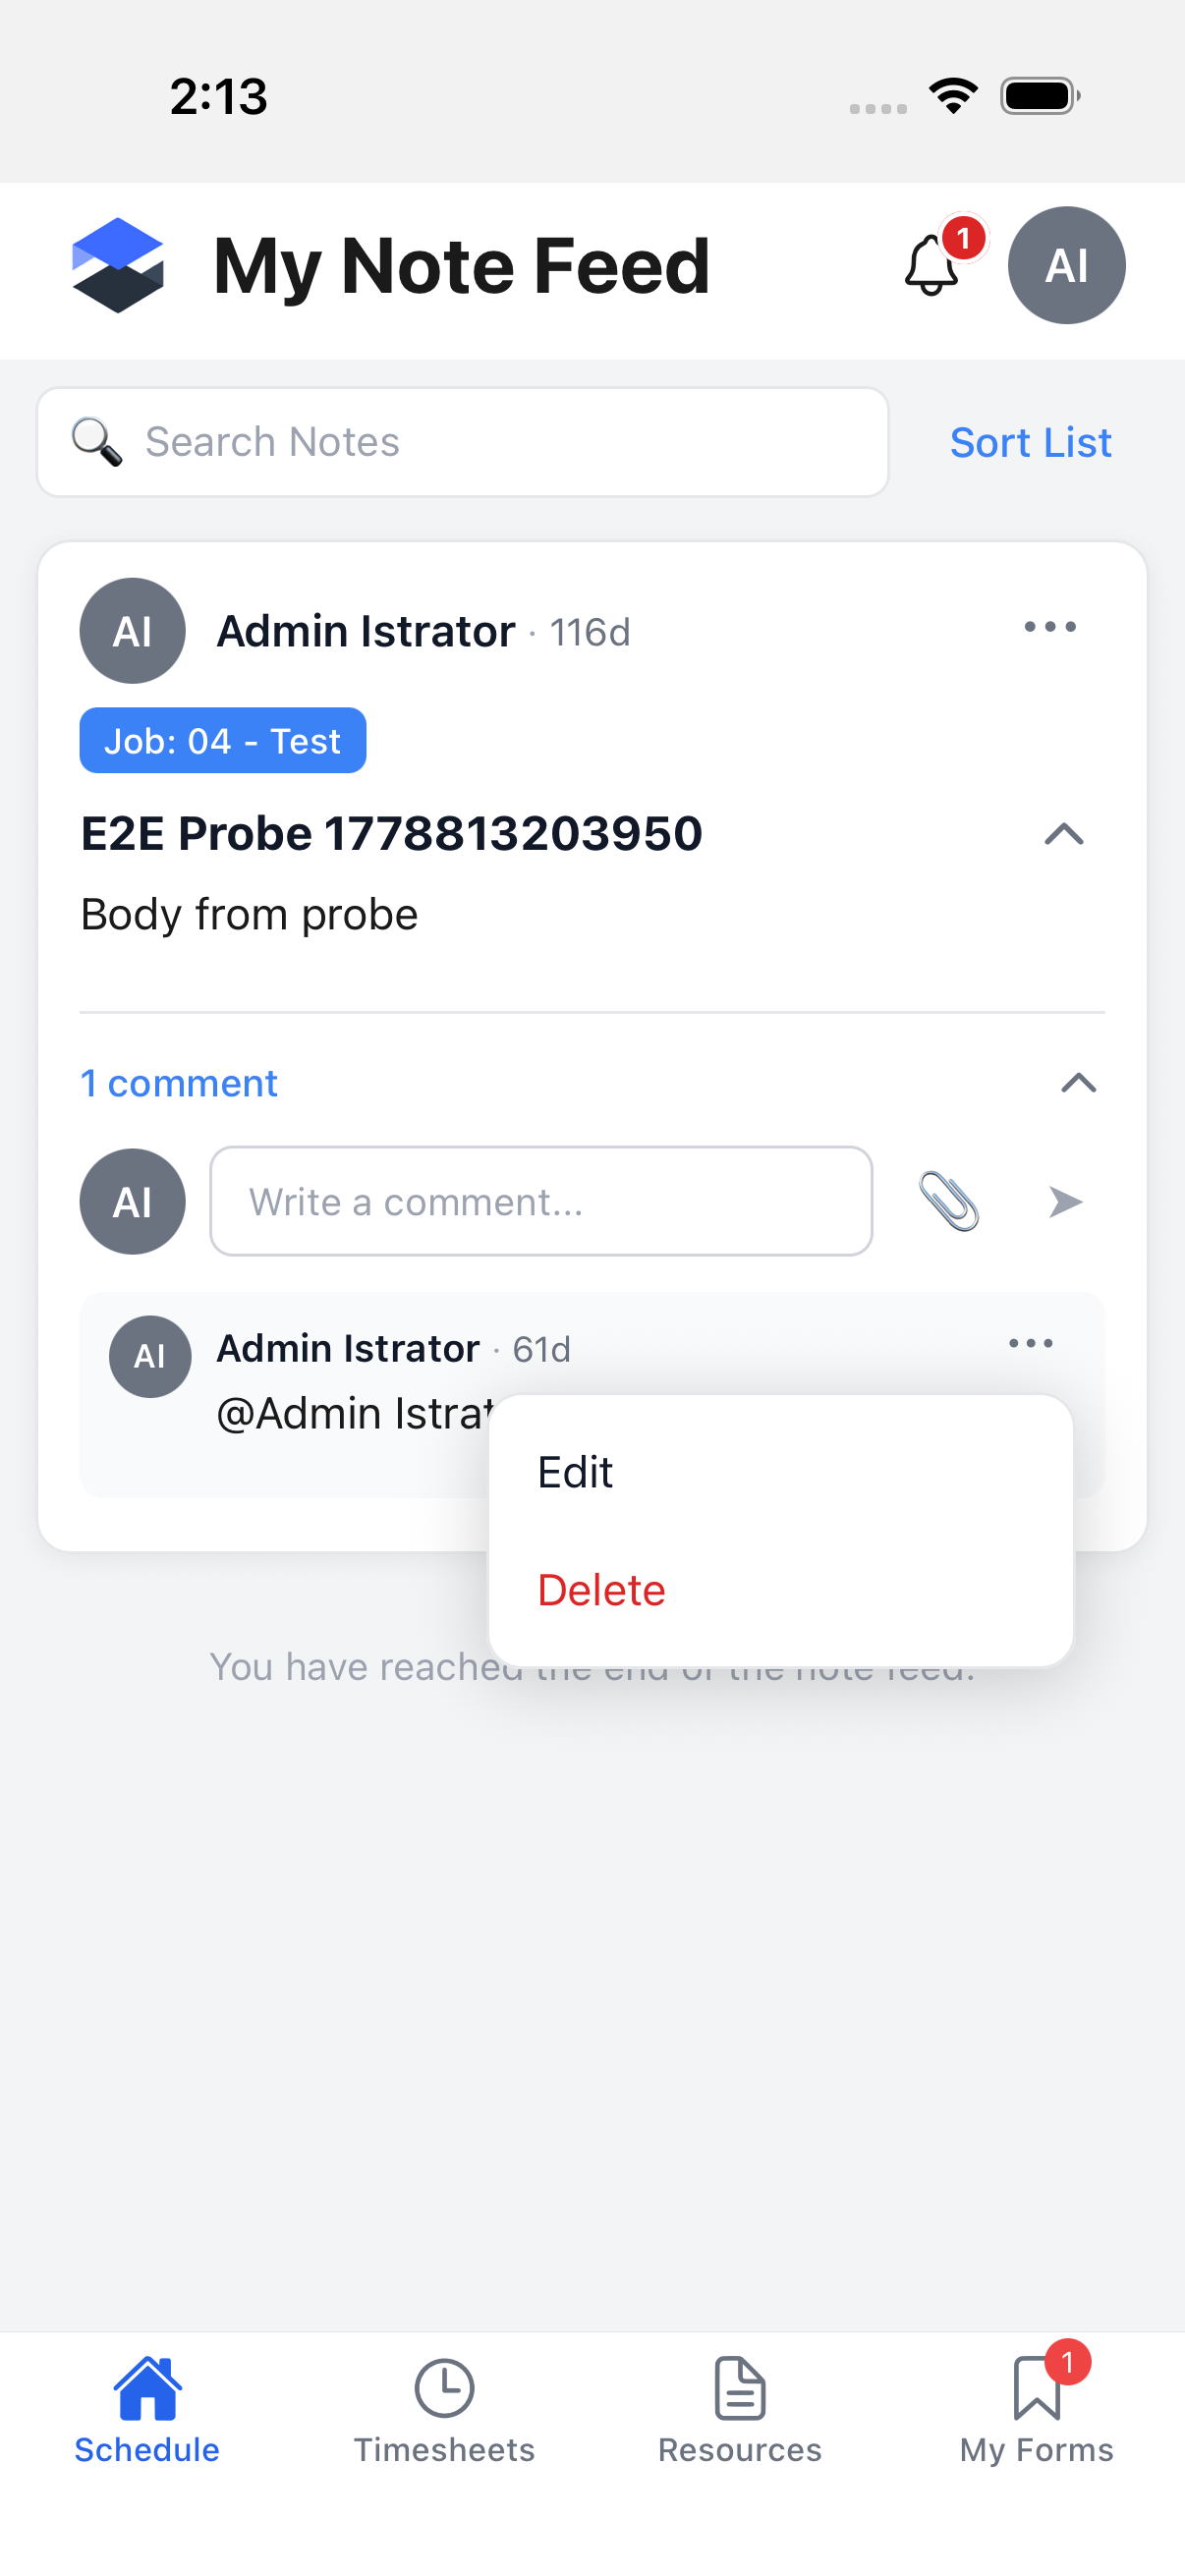
- Edit and Delete show only when you authored that comment and hold the matching permission -- the same rule as the note-level menu.
- Otherwise the menu shows No actions available.
Editing a comment happens in place -- the row itself turns into the composer, rather than opening a separate screen. Deleting shows the same kind of confirm dialog as deleting a note.
Editing a Note
Tapping Edit in a note's actions menu (see above) opens the same composer used for creating a note, in edit mode.
- Gate -- editing requires both that you are the note's author and the Notes → Edit permission. If either is missing, the screen shows "You don't have permission to perform that action." with a Back button instead of the form.
- Header -- reads Edit Note, but the submit button in the top-right still reads Send, not Save.
- Cross-entity field -- hidden in edit mode (see Cross-Entity Association).
- Cancel -- if you haven't changed anything, tapping Cancel exits immediately with no prompt; if you have, it shows the same three-way "Save your changes?" dialog as creating a note (see Drafts and Auto-Save).
This pass could not capture a screenshot of the loaded Edit Note screen. The actions menu's Edit, Pin, and Delete rows look separate but are announced as a single combined item, so the automated tooling used for this page could not tap Edit without risking a real Delete. That also affects screen-reader users, and has been flagged for a fix. Everything above about the Edit Note screen is described in writing instead.
Permissions Reference
Note permissions are set per role in Settings → Roles & Permissions:
| Permission | Gates |
|---|---|
| Notes → View | Seeing the Notes tab / My Note Feed at all. |
| Notes → Assign | The compose button and the New Note screen. |
| Notes → Edit | The Edit/Pin actions-menu rows, and the Edit Note screen's gate. Also reused for comment editing. |
| Notes → Delete | The Delete actions-menu row, for both notes and comments. |
Creating a note is governed by Notes → Assign rather than a separate "create" permission.
Edit and Delete can also be limited to "own notes only" for some roles. The mobile app always requires you to be the author on top of holding the permission, so it never offers an action Appello would refuse.
Rewrite with AI on Mobile
The note composer's rich-text toolbar includes a ✨ AI button, visible in the empty-composer screenshot above. It offers the same four options as desktop:
- Rewrite to be more professional
- Translate to French
- Translate to Spanish
- Translate to English
The ✨ AI button only appears while the device is online -- it's hidden entirely when offline, rather than shown disabled. For the full behavior (what gets sent as context, what the AI preserves, and what it does not do), see AI Note Enhancement, which documents the same control.
Who Gets Notified
- Mentioning someone (
@name,@group, or@Everyone) sends them a Note Tagged notification, and adds them to that note thread's subscriber list. - Commenting on a note sends the note's original author a Note Commented notification -- unless the commenter and the author are the same person.
- Everyone previously mentioned anywhere in that note's thread (not just this message) gets
another Note Tagged notification on new activity in the thread, because mentioning someone
subscribes them going forward. In other words, being
@mentioned once means you keep hearing about that note's thread even when a later reply doesn't mention you by name again. - The person taking the action is never notified about their own note or comment.
Both notification types are grouped under Notes in the app's notification-preferences sheet, alongside Note Created and Document Comment Mention. See Note Detail and the Standalone Note Screen above for where tapping one of these notifications actually takes you.
Related Pages
- Job Notes, Photos & Activity Feed -- the desktop-side walkthrough of notes, tagging, replies, visibility, and the account-wide notes feed.
- AI Note Enhancement -- the Rewrite with AI control in full, including what it preserves and does not do.