Signing In to the Appello Mobile App
This guide covers installing the Appello mobile app and signing in for the first time, switching companies, setting up a quick unlock method, changing your password, and signing out. It applies to the Appello app on iPhone and Android phones.
Screenshots on this page are from the Appello app, version 1.71.0, running on an iPhone simulator.
How signing in works
Signing in on mobile is three steps, in order:
- Company identifier -- tell the app which Appello tenant to load (once per device, unless you switch companies). See Selecting your company.
- Employee PIN or email/password -- prove who you are, using whichever method your administrator set up for your account. See Signing in with your Employee PIN and Signing in with email and password.
- Optional: biometric unlock -- after your first successful sign-in, you can turn on Face ID / Touch ID / fingerprint so later launches skip step 2 entirely. See Setting up biometric sign-in and Using biometric sign-in.
The app may also ask for a handful of device permissions (push notifications, location, biometric) along the way -- see What the app asks permission for.
Installing the app
The app is named Appello on both platforms. It is not yet listed publicly on the App Store or Google Play. Your administrator invites you to install it directly:
- Your administrator adds you to Appello's TestFlight (iPhone) or internal testing (Android) list and sends you an invitation.
- iPhone: Open the TestFlight invitation (email or link). If you don't already have the TestFlight app, you'll be prompted to install it from the App Store first. Then tap Install (or Accept) to install Appello through TestFlight.
- Android: Open the internal-testing invite link your administrator sent you, tap Become a tester, then install Appello from the Google Play Store link on that page.
As of this writing, the iPhone build is distributed only through TestFlight -- it is not yet on the public App Store.
Selecting your company
The first time you open the app, it asks for your company identifier before it asks for your email or PIN. Appello is multi-tenant -- this step tells the app which company's data to load.
- Open the Appello app.
- In Company identifier, enter the identifier your administrator gave you.
- Tap Continue.
If the identifier is recognized, you're taken to the sign-in screen. If not, you'll see Company not found -- double-check the spelling with your administrator.
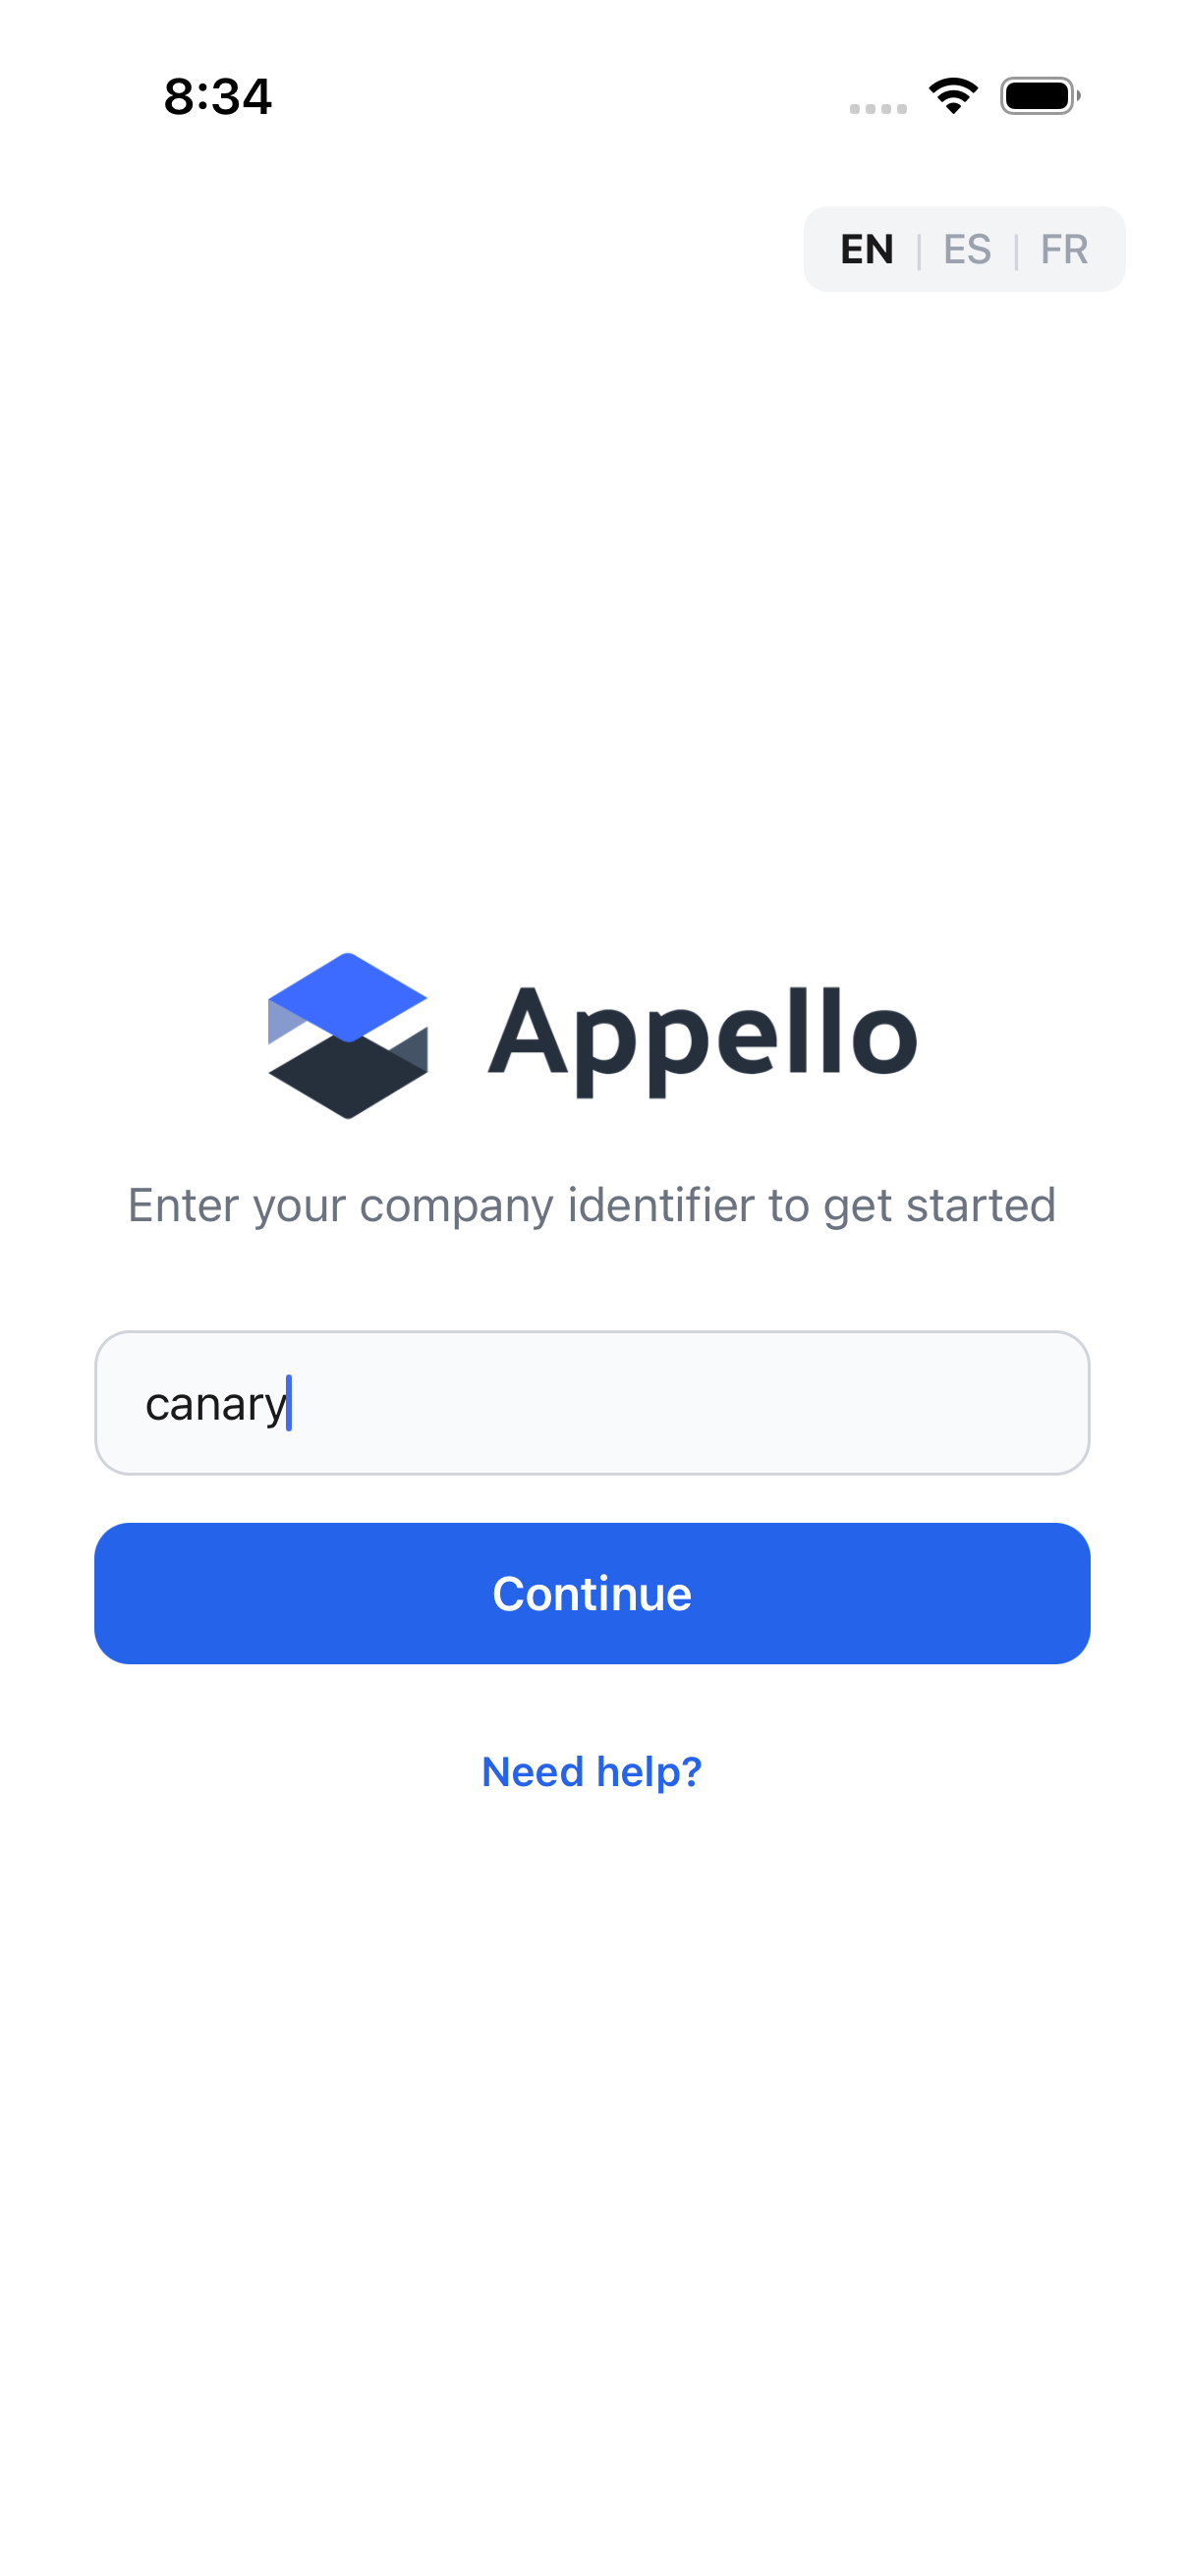
Once you've entered a company, the app remembers it. On every later launch you'll go straight to the sign-in screen for that company -- you won't need to enter the identifier again unless you switch companies or reinstall the app.
If you tap Continue with the field empty, or with an identifier that doesn't match any Appello company, the field is outlined in red with one of these messages:
| Situation | Message |
|---|---|
| Field left empty | "Please enter a company identifier." |
| Identifier doesn't match any company | "Company not found." |
Tap Need help? below the Continue button for a short explanation of what the company
identifier is and where to get it: your Appello-provided identifier unlocks your application, and
if you don't have it, contact your administrator or email support@useappello.com. Tapping
Email support in that dialog opens your phone's mail app addressed to support@useappello.com.
In the top-right corner of this screen (and the sign-in screen), an EN | ES | FR switch lets you set the app's display language before you've signed in -- see Choosing a display language below.
Signing in with your Employee PIN
If your company issues Employee PINs (common for crew members who don't have a company email address), the sign-in screen opens on the Employee PIN tab by default.
- On the sign-in screen, confirm the Employee PIN tab is selected (it's the default).
- Enter your last name.
- Enter your Employee PIN.
- Tap Sign In.
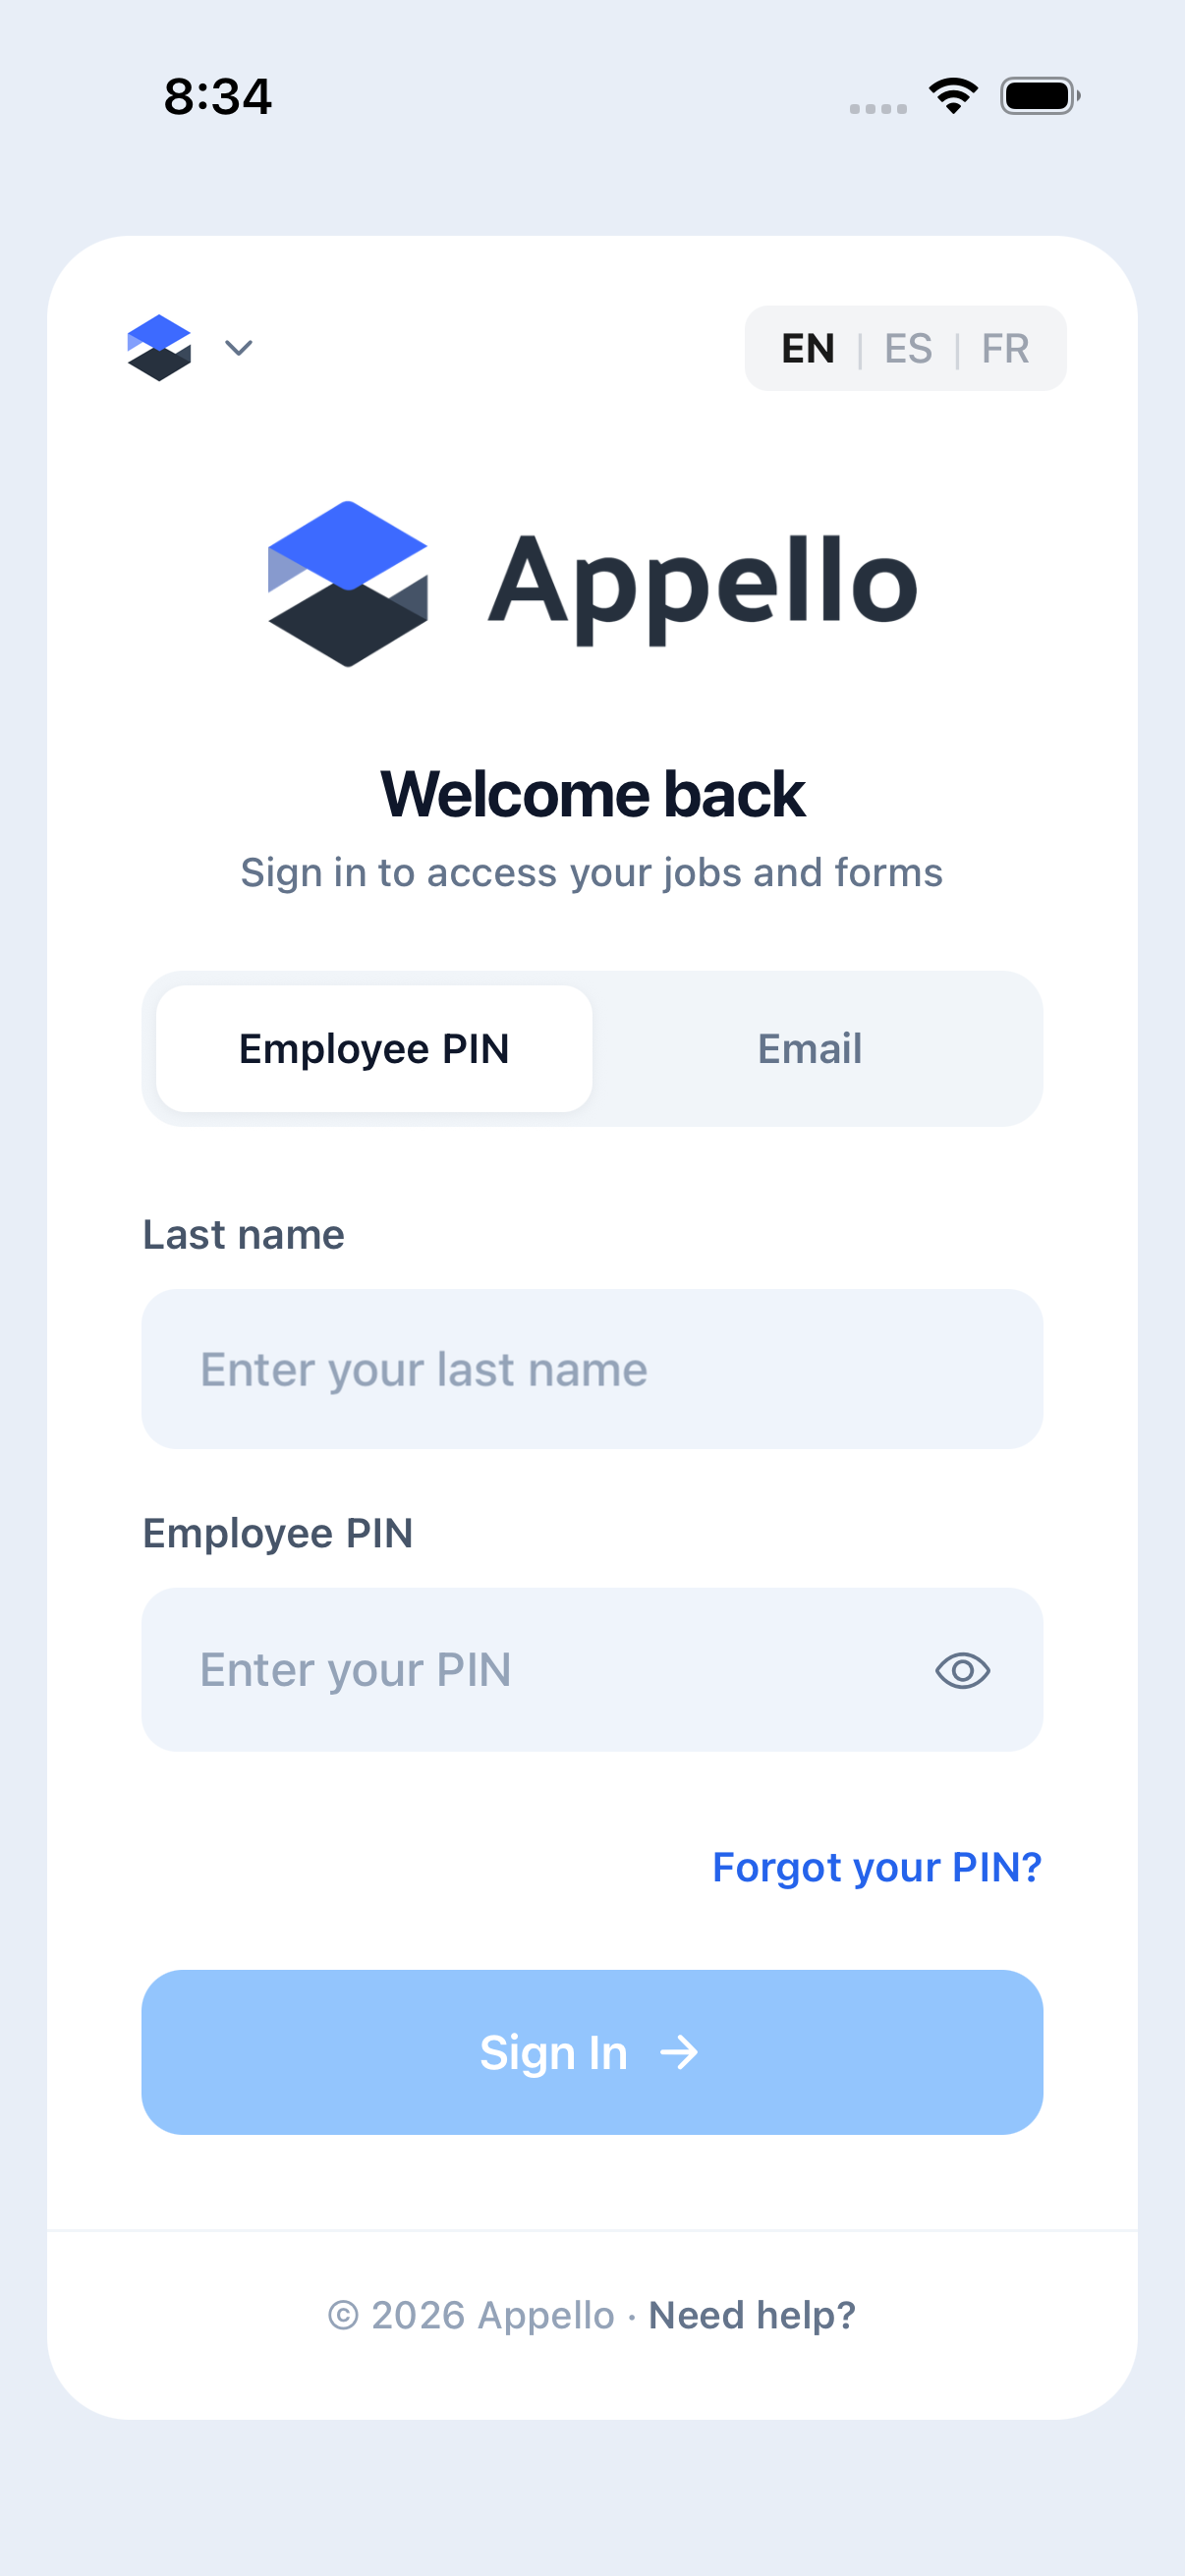
Your administrator assigns your Employee PIN -- you can't create or change it yourself in the app. If you don't have one, use the Email tab instead.
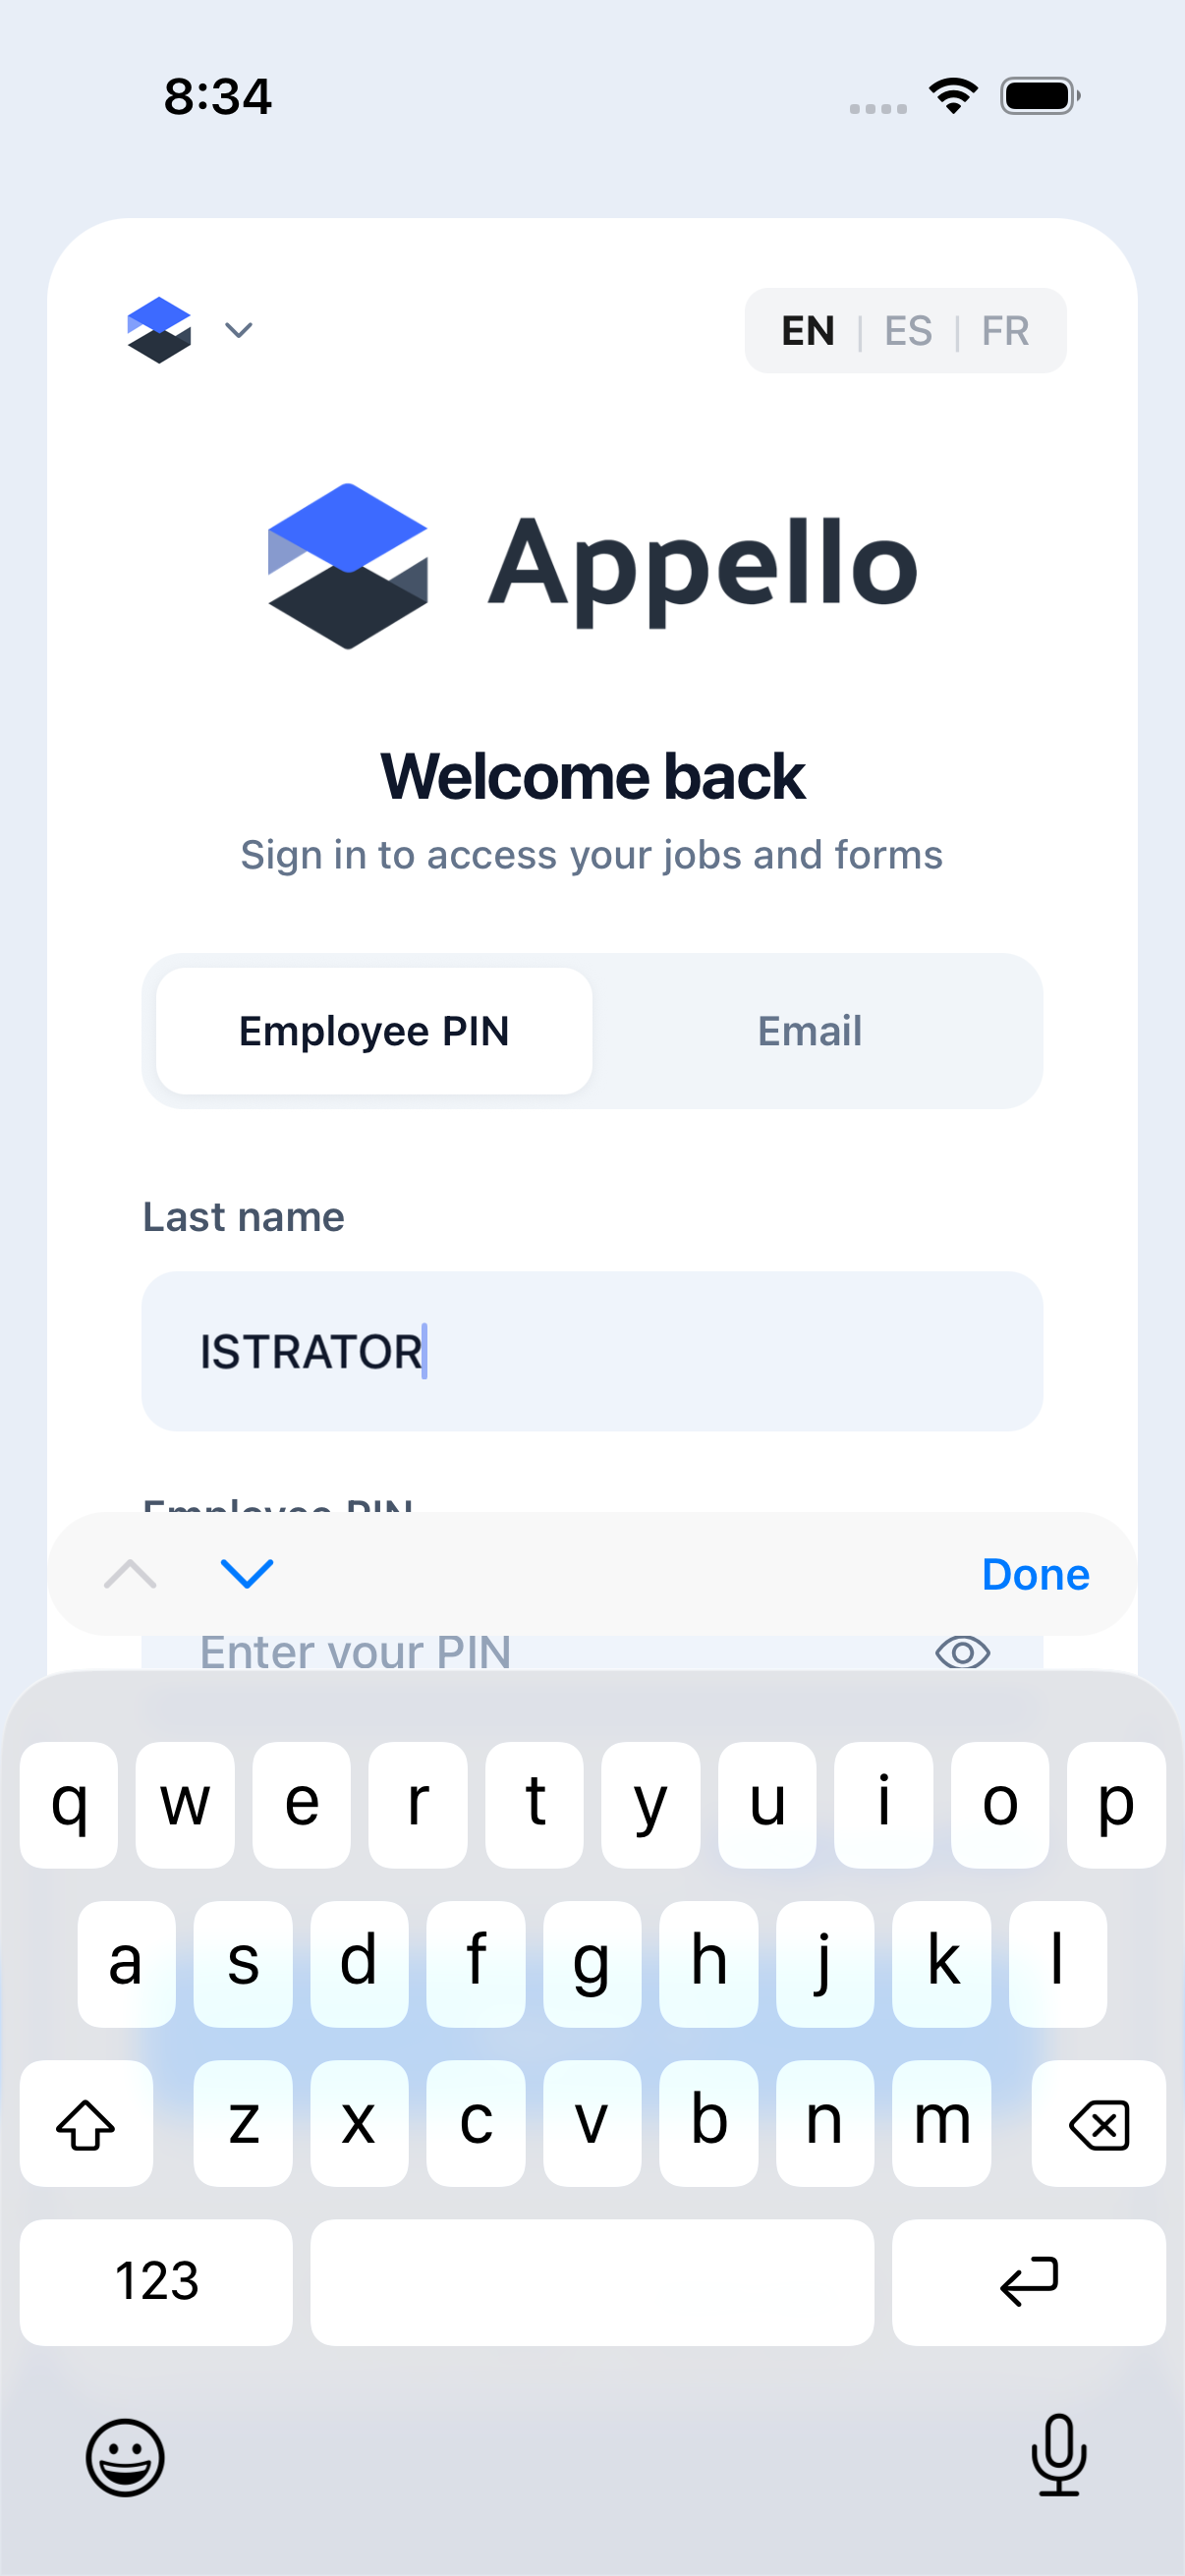
Tap the eye icon inside the Employee PIN field to reveal the digits you've typed (tap it again to hide them). The screenshot below shows the toggle switched to reveal mode before anything has been typed -- for security this page doesn't publish a screenshot of an actual PIN on screen.
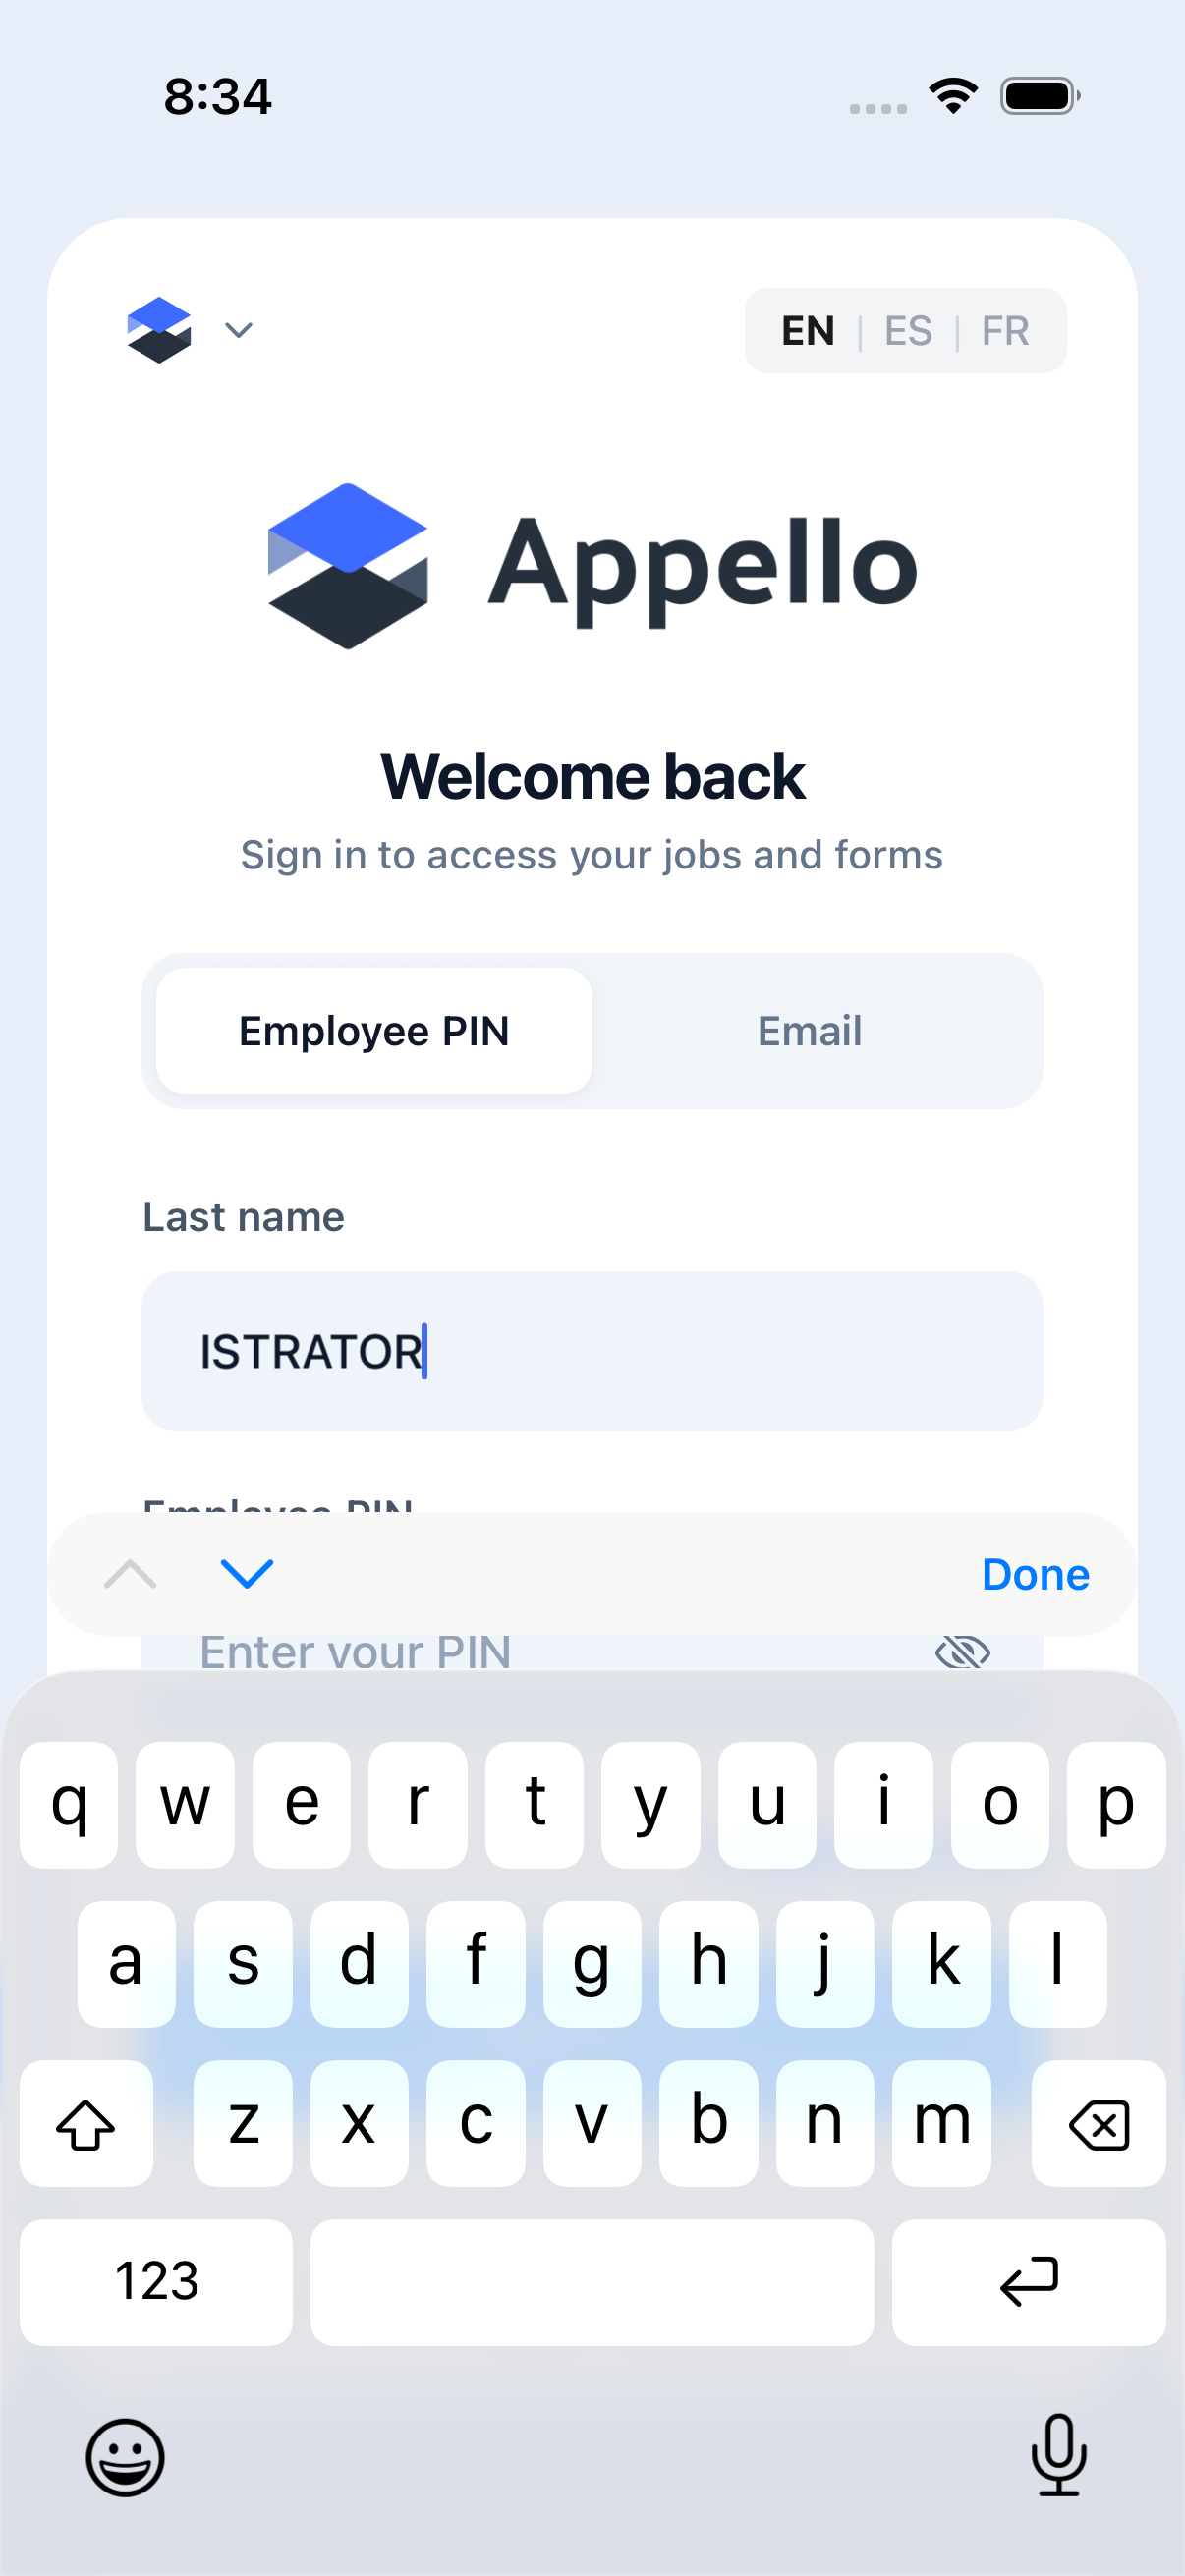
If you tap Sign In with either field empty, or with a last name/PIN combination that doesn't match an account, the fields are outlined in red with one of these messages:
| Situation | Message |
|---|---|
| Last name left empty | "Last name is required." |
| PIN left empty | "PIN is required." |
| Last name/PIN don't match | "Invalid PIN or last name." |
Tap Forgot your PIN? for a reminder that there's no self-service reset -- contact your administrator (see Forgot your Employee PIN in Troubleshooting).
Signing in with email and password
- On the sign-in screen, tap the Email tab.
- Enter your email address.
- Enter your password.
- Optionally check Remember me.
- Tap Sign In.
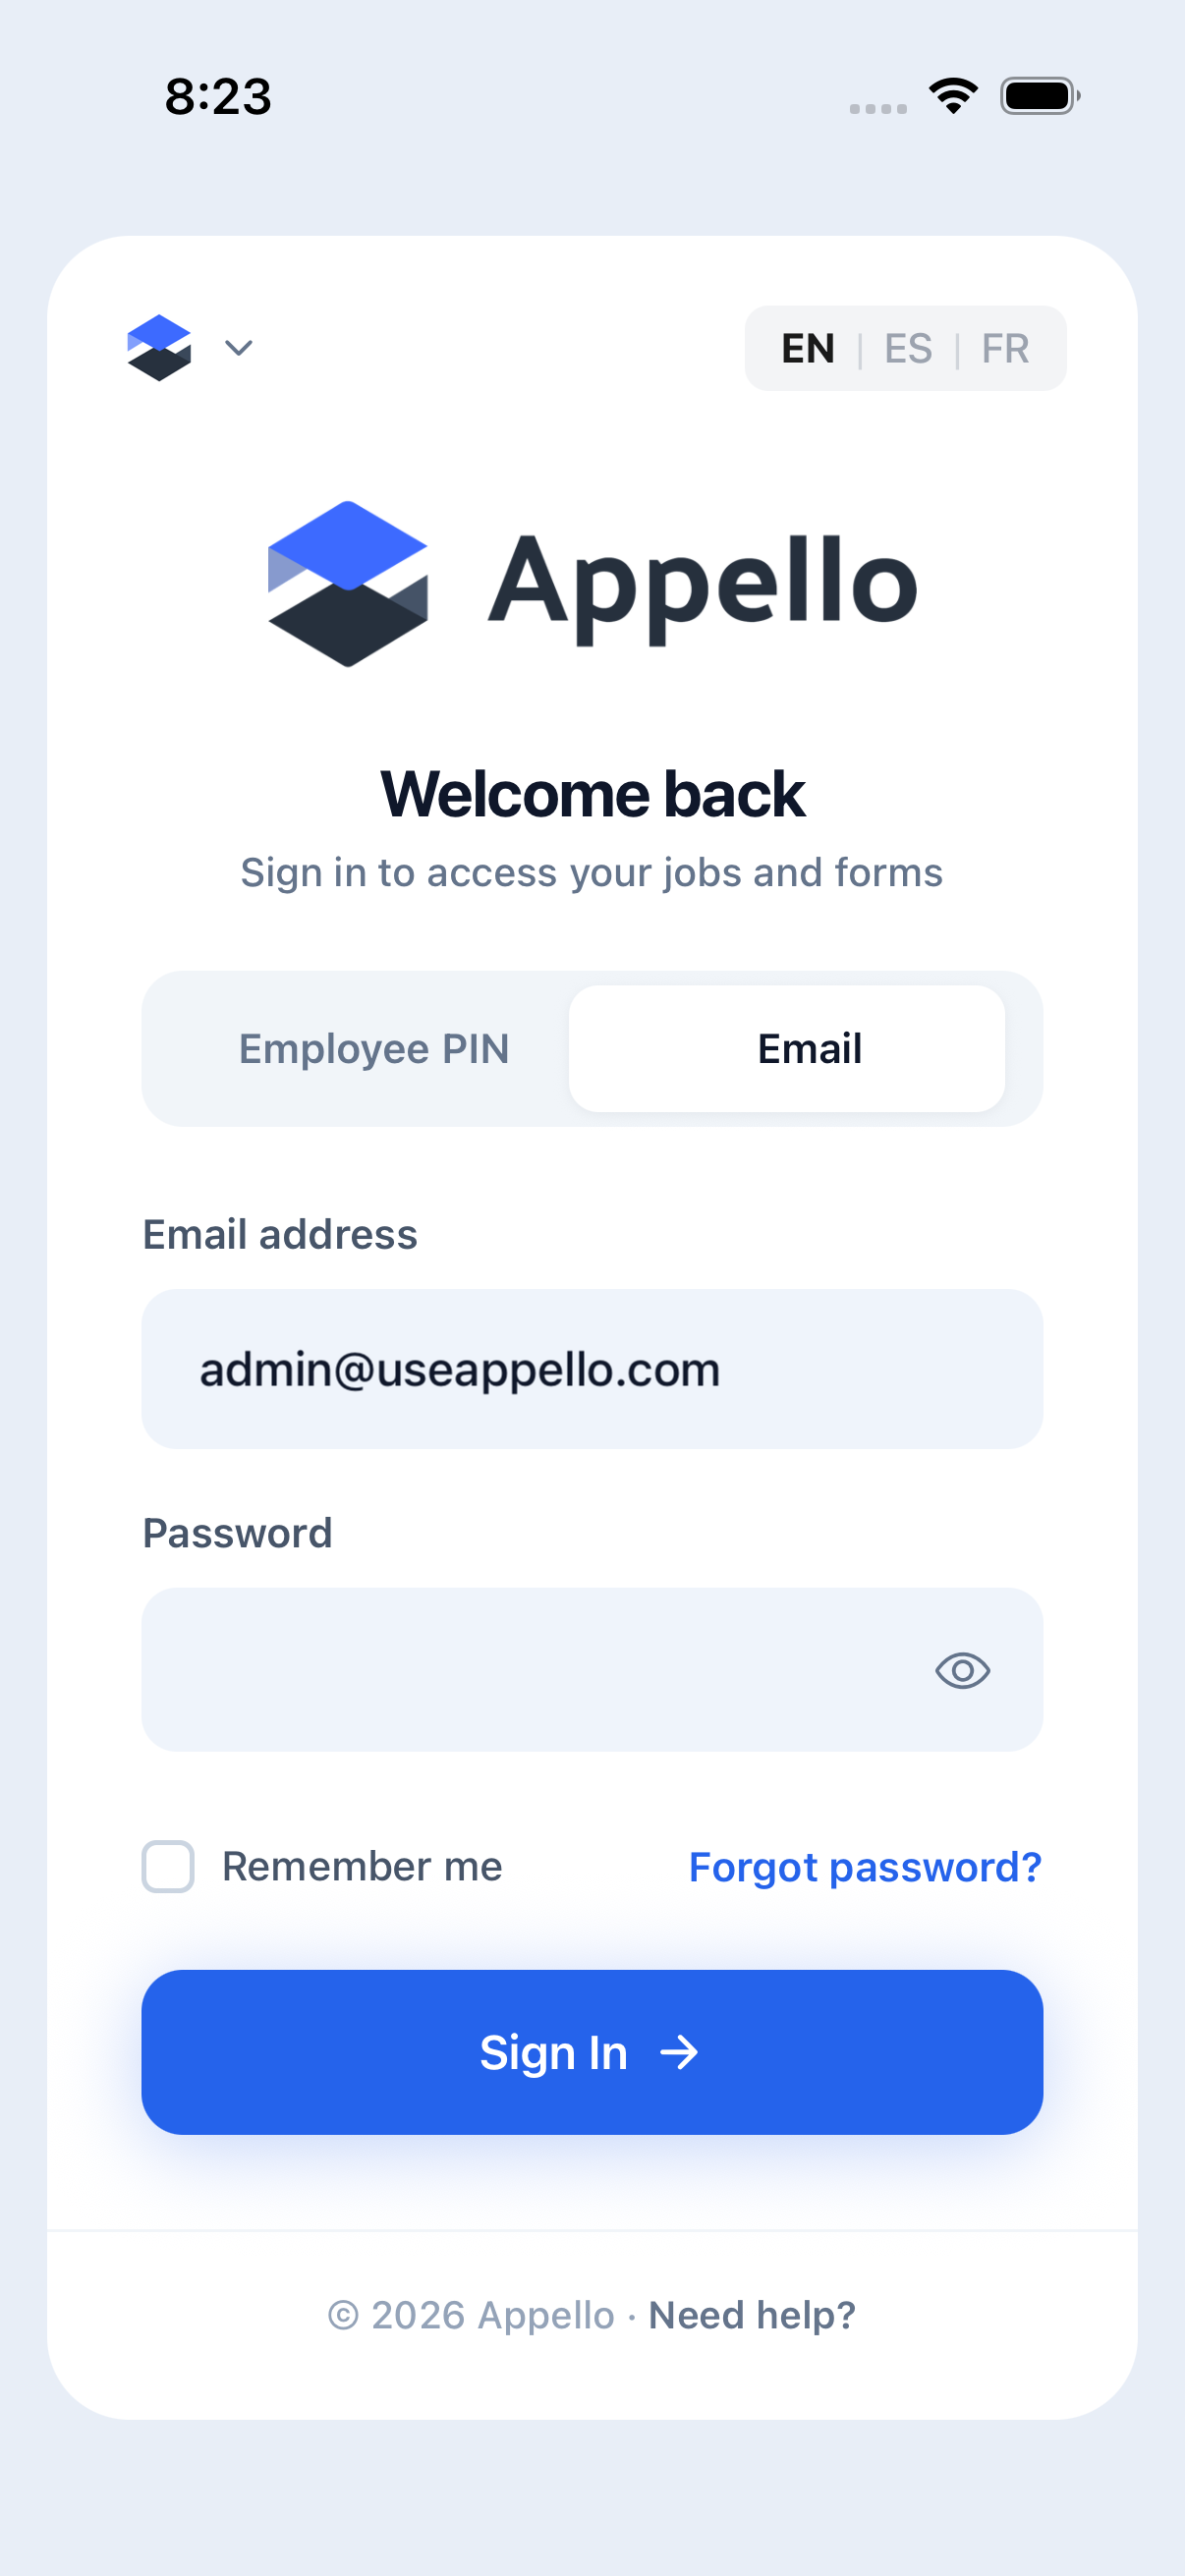
You can tap the eye icon in the password field to show or hide what you've typed, the same as on the Employee PIN tab.
The Remember me checkbox is currently a visual toggle only -- it does not yet save your email between app launches.
If you tap Sign In with either field empty, or with an email/password combination that doesn't match an account, the fields are outlined in red with one of these messages:
| Situation | Message |
|---|---|
| Email left empty | "Email is required." |
| Password left empty | "Password is required." |
| Email/password don't match | "Invalid email or password." |
| No network connection | "Unable to connect. Please check your internet connection." |
Tap Forgot password? to request a reset link -- see Forgot password below.
Selecting or switching your company
If you ever need to sign into a different Appello company on the same phone (for example, you work with more than one Appello customer):
- On the sign-in screen, tap your company logo in the top-left corner.
- In the menu that opens, tap Switch Company.
- You're returned to the company identifier screen. Enter the new company's identifier and tap Continue.
- Sign in with your credentials for that company.
Switching companies clears the company saved on your device and signs you out of the current one. You'll need to sign back in (email or PIN) for the new company.
Choosing a display language
Before you're signed in, the top-right corner of the company identifier and sign-in screens shows an EN | ES | FR switch. Tap ES or FR to change the app's display language immediately -- there's no separate confirmation step, and no account or company needs to be entered first.
This switch only appears on the pre-login screens (company identifier and sign-in). It's not present once you're signed in.
What the app asks permission for
The first time you sign in, the app may step you through a short series of full-screen slides (a carousel) asking for device permissions, one at a time. Each slide has a primary action button (for example Allow) and a Maybe later link to skip it -- a skipped slide can reappear on a later sign-in until you respond to it.
You can also reopen every slide at any time, regardless of what you answered before: tap your profile icon (top-right) to open the account menu, then scroll down to Settings and tap Permissions. This re-shows the full set of slides from the start.
The carousel shows up to four slides, in this order:
| Slide | Title | What it's for | Primary CTA | Secondary CTA |
|---|---|---|---|---|
| Push notifications | "Stay in the loop" | Notifies you when you're tagged in a note or arrive at a job site. | Allow Notifications | Maybe later |
| Location (while in use) | "Location & Movement" | Shown only if your company uses GPS tracking without background tracking. Verifies you're at the job site when clocking in; Motion & Fitness access is optional and only used to save battery while clocked in. | Allow | Maybe later |
| Location (always) | "Location & Movement" | Shown instead of the row above if your company also tracks location in the background (for example, to follow a crew through a shift), in addition to verifying clock-ins. | Allow | Maybe later |
| Biometric unlock | "Faster sign-in" | Offers to turn on the same biometric sign-in described in Setting up biometric sign-in below. | Enable Biometric Unlock | Maybe later |
Only one of the two location rows ever appears, and only if your company has GPS tracking turned on at all (a company-wide setting) -- companies without GPS tracking never see a location slide. Tapping the primary CTA triggers the standard iOS/Android system permission dialog for that permission; tapping Maybe later skips it without changing anything, and either way the carousel advances to the next slide. After the last slide, you're returned to wherever you were (typically your Schedule).
This pass of the documentation reached the Permissions menu item confirming it's the second
item under Settings in the account menu, past App Settings -- but couldn't scroll far
enough in the current test tooling to capture a live screenshot of the slides themselves without
risking a stray tap on the wrong control. The table above is sourced directly from
src/components/permissions/slides.ts, PermissionsCarousel.tsx, and CarouselSlide.tsx in the
app's codebase. Live screenshots of each slide are a follow-up.
If you try to clock in without location access
If your company requires GPS tracking and you try to clock in while location access is denied, the app shows a dedicated "Location required to clock in" screen instead of letting the clock-in proceed, with the message "Your company requires location for clock-in. Please enable location permission to continue." It gives you two options:
- Open Settings -- jumps to the app's page in your phone's Settings, where you can turn location access on.
- Cancel -- backs out without clocking in.
If you return from Settings having granted access, this screen dismisses itself automatically -- you don't need to tap anything else.
This screen only appears while attempting to clock in with location access denied, which isn't
something this documentation pass could trigger without changing a permission on the shared demo
device -- so no live screenshot is included. The description above, including the exact copy and
the clock-in-permission-open-settings control, is sourced from
app/(app)/clock-in-permission.tsx in the app's codebase.
Setting up biometric sign-in (Face ID / Touch ID / fingerprint)
After you've signed in once with your email/password or PIN, you can turn on biometric unlock so the app recognizes you automatically the next time you open it -- no typing required.
- Tap your profile icon in the top-right corner to open the account menu.
- Under Settings, tap Security.
- Turn on Unlock with Face ID (or Touch ID / Fingerprint, depending on your device).
- Confirm with your device's Face ID, Touch ID, or fingerprint prompt when asked.
The toggle is grayed out if your device doesn't have a secure biometric enrolled. If that happens, add a fingerprint or face scan in your phone's own Settings app first, then come back and try again.
Using biometric sign-in
Once biometric unlock is turned on, the next time you open the app after signing out (or after the app has been closed for a while), you'll see a welcome-back screen instead of the full sign-in form.
- Open the app.
- You'll see a greeting with your name or email and a single button, e.g. Sign in with Face ID.
- Tap the button and complete the Face ID / Touch ID / fingerprint prompt.
You're signed in without typing anything. If you'd rather sign in a different way (for example, someone else needs to use the app on a shared device), tap Use another sign-in method to go to the regular Email / Employee PIN form.
If you cancel the Face ID / Touch ID prompt or it fails, you're simply returned to the welcome-back screen -- no error is shown. Tap the button again to retry, or use another sign-in method.
Changing your password
If you sign in with email and password, you can change your password at any time while signed in.
-
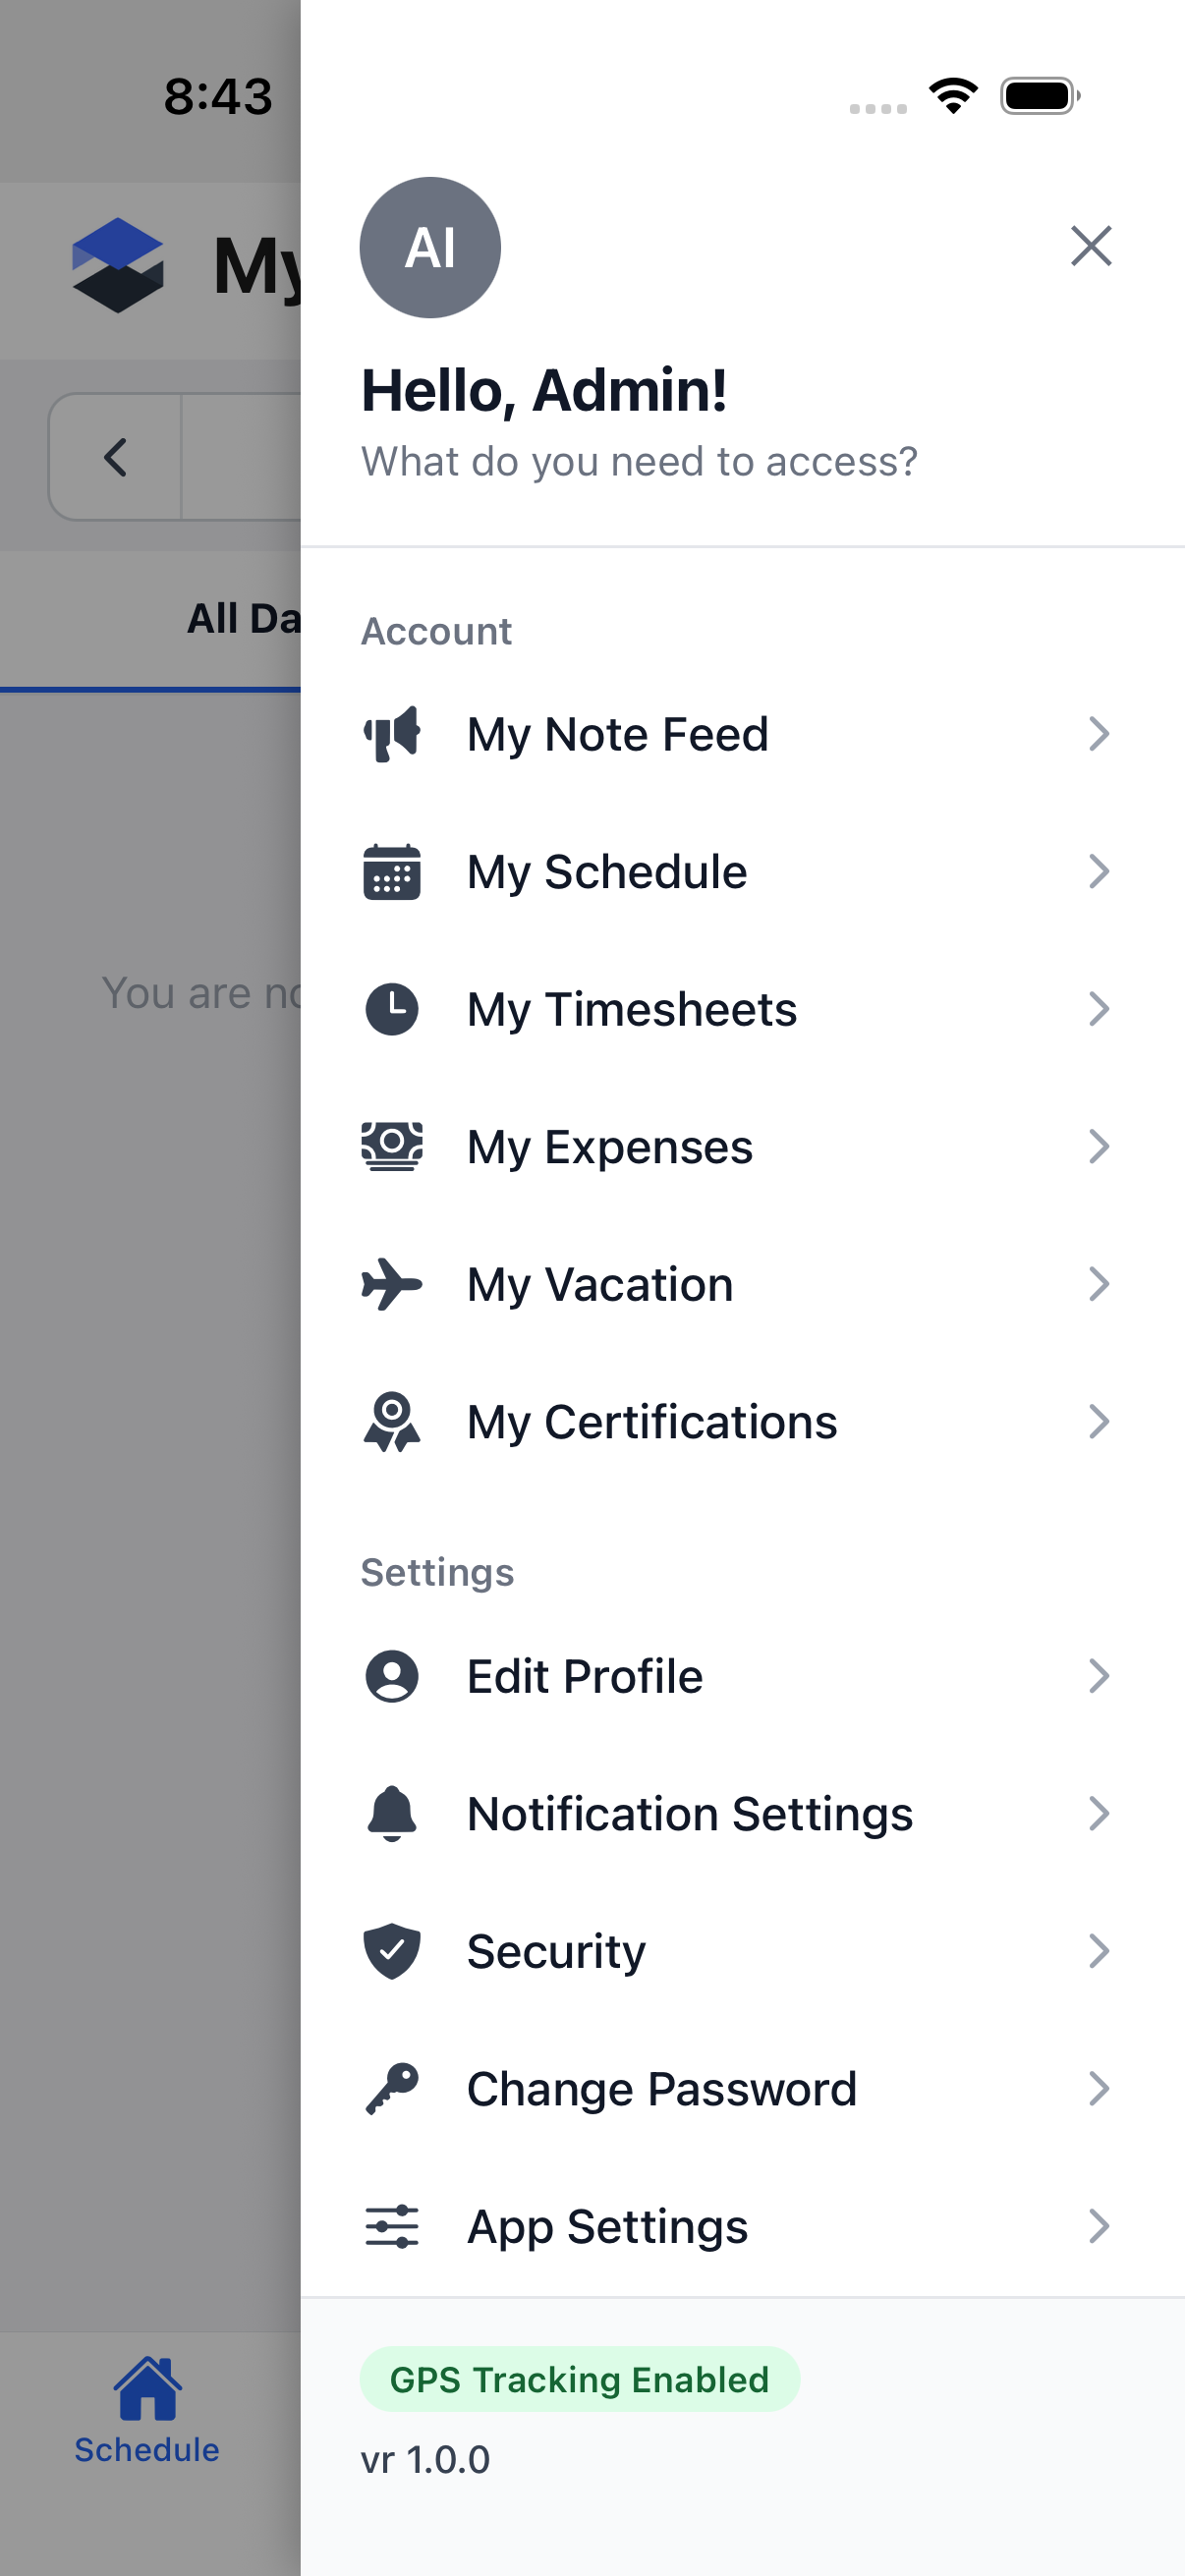
Tap your profile icon in the top-right corner to open the account menu.
-
Under Settings, tap Change Password.
-
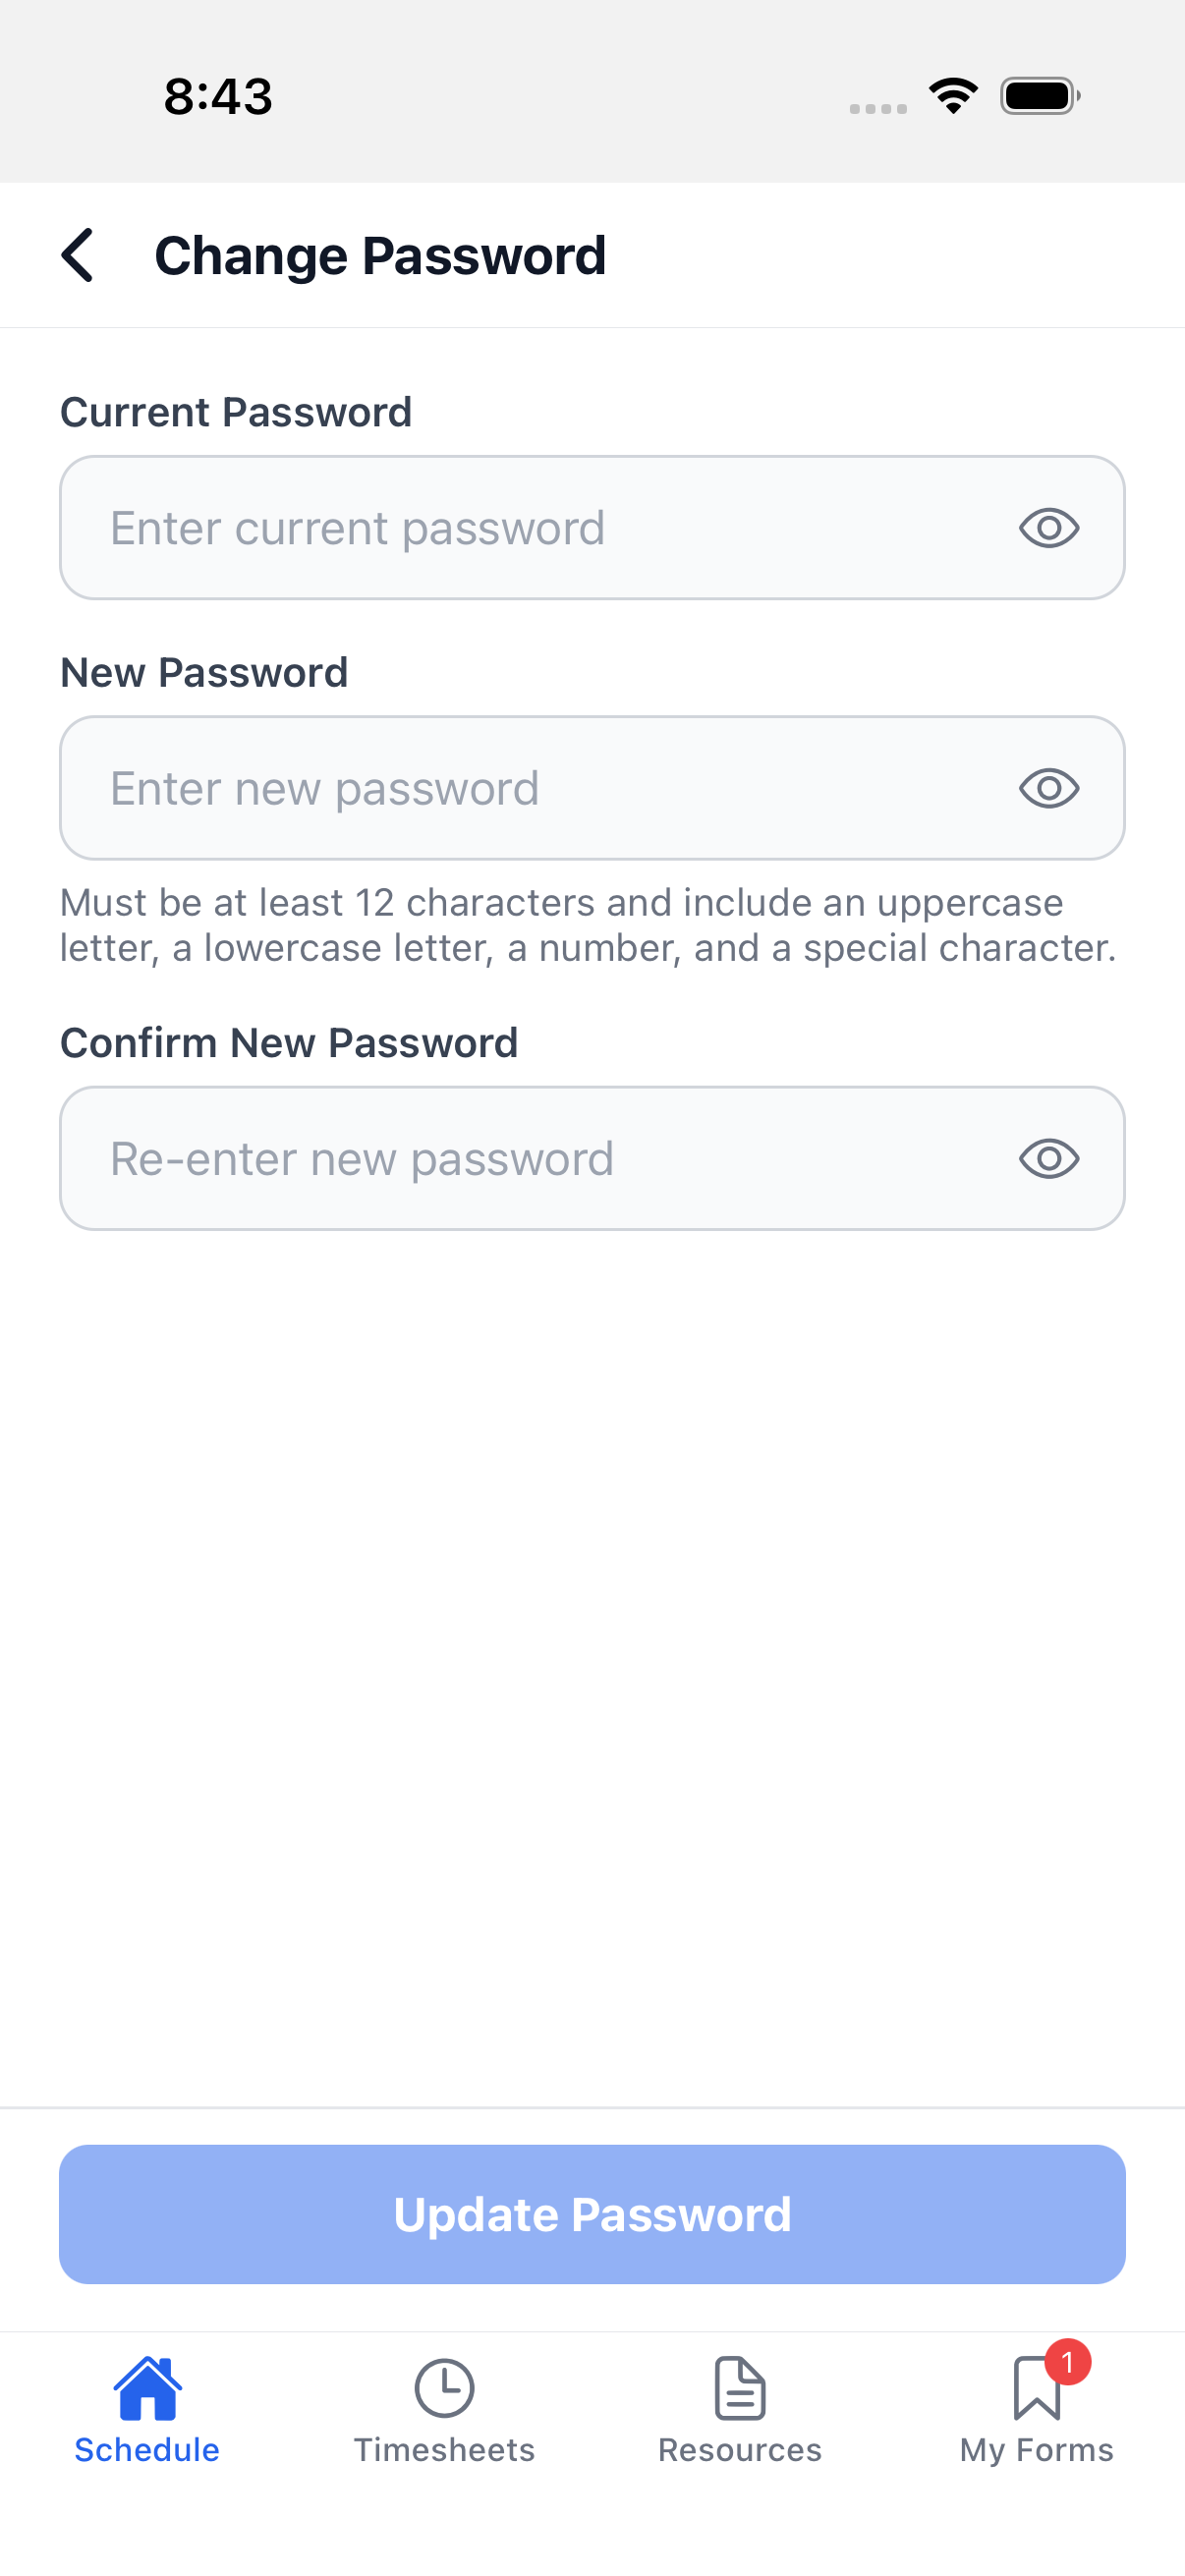
Enter your Current Password, New Password, and Confirm New Password. Your new password must be at least 12 characters, with at least one uppercase letter, one lowercase letter, one number, and one special character.
-
Tap Update Password.
There is no in-app way to change an Employee PIN. PINs are assigned and reset only by your administrator -- see Forgot your Employee PIN in Troubleshooting below.
Forgot password
Employee PIN sign-in doesn't use a password, so this only applies if you sign in with email and password.
- On the sign-in screen, tap the Email tab.
- Tap Forgot password?.
- Enter your email address.
- Tap Send Reset Link.
If you leave the field empty or type something without an @ in it, the field is outlined in red
with "Email is required." or "Enter a valid email address.", and nothing is sent. Tap the
back arrow (top-left) at any point to return to the sign-in screen without sending anything.
You'll always see a Check Your Email confirmation (with a Back to Sign In button), whether or not that email address has an Appello account -- this is intentional and doesn't necessarily mean an email was sent to that specific address. If an account exists, an email arrives with a link to set a new password.
What actually gets sent: the app calls an unauthenticated forgotPassword mutation on the Appello
API with just the email address, and the API always returns the same generic response regardless
of whether that address matches an account (anti-enumeration by design) -- so the app can't tell
you whether the address was recognized, and neither can this page. Confirmed from
src/services/authService.ts (requestPasswordReset) and app/forgot-password.tsx in the app's
codebase.
Live screenshots of this screen aren't included in this pass -- reaching it requires being
signed out, and this documentation pass ran against a shared, already-signed-in demo device that
this page's author was asked not to sign out of. The field names above
(forgot-email-input, forgot-submit-button, forgot-password-back, forgot-password-done) are
sourced directly from app/forgot-password.tsx.
Opening the link takes you to a Reset Password page in your phone's web browser (not inside the mobile app itself):
- Enter a new password and confirm password. Your new password must be at least 12 characters, with at least one uppercase letter, one lowercase letter, one number, and one special character.
- Tap Save.
- You're signed out of that browser session and taken to the web sign-in page with a Password changed successfully! confirmation.
- Return to the Appello mobile app and sign in with your new password on the Email tab.
If you signed in with an Employee PIN and forgot it, there is no self-service reset -- contact your administrator.
Signing out
- Tap your profile icon in the top-right corner to open the account menu.
- Scroll to the bottom and tap Sign Out.
- If you have unsynced work (for example, timesheets or notes saved while offline), you'll see a warning with a count of pending items. Confirm to sign out anyway, or cancel to sync first.
Signing out does not forget your company or clear your biometric enrollment -- the next time you open the app, you'll land back on the sign-in screen for the same company, and your Face ID / Touch ID / fingerprint button (if enabled) will still be there.
Troubleshooting
| Problem | What to do |
|---|---|
| Wrong company / "Company not found" | Re-check the identifier for typos -- it's not case-sensitive. Confirm the correct identifier with your administrator. |
| Account locked | After 5 failed sign-in attempts your account is locked for 5 minutes; after 10 failed attempts, 30 minutes; after 15 or more, 1 hour. You'll see: "Account temporarily locked due to excessive failed login attempts. Please try again later." Wait out the lockout window and try again, or contact your administrator to reset your password sooner. |
| Forgot your Employee PIN | There's no self-service PIN reset or PIN change in the app. Tap Forgot your PIN? on the Employee PIN tab for a reminder, then contact your administrator -- only they can reset it. |
| Biometric option not offered | The Sign in with Face ID / Touch ID / Fingerprint button only appears if (1) your device has a fingerprint or face scan enrolled at the device level, and (2) you've turned on Unlock with Face ID/Touch ID in Account -> Security after signing in at least once. If your device only supports a weaker face-unlock method (common on some budget Android phones), the app may not offer biometric unlock at all -- sign in with email/password or PIN instead. |
Related pages
- Account -> Security -- where biometric unlock is turned on or off
- Account -> Change Password -- for changing a known password while signed in
- My Forms on Mobile -- filling out and submitting forms once you're signed in
- Resources, Files and Job Info on Mobile -- resource acknowledgements and other job-info workflows
- Mobile App Overview -- the Profile tab and other post-login navigation