Equipment List
Central inventory of tools, vehicles, and assets available to schedule and assign to jobs. Track equipment status, location, maintenance history, rates, and inspection records from one record per item.
Where it is
Click path: Sidebar → Equipment → Equipment Management
URL: /equipment
Gated by the equipment.view permission (Equipment in Roles & Permissions). Individual tabs on the equipment detail page carry their own additional gates -- see Equipment detail page below.
Overview
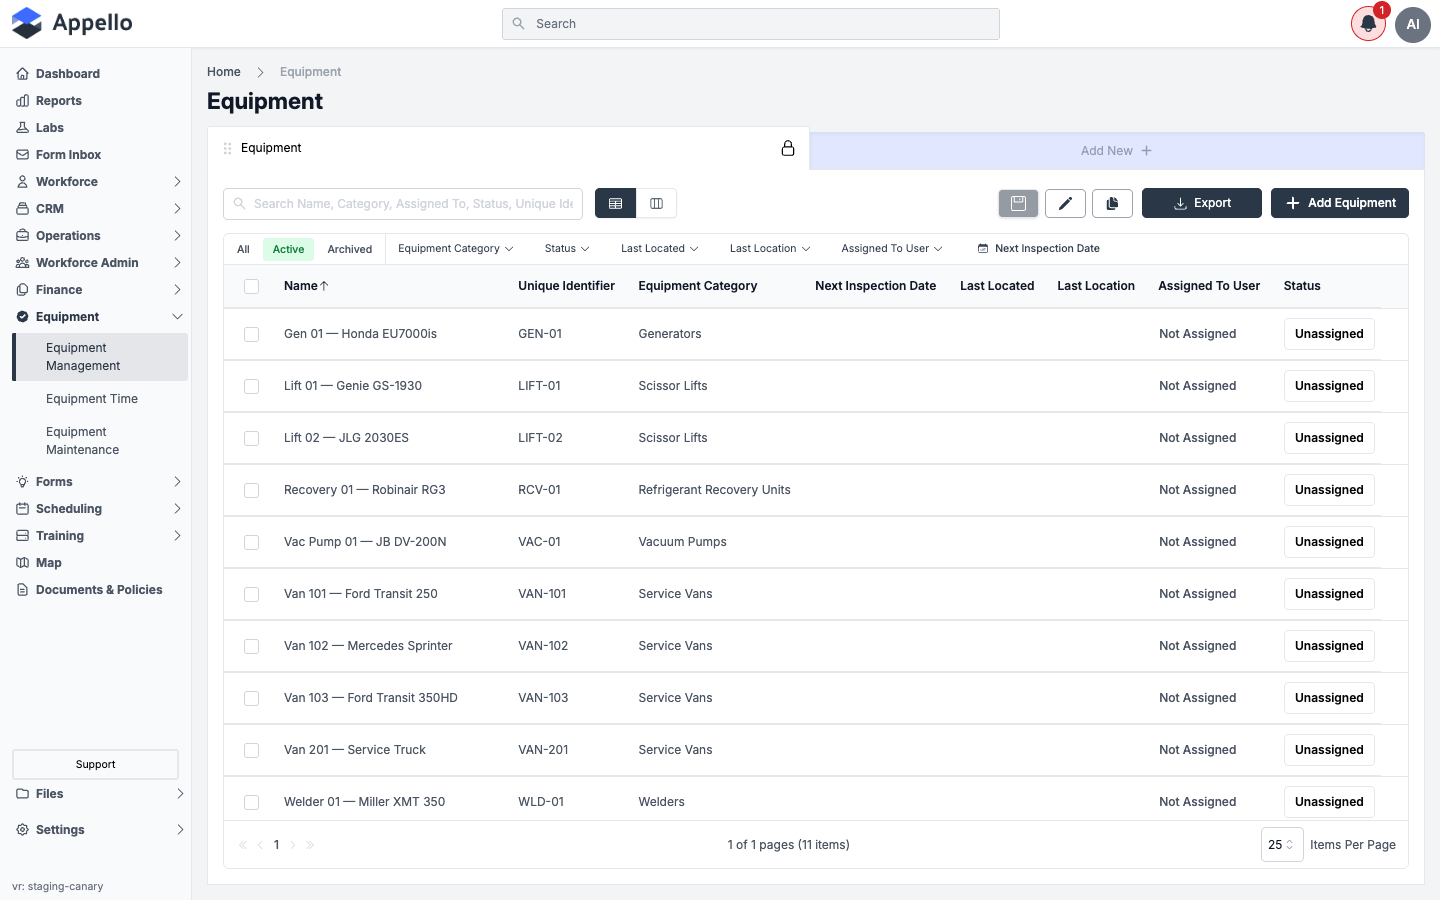
The Equipment page lists every registered equipment record. Each row shows the equipment's name, unique identifier, category, next inspection date, last-known location, assigned user, and status. Click a row to open that equipment's detail page.
List columns
| Column | Description |
|---|---|
| Name | Equipment name (e.g. "Gen 01 — Honda EU7000is"). Sortable; sorted ascending by default. |
| Unique Identifier | The equipment's cuid -- a short code such as GEN-01, either auto-generated per category or entered by hand. |
| Equipment Category | The equipment type (Generators, Scissor Lifts, Service Vans, etc.). |
| Next Inspection Date | Calculated from the category's inspection frequency once a last-inspection date is recorded -- see Equipment Maintenance. |
| Last Located | Timestamp of the most recent location ping recorded against this equipment. |
| Last Location | The most recent recorded location. |
| Assigned To User | The user currently checked out to this equipment, if any; click the value to reopen that check-out/check-in panel. |
| Status | The equipment's current status, shown as a button. Click it to change the status inline -- see Equipment status change below. |
On the demo instance used for these screenshots every piece of equipment shows a status of Unassigned -- this is the seed data's only configured status value, not a fixed default. Status values are configured per instance as property values; check Settings for your instance's actual status list.
Filters and search
| Control | Description |
|---|---|
| All / Active / Archived | Toggle between active equipment, archived equipment, or both. |
| Equipment Category | Multi-select by category, searchable. |
| Status | Multi-select by status. |
| Last Located | Date-range filter on when the equipment last reported a location. |
| Last Location | Filter equipment that has a recorded last-known location. |
| Assigned To User | Multi-select by the user currently checked out to the equipment. |
| Next Inspection Date | Date-range filter, with quick-select ranges. |
| Search | Free-text box. Placeholder reads "Search Name, Category, Assigned To, Status, Unique Identifier" -- matches the equipment's name, category, current assigned-to user, status, and cuid. |
| Table / Board view toggle | Switches the list between the default table and a Kanban board grouped by status -- see Equipment status change. |
| Export | Exports the current filtered list to CSV. |
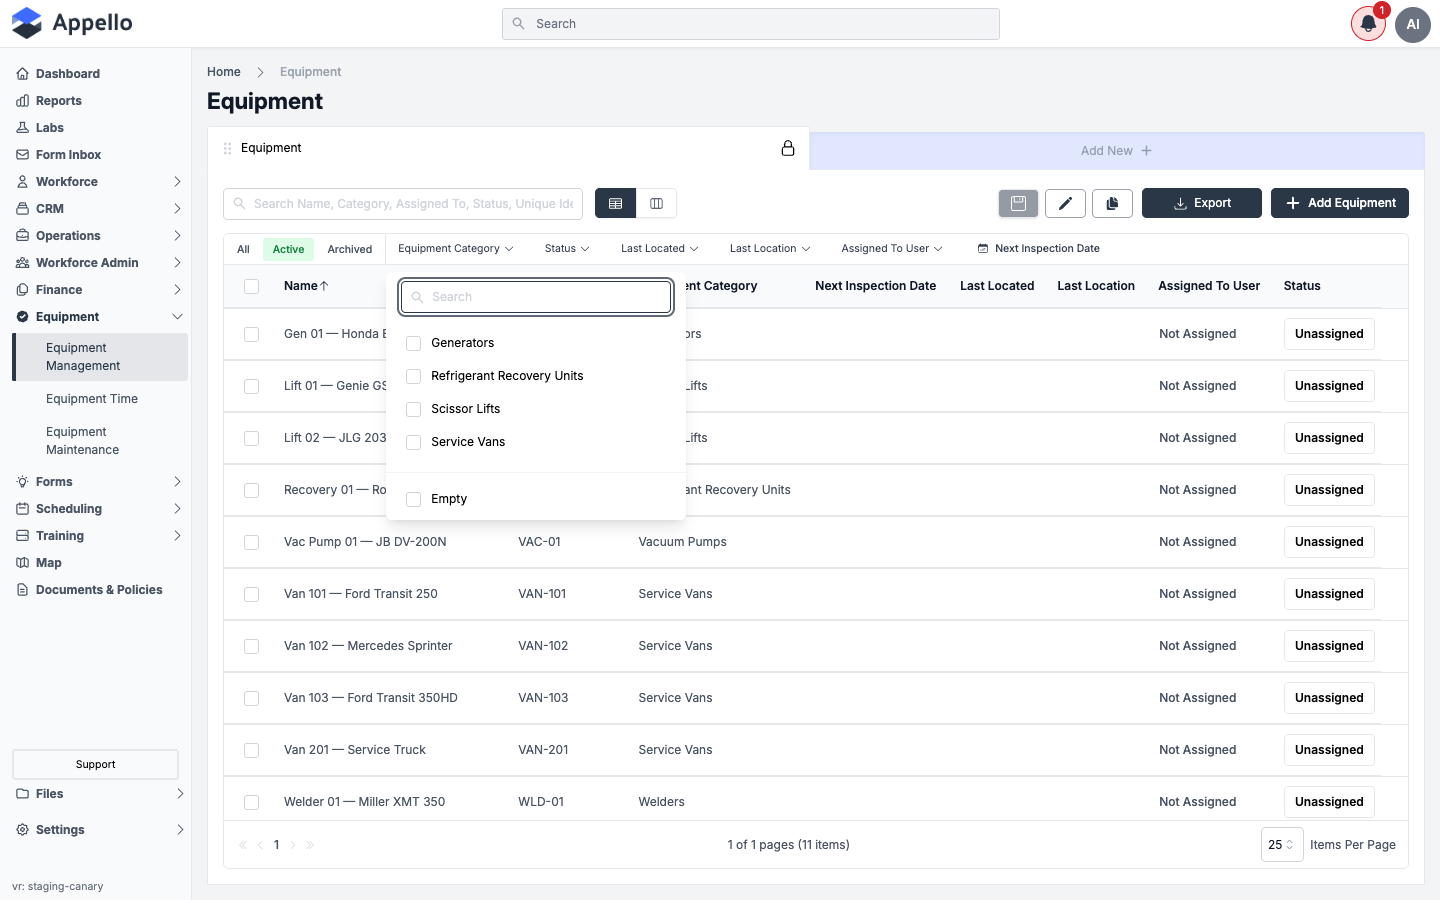
Manufacturer, make/model, and other custom equipment attributes are not part of the quick search -- they're visible on the individual equipment record but are not indexed by the search box or available as a dedicated filter on the demo instance used for these screenshots.
Adding equipment
Click + Add Equipment in the top-right corner of the list to open the Add Equipment panel.
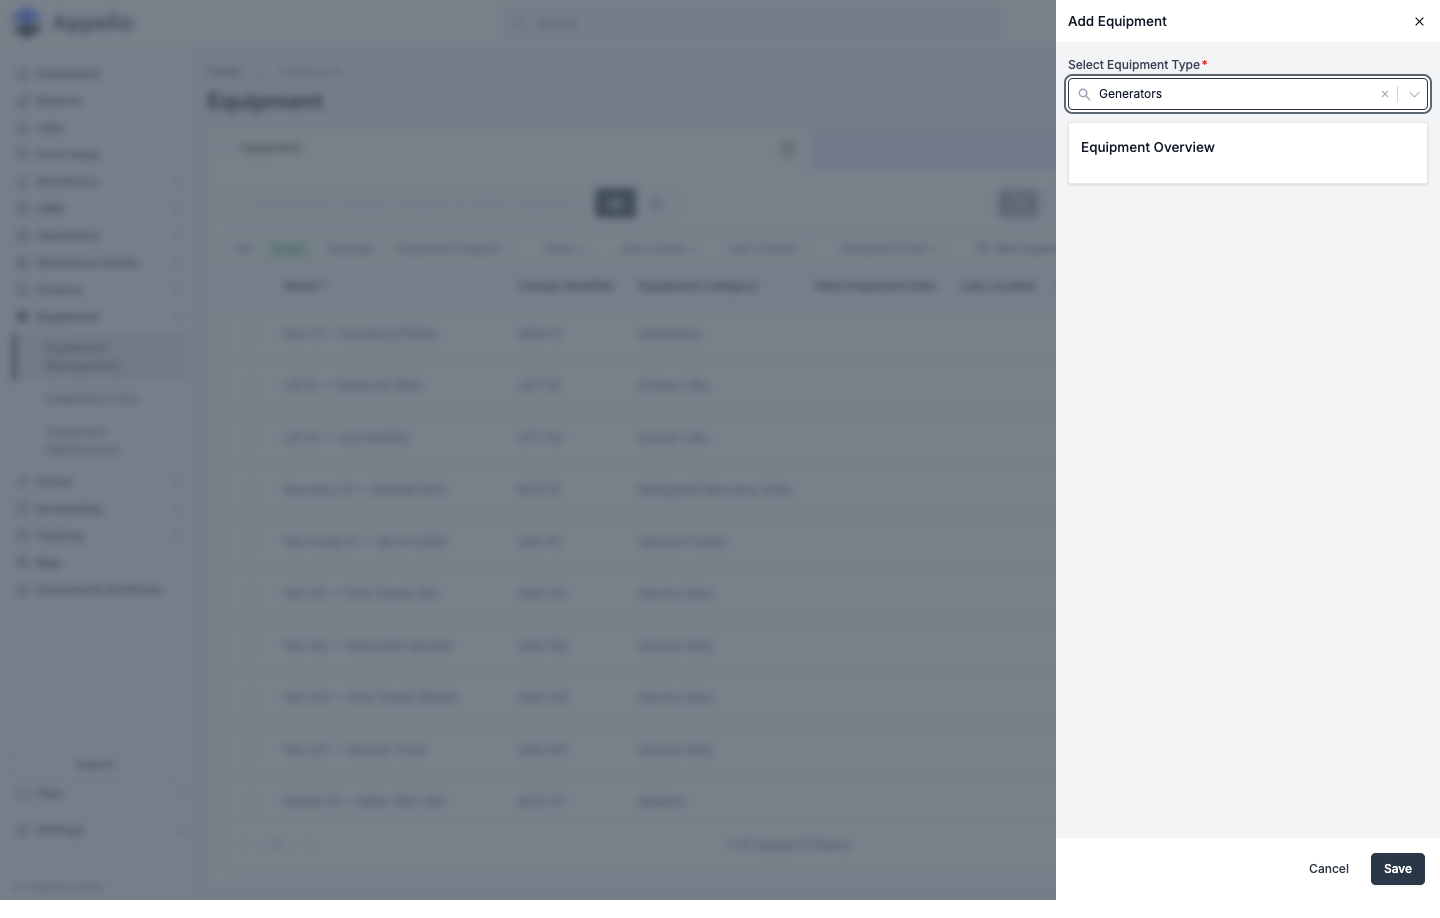
- Select an Equipment Type (the equipment's category). This is the only field shown until a type is chosen.
- Once a type is selected, Appello fetches that category's configured field layout and renders the rest of the form inside an Equipment Overview card. Fill in the fields that apply.
- Click Save, or Cancel to discard.
The panel used to add or edit equipment exposes these fields. Which of them actually appear depends on how the selected category's field layout is configured -- on the demo instance used above, the Generators category's layout renders no fields beyond the type selector, so the fields below are confirmed from source rather than from a populated screenshot:
| Field | Required | Type | Effect |
|---|---|---|---|
| Select Equipment Type | Yes | Combobox (Equipment Category) | Determines which of the fields below render, and drives auto-generated Unique Identifiers. |
| Equipment Name | Yes | Text | The equipment's display name. |
| Unique Identifier (cuid) | No | Text | Leave blank to auto-generate from the category; on edit, must stay unique. |
| Status | Yes | Combobox (property value) | Sets the equipment's current status. |
| Description | No | Rich text (WYSIWYG) | Free-text notes. |
| Purchase Date | No | Date | When the equipment was bought. Defaults to today. |
| In Service Date | No | Date | When the equipment entered active use. Defaults to today. |
| Out Of Service Date | No (toggle to reveal) | Toggle + Date | Toggle on to set a date the equipment stopped being used. |
| Expiry Date | No (toggle to reveal) | Toggle + Date | Toggle on to set an expiry date for the equipment. |
| Last Inspection Date | Yes, only when the category requires inspection | Date | Only rendered when the category has Requires Inspection enabled; recalculates Next Inspection Date. |
| Next Inspection Date | Yes, only when the category requires inspection | Date | Auto-calculated from Last Inspection Date plus the category's inspection frequency; editable. |
| Customer | No | Combobox (Company) | Links the equipment to a customer/company record. |
Every equipment category can also define its own custom attributes (list, image/document, boolean, time, year, numeric, email, currency, URL, or text fields) in addition to the defaults above -- these render as extra fields in the same Equipment Overview card, per category.
Bulk actions
Select one or more rows with the row checkboxes to reveal the bulk action bar:
| Action | Effect |
|---|---|
| Archive | Archives the selected equipment (moves it out of the Active filter). |
| Delete | Permanently deletes the selected equipment. Appello first reports a count of related records that would also be affected. |
| Restore | Un-archives previously archived equipment (available from the Archived filter). |
Confirmed from source rather than a live screenshot: the canary crawl for this page is read-only and does not select rows or trigger archive/delete/restore.
Equipment detail page
Click path: Click any row on the Equipment list, or a linked equipment name elsewhere in the app.
URL: /equipment/[id]?tab=<tab-param>
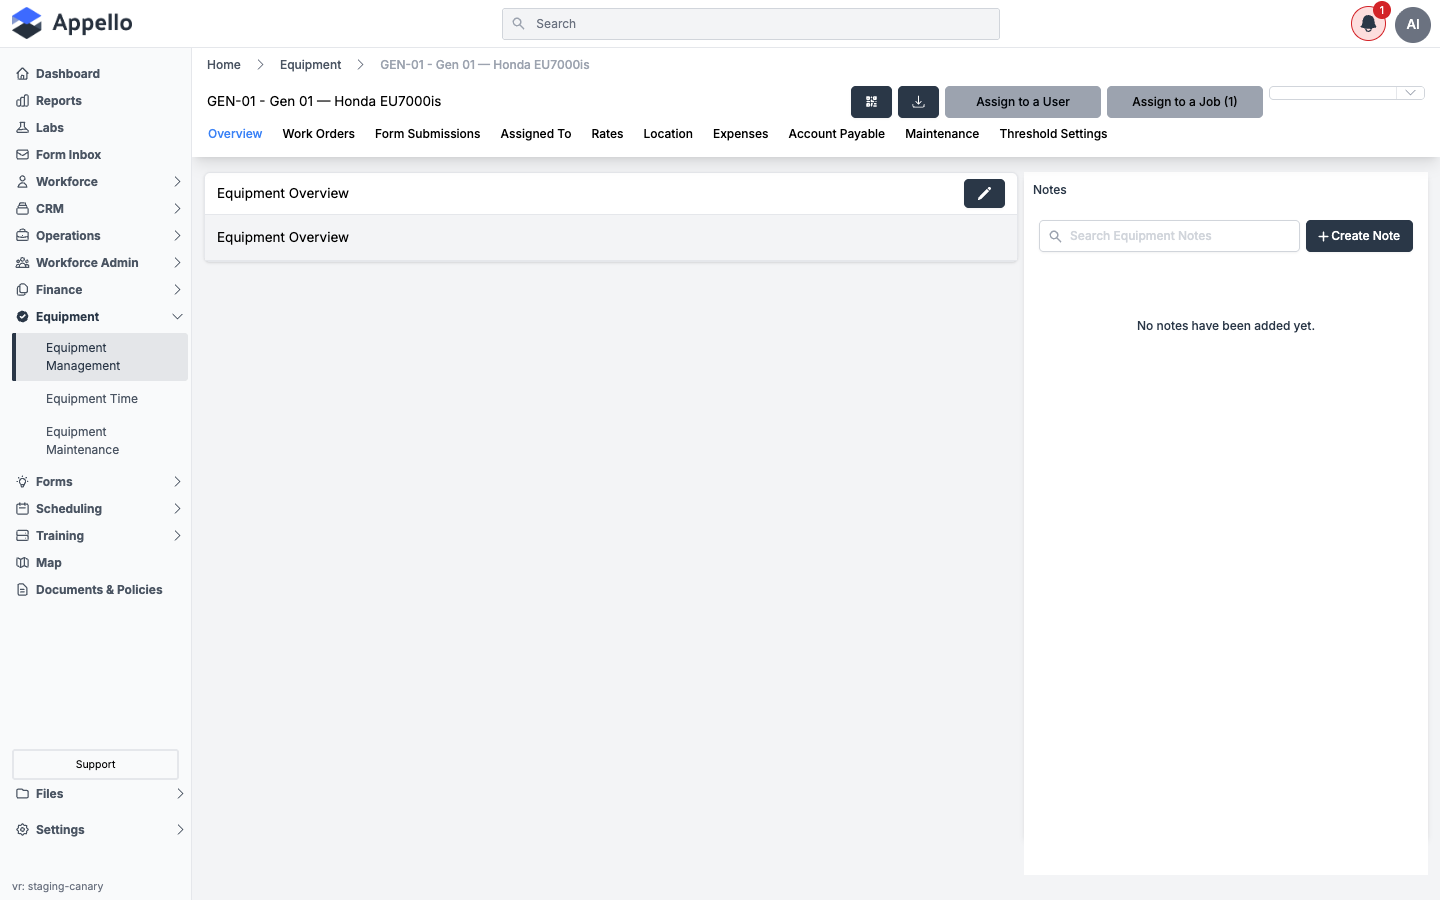
Every tab shares the same header: breadcrumbs, a QR-code export button, a down-arrow Download button (see Download a PDF of the equipment record below), the Assign to a User / Assign to a Job (N) buttons (see Assigned To below), and a status dropdown (see Equipment status change). Tabs appear in this order, each gated by its own permission:
| Tab | URL tab= param | Gate | Contents |
|---|---|---|---|
| Overview | overview | equipment.view | Standard and custom fields, and the equipment's notes feed. |
| Work Orders | work-orders | job.view | Work orders this equipment is/was serviced on. |
| Form Submissions | form-submissions | equipment.view | Safety/inspection form submissions filed against this equipment. |
| Assigned To | assigned-to | equipment.assign | Check-out/check-in and the full assignment history. |
| Rates | rates | equipmentrate.view | The equipment's billing rates by period. |
| Location | location | equipment.view | Location history (GPS pings, check-ins/check-outs). |
| Expenses | expenses | expense.view | Employee expenses logged against this equipment. |
| Account Payable | account-payable | expense.view | Vendor invoices logged against this equipment. |
| Maintenance | maintenance | MaintenanceSchedule.view | See Equipment Maintenance. |
| Threshold Settings | threshold-settings | MaintenanceThreshold.view | See Equipment Maintenance. |
Download a PDF of the equipment record
Two icon-only buttons sit side by side at the left of the header's action area:
- QR code (the grid icon) -- immediately downloads a PDF of this equipment's QR code label,
named
<Equipment ID> - <Name>.pdf. No template is involved. - Download (the down-arrow icon) -- opens the Select Template For Export picker and produces a one-record PDF of this equipment built from a Download Template. This is a different thing from the CSV Export on the Equipment list, which uses a fixed column set.
Equipment templates are set up per Equipment Category under Settings → Download Templates → Equipment (see Templates → Download Templates), so the picker only lists templates created for this record's own category.
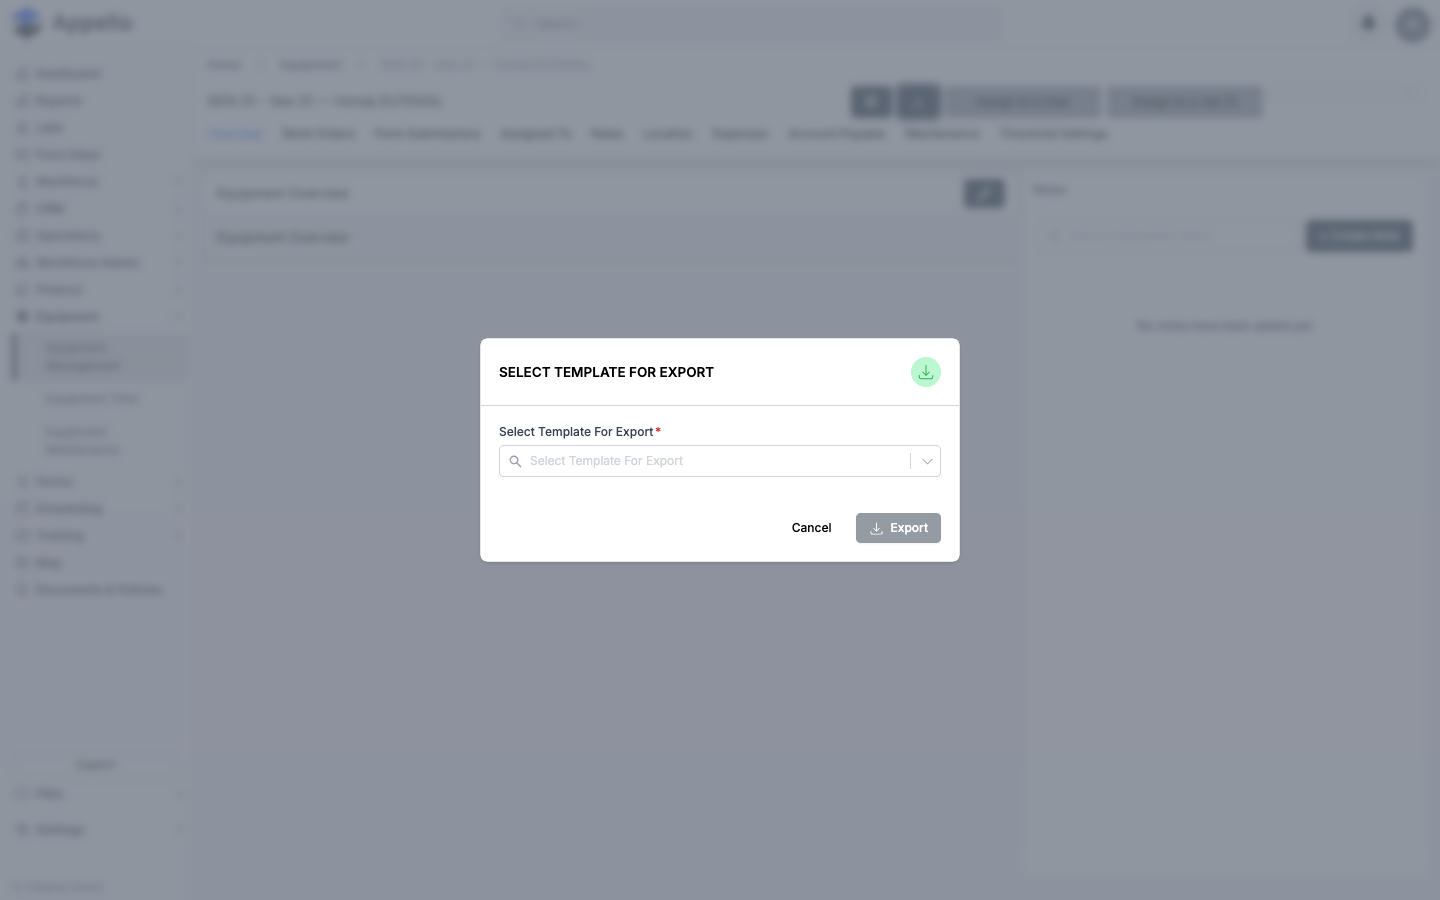
- Click the Download icon in the header.
- In the Select Template For Export picker, choose a template. Export stays disabled until one is chosen. An empty dropdown means no template exists yet for this equipment's category.
- Click Export. The PDF is generated from the fields that template has toggled on (plus a map
image of the equipment's last known location when it has coordinates) and downloads as
<Company Name>_Equipment Details_<date>_<time>.pdf. Cancel closes the picker without generating anything.
There is no separate permission for either button beyond equipment.view for the page itself.
Confirmed from source (pages/equipment/[id]/index.tsx passes the record's equipmentCategoryId
to components/ConfirmTemplate/TemplateSelectionModal.tsx, which then queries
equipmentDownloadTemplates instead of objectDownloadTemplates; the equipmentDetail and
equipment-qr-code cases in pages/api/pdf-export.ts build the two documents) and on the canary
demo instance on 2026-09-08; the picker was opened and dismissed without clicking Export. The
shared behavior of this picker is documented in
Exports, Imports and Bulk Actions → Downloading a record with a download template.
Overview
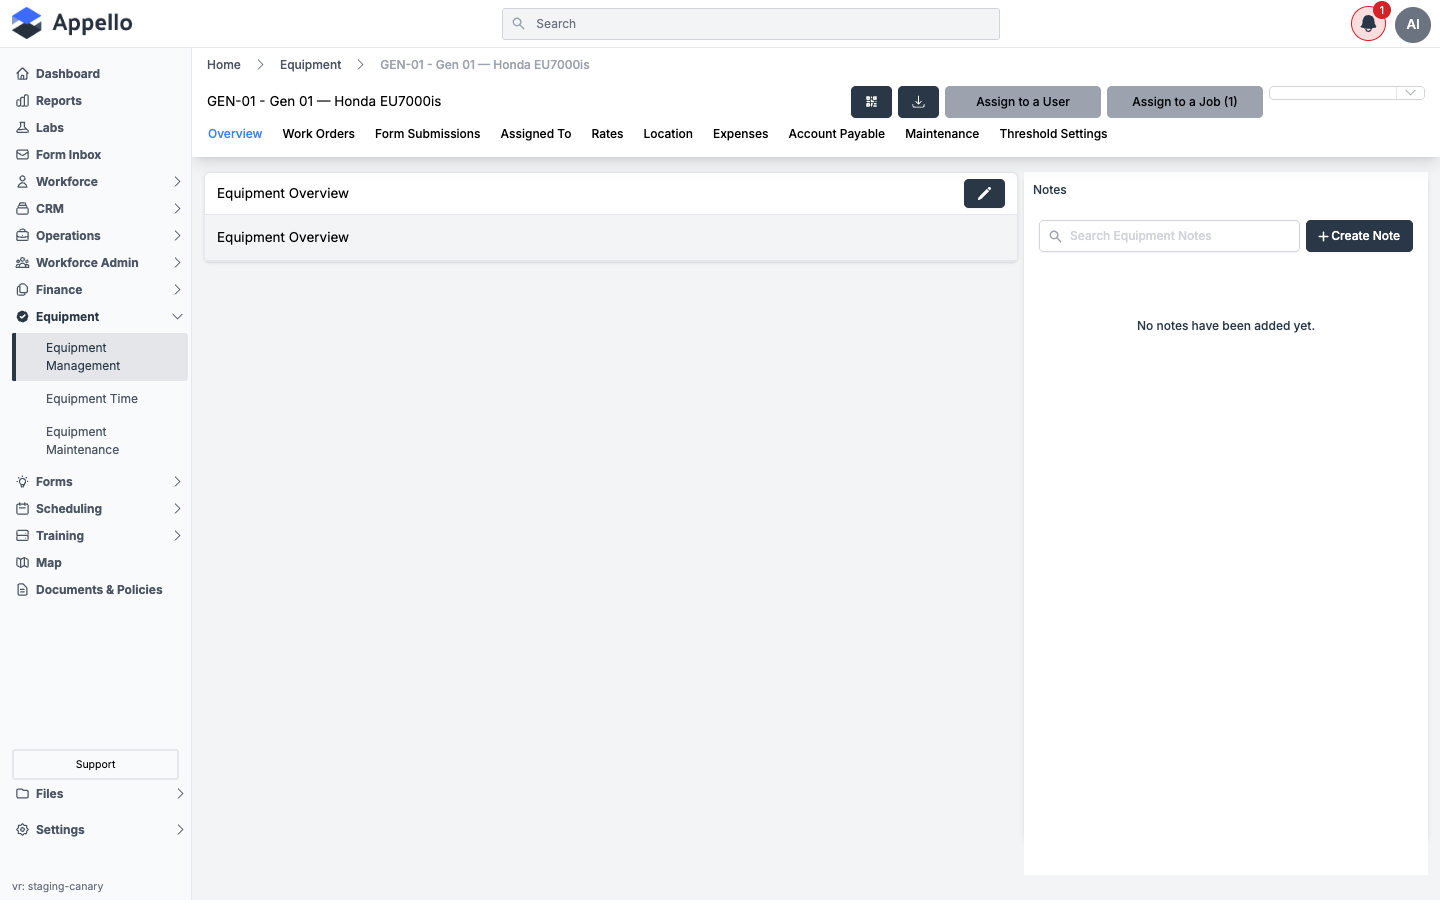
The Overview tab shows the same fields as the Add Equipment form, rendered read-only, plus a Notes panel (search notes, + Create Note). Click the pencil icon on the Equipment Overview card to reopen the Add/Edit form and change any field, including Status.
On this demo instance the equipment's category has no field layout configured beyond the card header, so the Overview tab above shows no populated fields -- consistent with the empty Add Equipment form on the same instance.
Work Orders
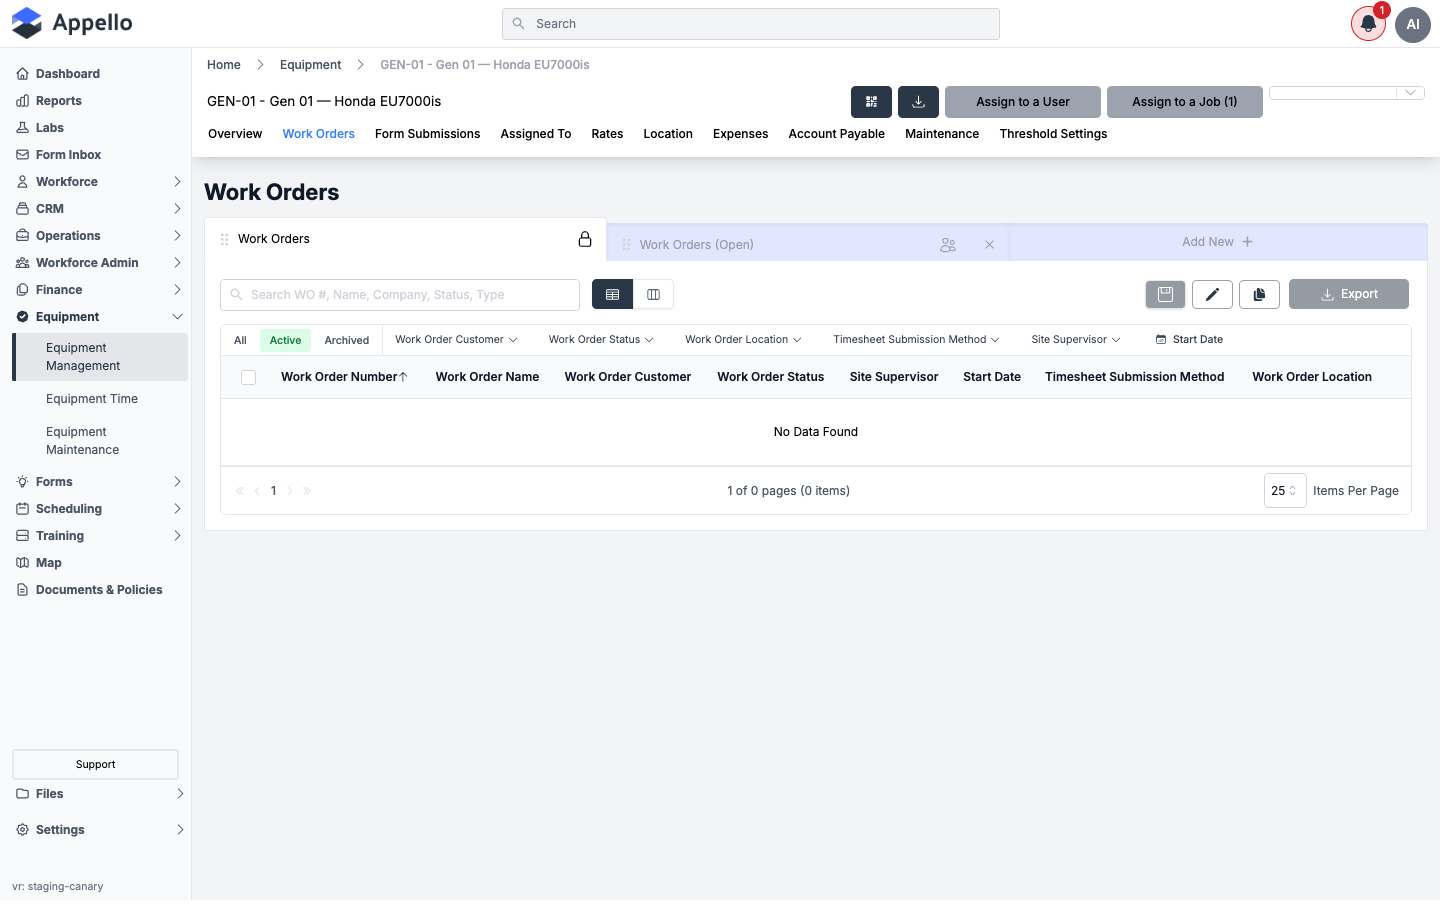
A filtered work-order list (search placeholder "Search WO #, Name, Company, Status, Type") scoped to work orders this equipment has been serviced on. This is the same list view used on the main Work Orders page, minus the create button.
Form Submissions
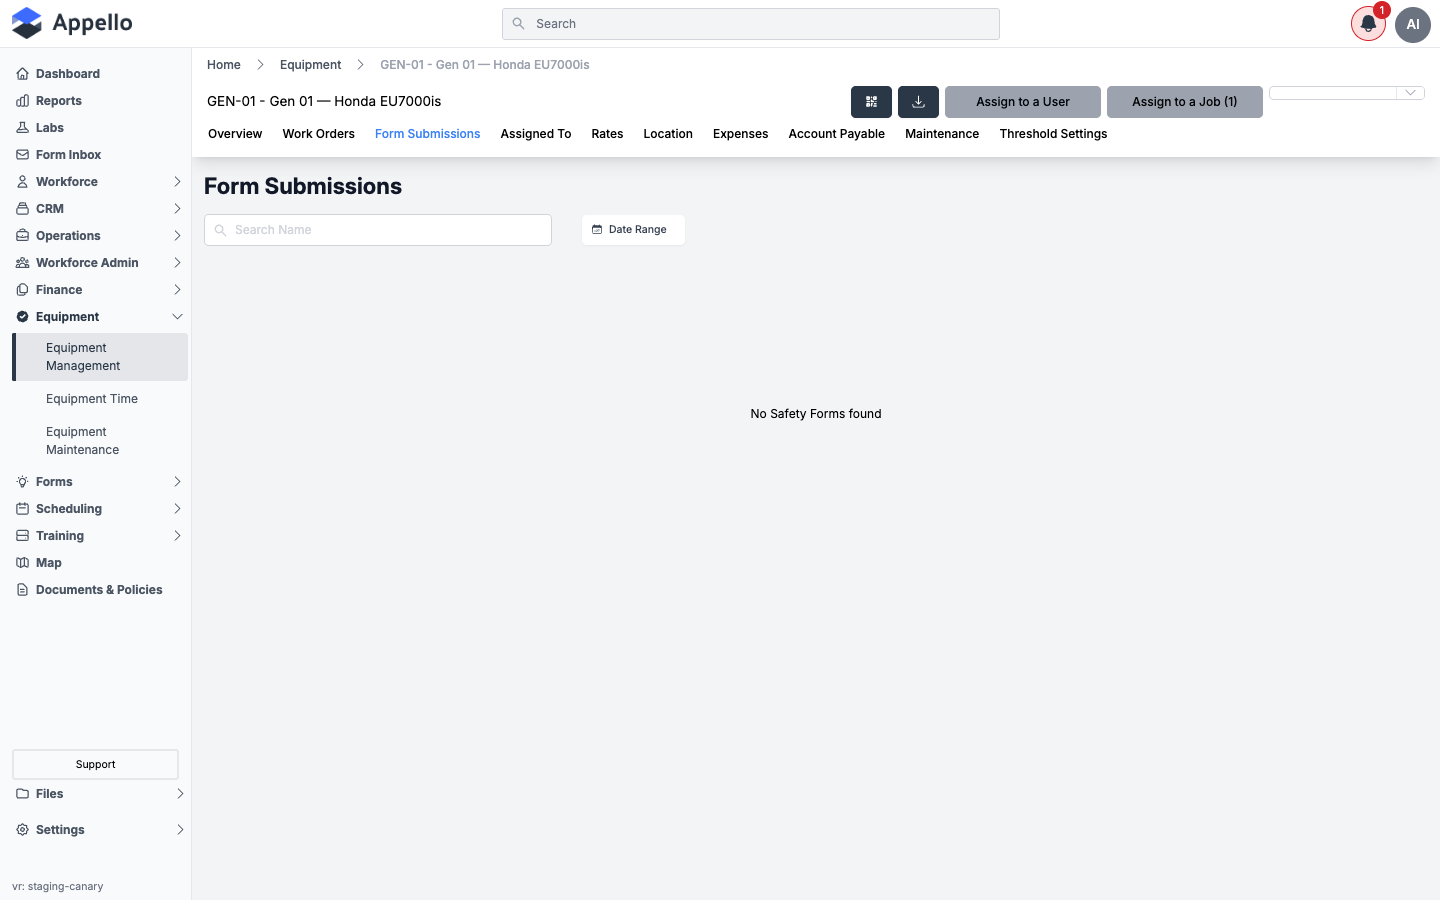
Lists safety/inspection form submissions filed against this piece of equipment, with Search Name and Date Range controls. See Equipment Inspection Forms for how forms get attached to equipment in the first place.
Assigned To
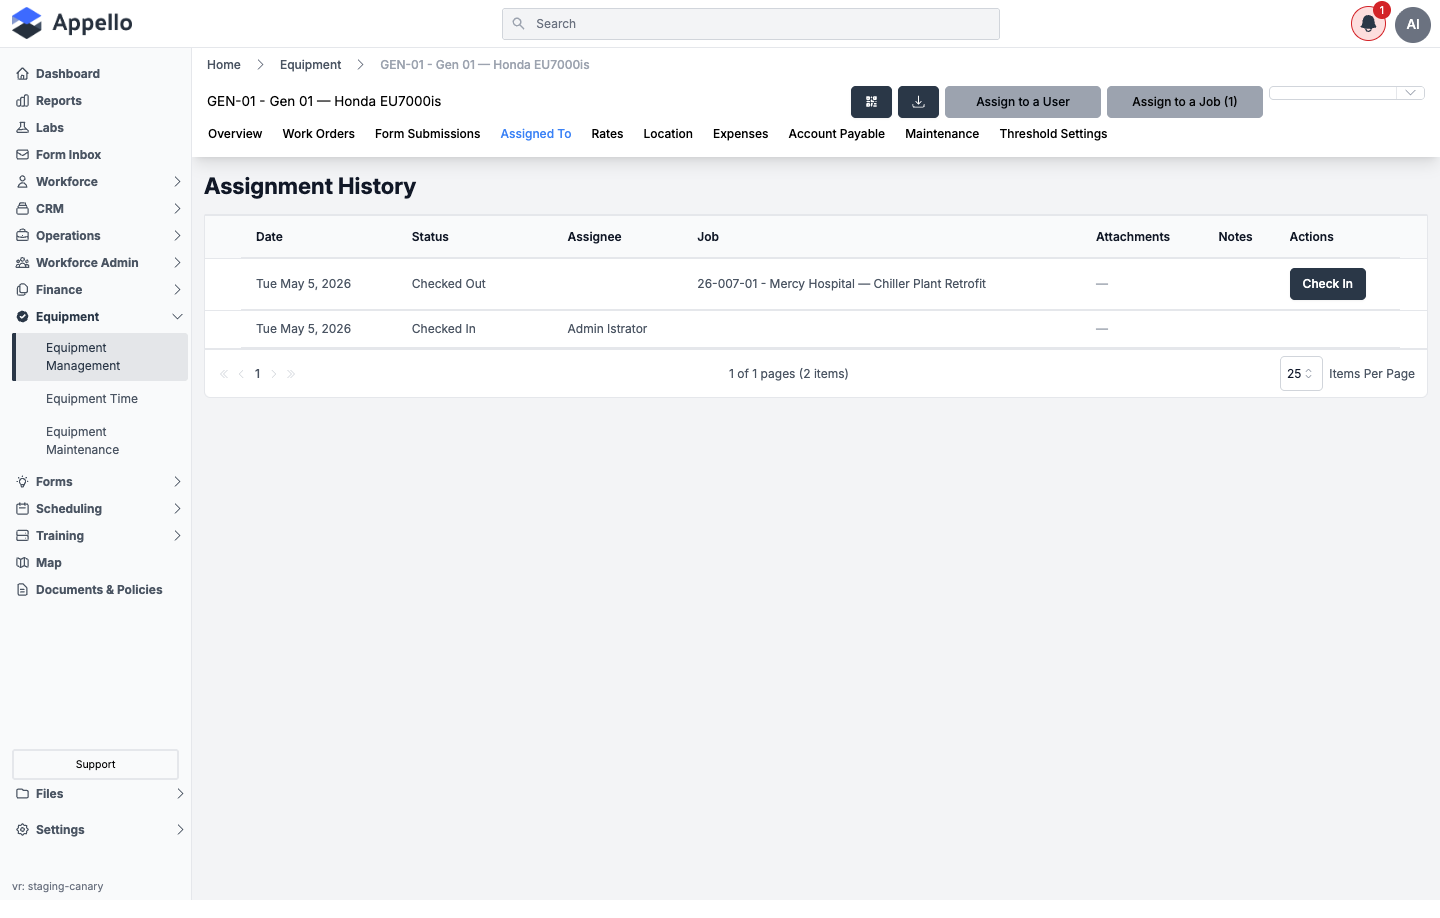
Every piece of equipment can be checked out to a user, a job, or both at once, and each equipment record keeps a running history of every checkout and check-in.
Checking out from the equipment record
Two buttons in the header (present on every tab) drive checkout:
- Assign to a User -- opens the Check Out Equipment panel set to search users.
- Assign to a Job (N) -- opens the same panel set to search jobs instead. The number in parentheses is how many active job assignments this equipment currently has.
Either button opens the same Check Out Equipment panel:
| Field | Required | Description |
|---|---|---|
| Checked Out To | Yes | The user or job receiving the equipment, depending on which button you clicked. |
| Date Checked Out | Yes | Defaults to today. |
| Billing Period (Per) | No | Hour, Day, Week, Month, or Year -- how this checkout is billed. Applied to every equipment time entry logged against it. |
| Operator Included (wet hire) | No | Toggle on if an operator comes with the equipment. |
| Full Day Billing | No | Toggle on to bill a full day regardless of hours logged. |
| Attachments | No | Other equipment (breakers, buckets, GPS masts, etc.) riding along with this checkout. Auto-populates as sub-line rows on equipment time entries. |
| Check Out Note | No | Free-text note, up to 500 characters. |
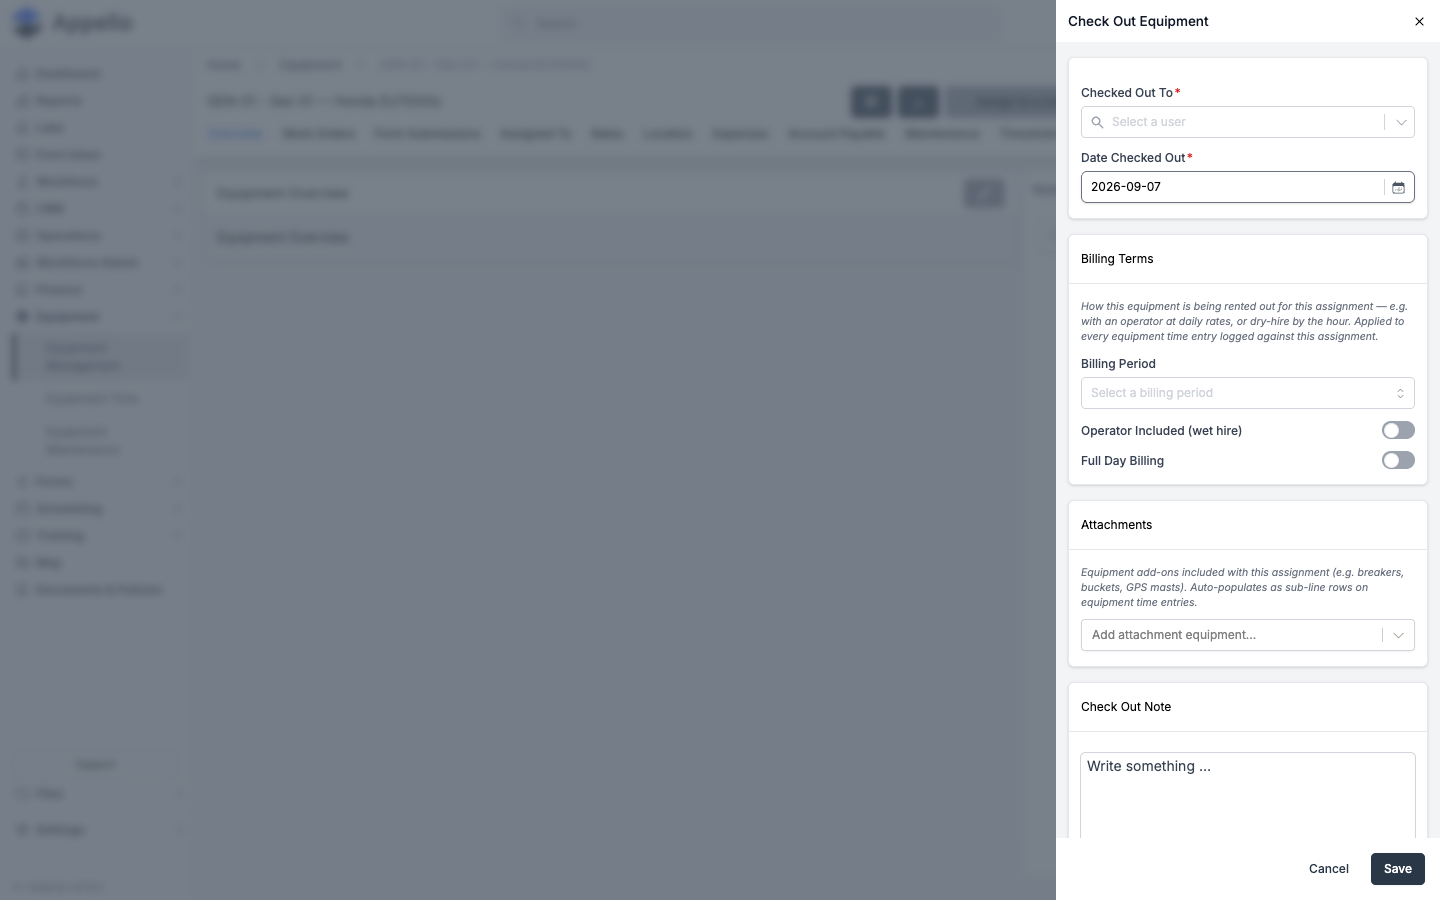
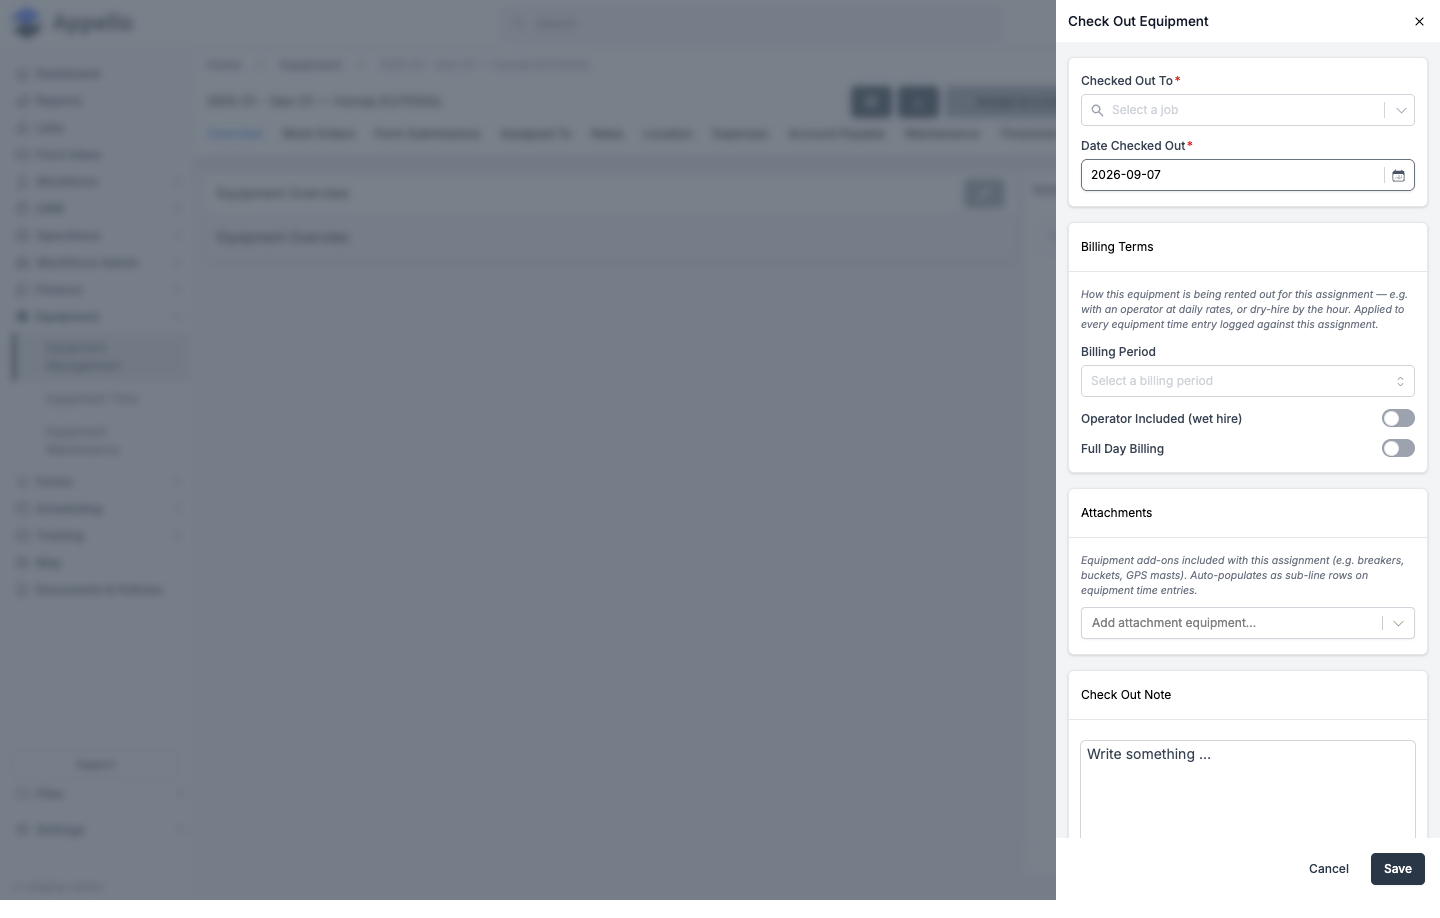
Click Save. The Assign to a User button now shows the assigned user's name (or Assign to a Job (N)'s count goes up by one), and the equipment list's Assigned To User column updates.
To check out several pieces of equipment to one job in a single panel, use Assign Equipment from the job's Assigned Equipment tab instead -- see Equipment on jobs below.
Checking equipment back in
- From this tab, find the open ("Checked Out") row and click Check In.
- From the main equipment list, click the Assigned To User value for a checked-out item to reopen the same panel for that assignment.
Checking in opens the same panel with a Date Checked In field and a Check In Note field in place of the checkout-specific fields.
Assignment history
The Assigned To tab's Assignment History table lists every checkout and check-in:
| Column | Description |
|---|---|
| Date | The checkout or check-in date. |
| Status | Checked Out or Checked In. |
| Assignee | The user, if this row was a user checkout -- links to the user's profile. |
| Job | The job, if this row was a job checkout -- links to the job record. |
| Attachments | Any attachment equipment carried on this assignment. |
| Notes | The checkout or check-in note. |
| Actions | A Check In button on any row that is still checked out. |
Rates
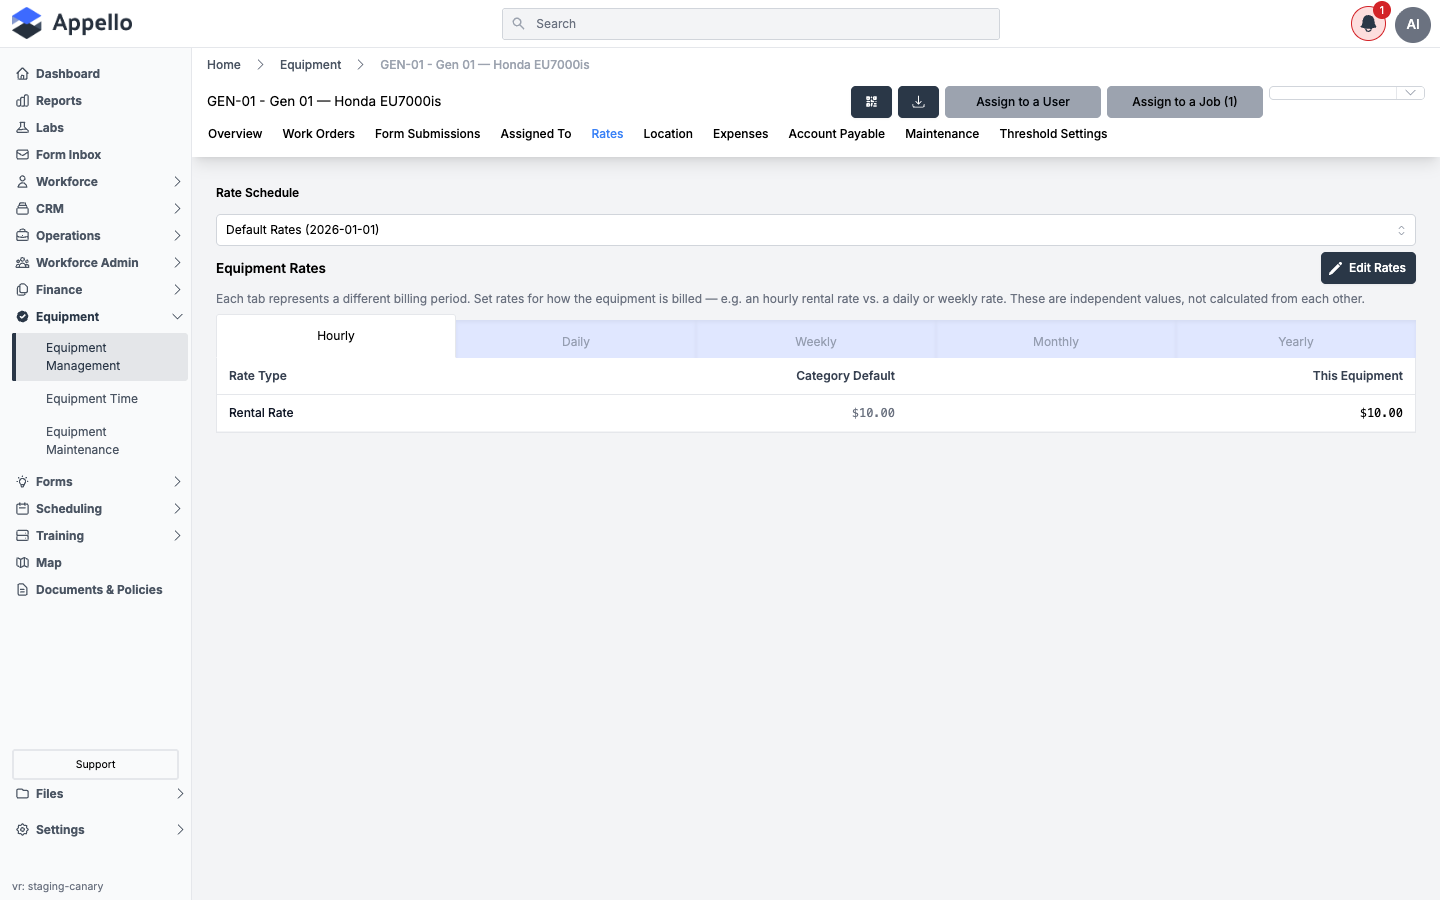
Shows the equipment's billing rates by period (Hourly, Daily, Weekly, Monthly, Yearly), each rate type showing the category-wide default alongside this equipment's own override. Click Edit Rates to set an override. Full coverage of the Rate Schedule selector, rate types, and the edit flow lives in Equipment Maintenance → Equipment Rates and Cost Tracking -- this section covers the two forms behind that page instead of duplicating it.
Rate schedule form
Rate schedules (e.g. "Default Rates (2026-01-01)") are created and edited with the EquipmentRateScheduleForm modal:
| Field | Required | Type | Effect |
|---|---|---|---|
| Schedule Name | Yes | Text | The schedule's label, shown in the Rate Schedule selector. |
| Effective Date | Yes | Date | When this schedule takes effect. Must fall strictly between the neighbouring schedules on the timeline. |
| Description | No | Text area | Optional notes about this rate schedule. |
Creating a new schedule can duplicate rate values from the currently selected schedule as a starting point. Editing a schedule's effective date can re-rate non-approved equipment time entries that fall inside the new date window -- Appello shows a confirmation listing the affected entries before committing that kind of change. Approved entries are never touched.
Rate labels (rate types)
The billing lines shown as rows on the Rates tab (e.g. "Rental Rate") are rate labels, scoped to an Equipment Category. Adding one takes a single field:
| Field | Required | Type | Effect |
|---|---|---|---|
| Name | Yes | Text | The rate type's label (e.g. "Rental Rate", "Ownership Rate"). |
Both the rate schedule form and the rate-label Name field live on the Equipment Category's
own Rates tab in Settings, not on this per-equipment Rates tab -- the per-equipment tab only lets
you override a rate value, not create schedules or rate types. This is confirmed from source
(CreateEditScheduleModal and the inline rate-label form in EquipmentCategoryRatesTab); the
crawl for these screenshots did not reach that Settings screen.
Location
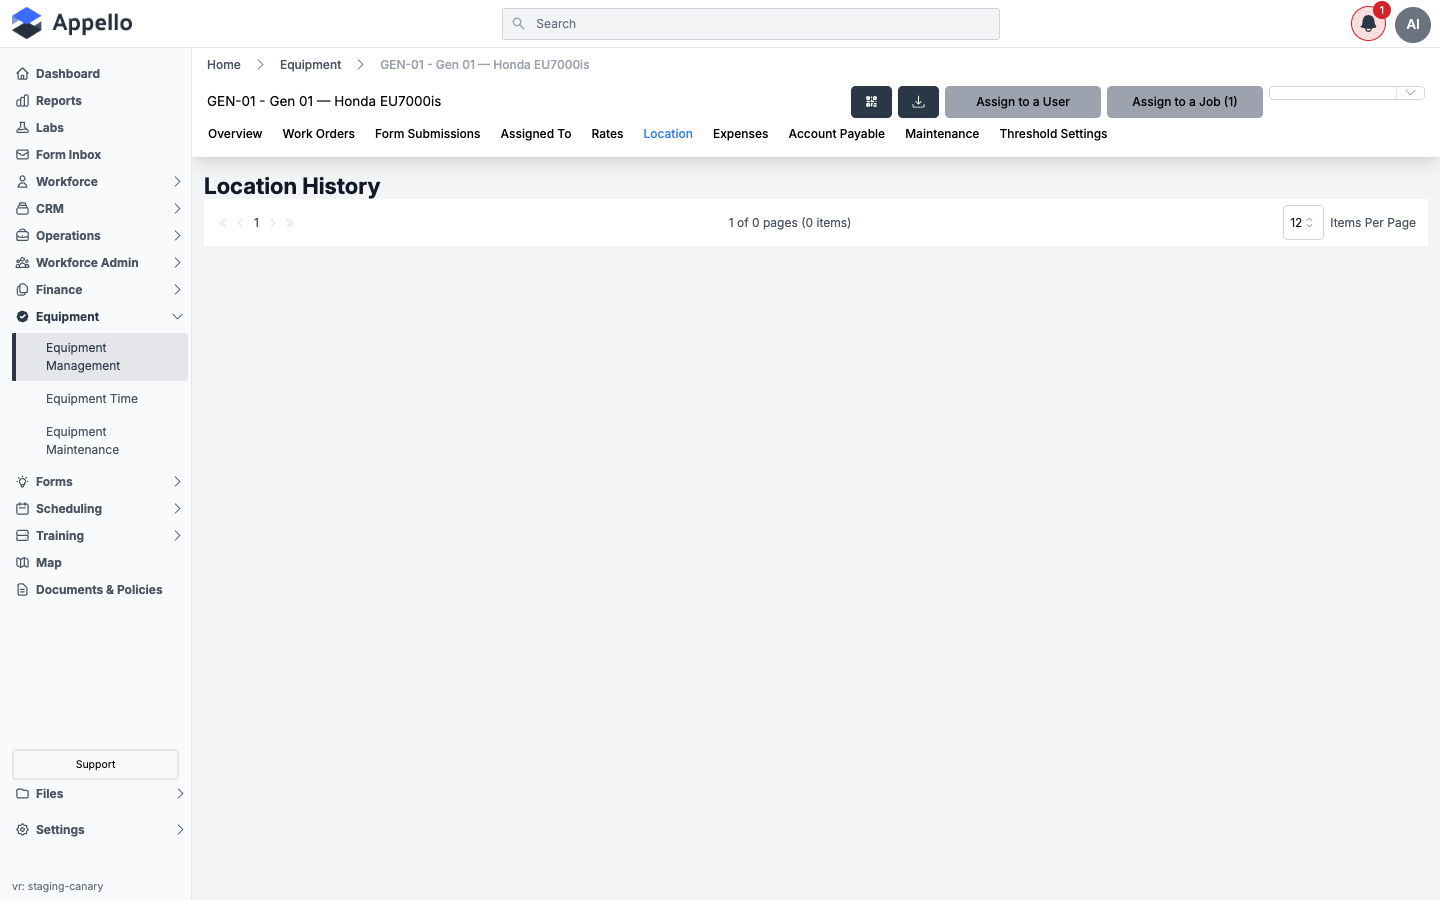
A paginated feed of location events for this equipment, newest first, each shown as a card with a static map:
| Field | Description |
|---|---|
| Date | When the location was recorded. |
| Location | Latitude/longitude, with a View on map link to Google Maps. |
| Action | "Using Equipment" (recorded from a safety-form submission) or "Checked In". |
| Related Form / Form ID | Shown for "Using Equipment" rows -- links to the safety-inspection form submission. |
| Signed By | Shown for "Using Equipment" rows -- everyone who acknowledged that submission. |
| Assigned To | Shown for "Checked In" rows -- who the equipment was checked in by/to. |
Expenses
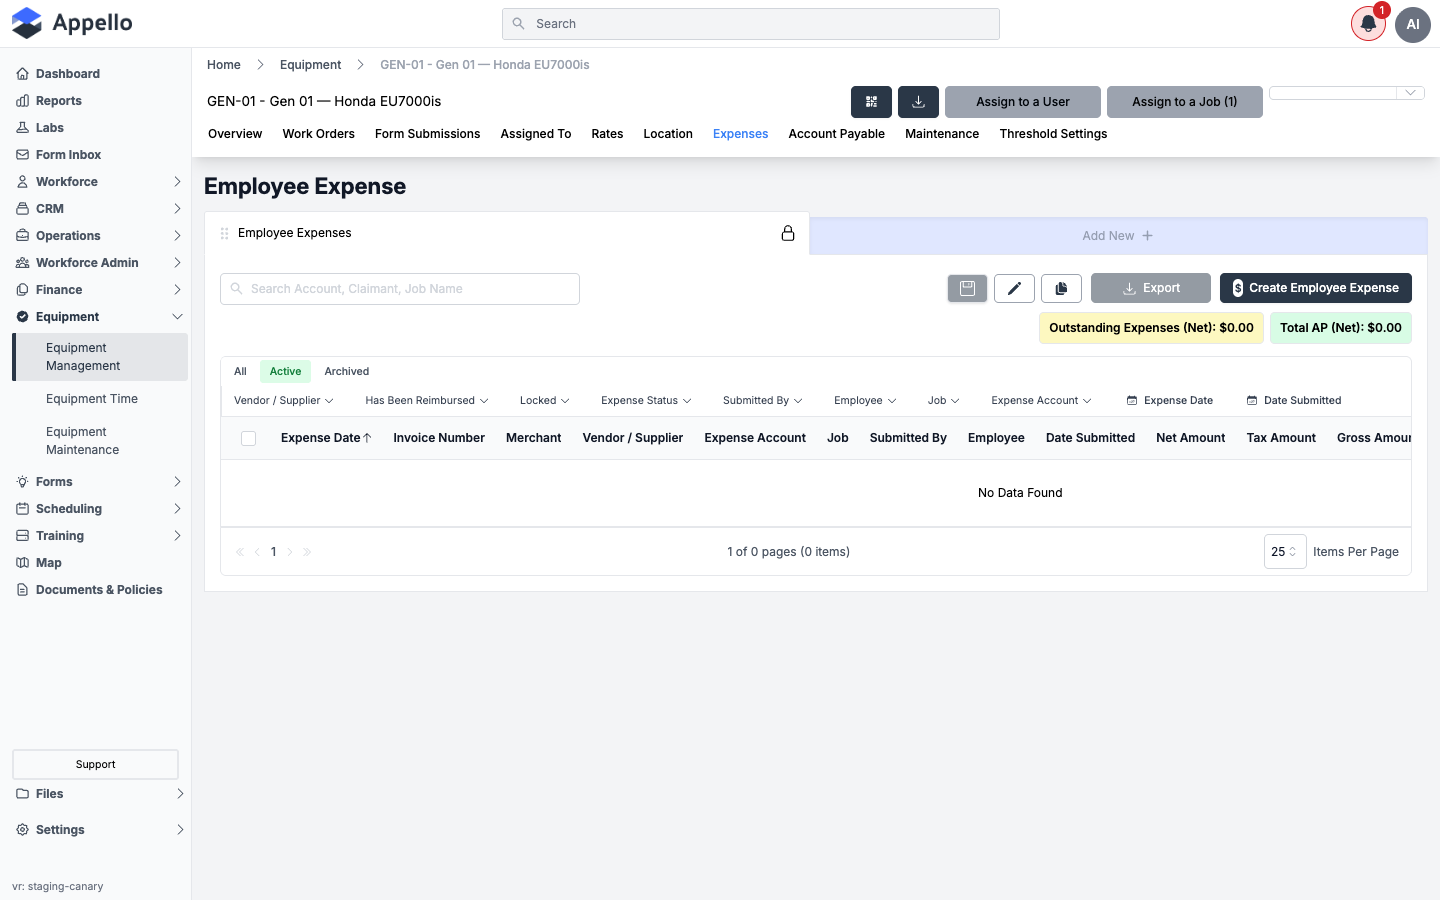
The standard Employee Expenses list view, scoped to expenses claimed against this equipment (Search Account, Claimant, Job Name, Outstanding Expenses (Net) / Total AP (Net) summary chips, + Create Employee Expense).
Account Payable
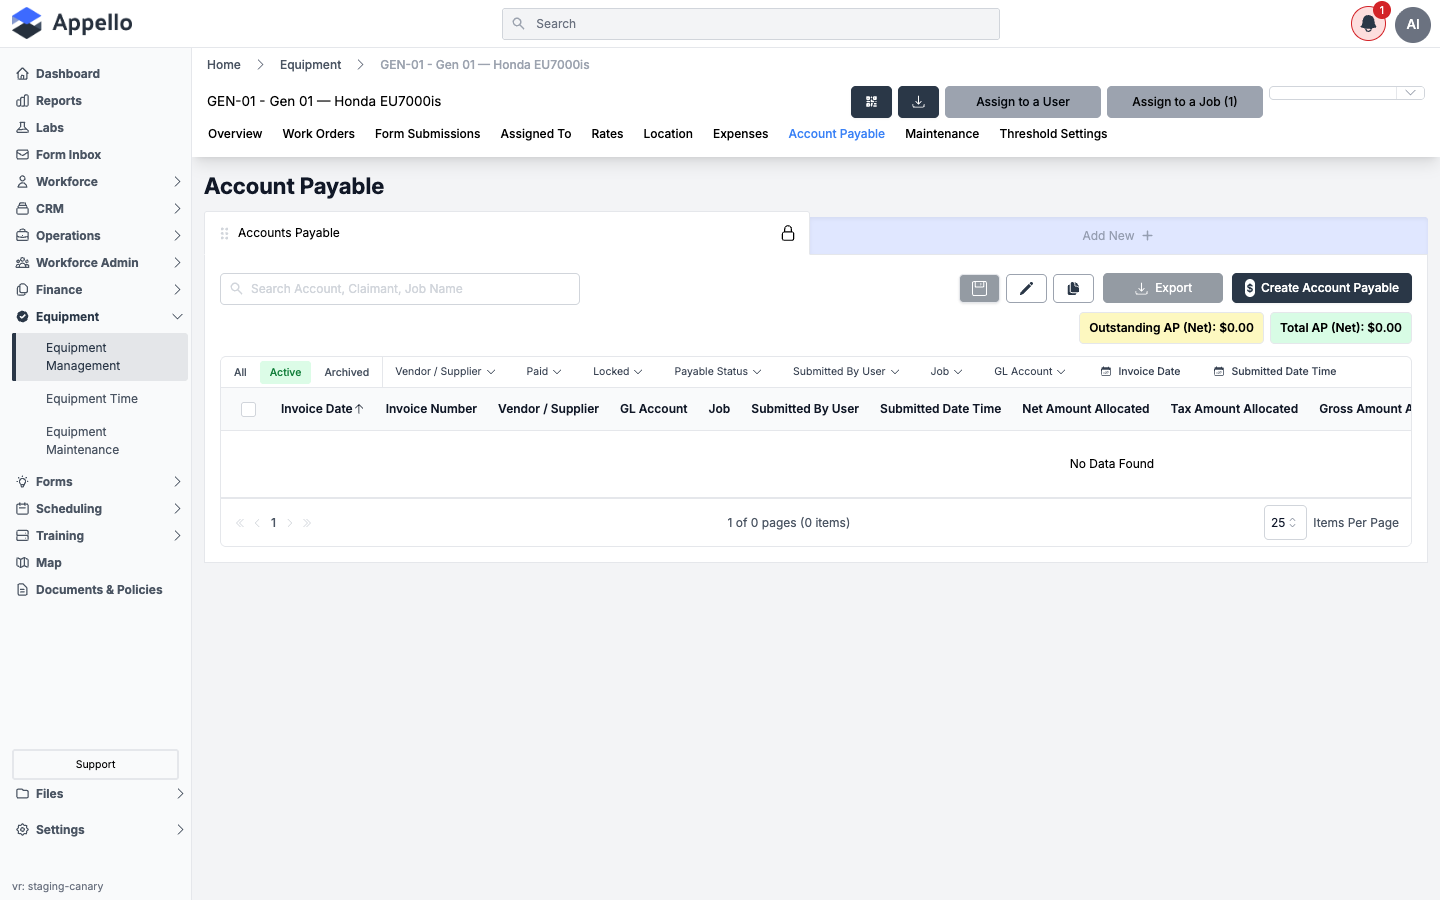
The standard Accounts Payable list view, scoped to vendor invoices logged against this equipment (Search Account, Claimant, Job Name, Outstanding AP (Net) / Total AP (Net) summary chips, + Create Account Payable).
Maintenance and Threshold Settings
Covered in full, including screenshots, on Equipment Maintenance -- see that page's Scheduling Maintenance, Maintenance thresholds, and Service History sections rather than duplicating them here.
Equipment on jobs
Where equipment shows on a job
Every job has its own Assigned Equipment tab (under the job's Operations tab group) listing every piece of equipment currently checked out to that job -- the same list view as the main Equipment page, filtered to this job.
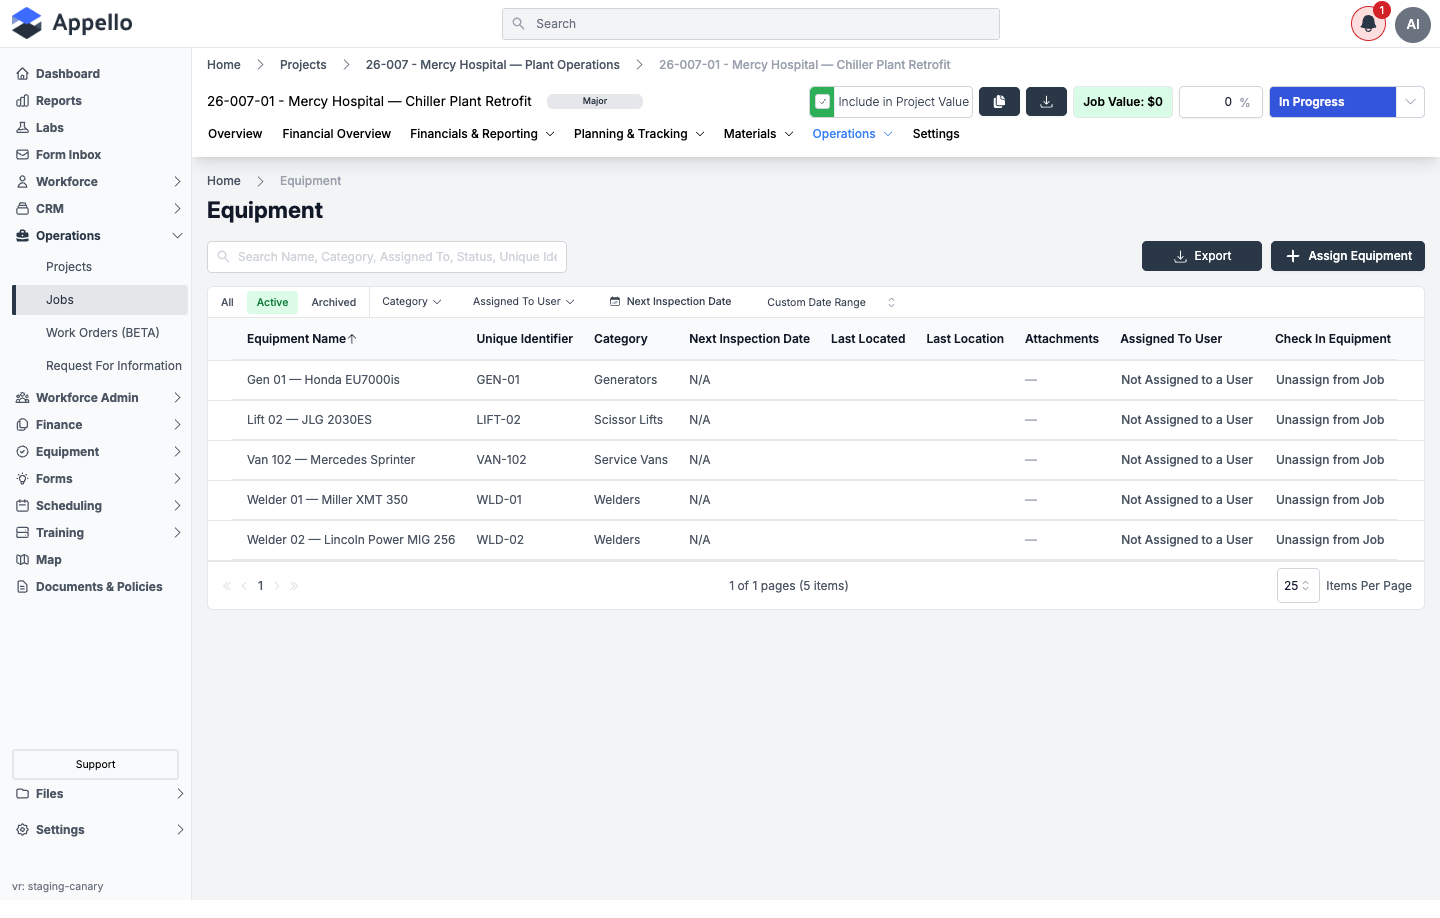
Rows carry the same columns as the main Equipment list (Equipment Name, Unique Identifier, Category, Next Inspection Date, Last Located, Last Location, Attachments), plus two job-specific columns:
| Column | Description |
|---|---|
| Assigned To User | Whether the equipment is also checked out to a user; click the value to open its check-in/check-out panel. |
| Check In Equipment | An Unassign from Job button that checks the equipment back in from this job. |
Assigning equipment to a job in bulk
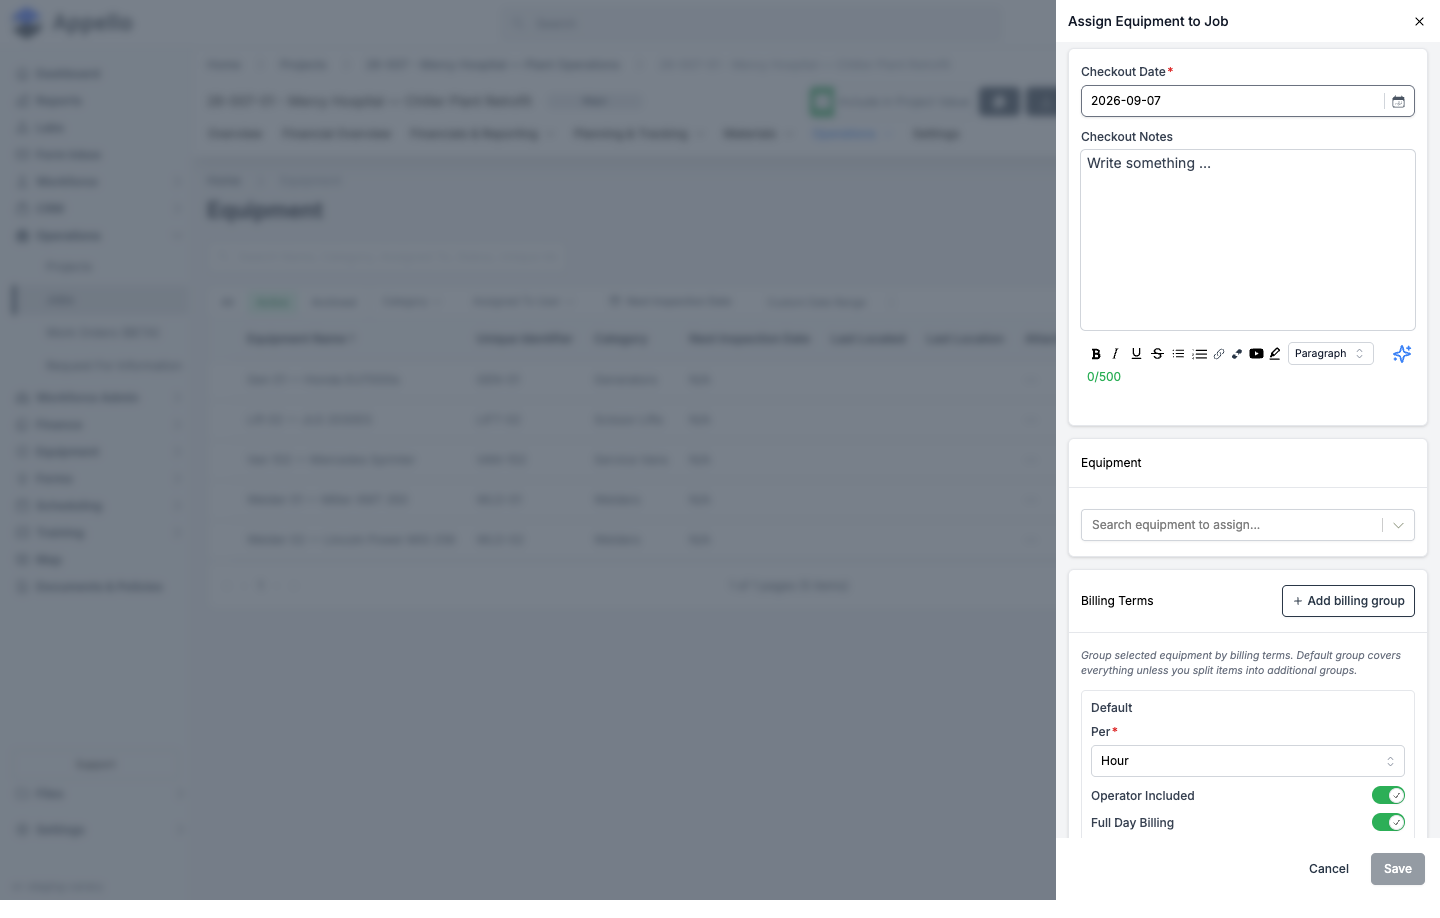
Use Assign Equipment on the job's Assigned Equipment tab to check out several pieces of equipment to the job in one panel:
-
Click Assign Equipment.
-
Fill in Checkout Date and an optional Checkout Notes (rich text, 500 characters).
-
In the Equipment section, search and select one or more items. Equipment already assigned to this job is excluded from the search results.
-
Under Billing Terms, the Default group sets Per, Operator Included, and Full Day Billing for every selected item. Click + Add billing group to split the selected equipment across more than one billing group (for example, equipment billed hourly vs. equipment billed daily) and move items between groups.
-
Optionally click Add attachment to link attachment equipment (breakers, buckets, etc.) to a specific parent item within this batch.
-
Click Save. Appello creates one equipment assignment per selected item, all checked out to this job on the same date.
Scheduling equipment
On the demo instance used for these screenshots, equipment does not appear as its own resource row on the Job Schedule calendar the way workers do -- there is no drag-and-drop equipment calendar. Checking equipment out to a job (above) is what puts it on that job's Assigned Equipment tab; logging dated equipment time entries against it (see Allocating one unit across jobs below) is how equipment usage is tracked day by day. For scheduling workers to jobs, see the Job Schedule guide.
Allocating one unit across jobs
A single piece of equipment often needs its time split across more than one job on the same day -- for example, a generator that ran half a shift on one job and half on another. Appello handles this with dated Equipment Time entries -- one entry panel per equipment/day, one row per job or operator -- rather than by creating separate assignments for each job. See Equipment Time for the full walkthrough: the weekly grid, the entry form's per-row fields, the approve/reject workflow, and how approved hours get costed against the equipment's rate labels.
Workflow: Equipment status change
Equipment status is a property-value list (equipmentStatuses) configured per instance, not a fixed enum -- the values shown in this guide (e.g. "Unassigned" on the demo instance) reflect that instance's own configuration, not a universal default.
There are three ways to change a piece of equipment's status, all of which call the same
editEquipment mutation against the equipment's statusId:
- From the equipment detail page -- every tab's header carries a status dropdown next to the Assign to a User / Assign to a Job (N) buttons (see the header screenshot under Equipment detail page). Selecting a new value saves immediately; there is no separate Save step.
- From the equipment list -- click the status badge in the Status column of a row to edit it inline, or switch the list to its Board view (the second view-toggle icon next to the table icon) to see equipment grouped into columns by status and drag a card between columns to change its status.
- From the Add/Edit Equipment form -- Status is a required field every time equipment is created or edited (see Adding equipment).
No email or system notification was found triggered by an equipment status change in the source reviewed for this page -- only the standard on-screen success toast.
Permissions and settings that affect this page
| Gate | Affects |
|---|---|
| equipment.view | Seeing the Equipment list and the Overview, Form Submissions, and Location tabs. |
| equipment.assign | Seeing the Assigned To tab and the check-out/check-in buttons. |
| equipmentrate.view / equipmentrate.edit | Seeing the Rates tab, and being able to edit or override a rate value. |
| job.view | Seeing the Work Orders tab. |
| expense.view | Seeing the Expenses and Account Payable tabs. |
| MaintenanceSchedule.view | Seeing the Maintenance tab. |
| MaintenanceThreshold.view | Seeing the Threshold Settings tab. |
| Per-field permissions | Individual equipment fields can be hidden or made read-only per role; a field with no view permission is skipped in both the Add/Edit form and the Overview tab. |
Related Pages
- Equipment Maintenance — Maintenance schedules, thresholds, service history, and the full rate schedule / rate value editing flow.
- Form Builder & Management — Create pre-use inspection forms and attach them to equipment.
- Job Schedule — Schedule workers alongside the equipment checked out to a job.