Labs
Everything under Labs is experimental. These features may change or be removed at any time without notice, and they are not covered by the same support commitments as the rest of the product.
What is Labs?
Labs is a section of the web application where early, in-progress features are made available for preview before they are considered finished. It sits in the main sidebar, between Reports and Form Inbox, marked with a beaker icon.
Click path: sidebar → Labs. URL: /labs.
Who can see Labs
Labs is not a per-user permission or a per-role setting -- it is an instance setting your Appello administrator or Appello support enables, and it decides whether the feature exists on your instance at all.
- On: every user on that instance sees the Labs item in the sidebar, and it opens the dashboard.
- Off: the nav item isn't shown at all, and going straight to the Labs URL returns you to the Dashboard instead of rendering the page.
Because it is an instance setting rather than a permission, there is no screen in the product -- for admins or anyone else -- where you turn Labs on or off.
Ask your Appello contact whether Labs is enabled for your instance -- there is no in-app setting to check or change it yourself.
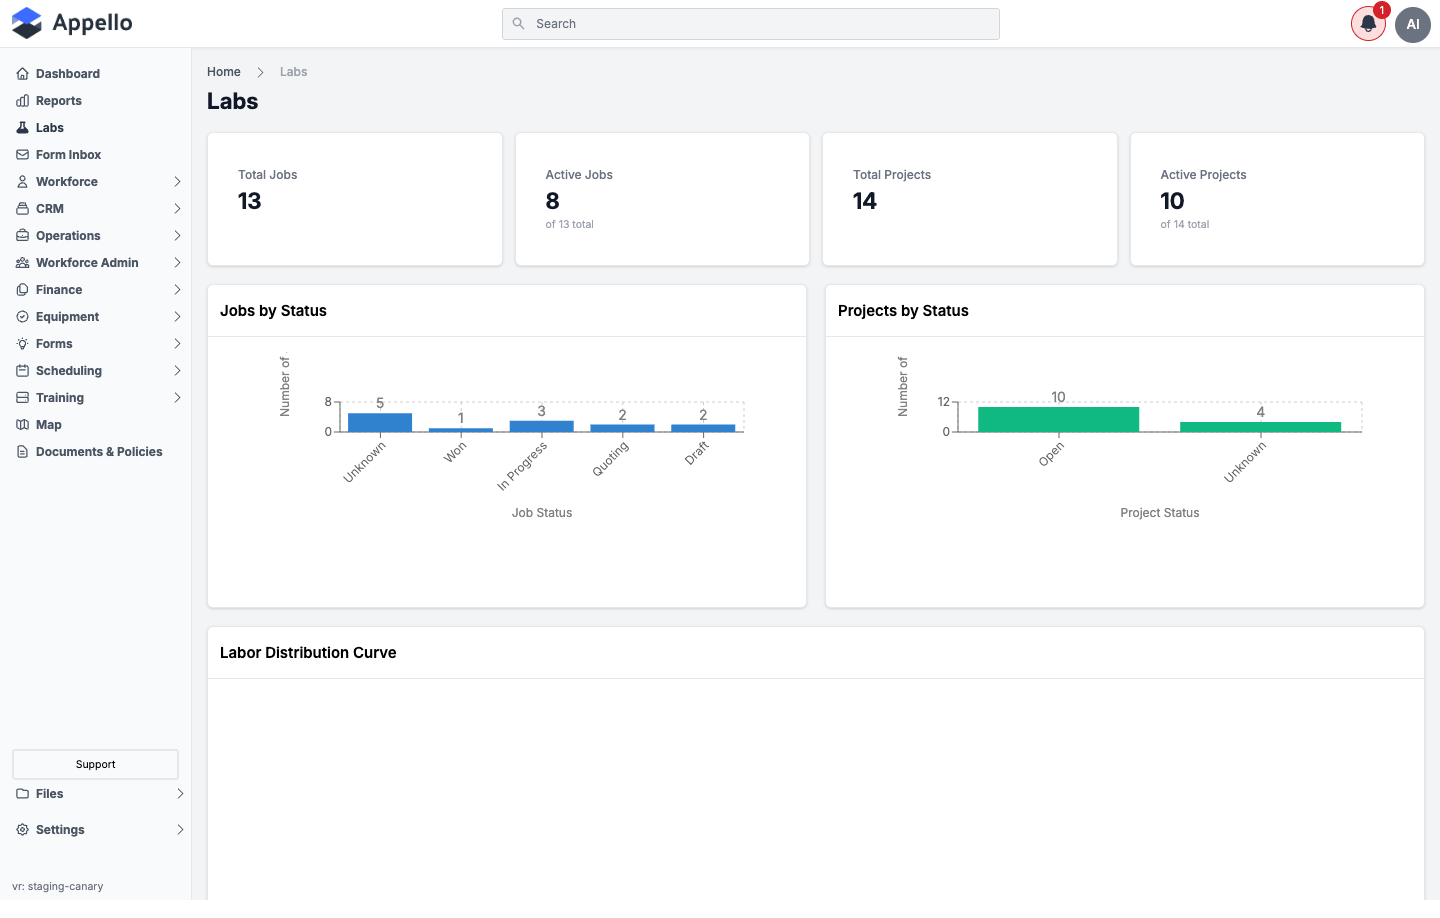
On the demo instance on 2026-09-08, opening Labs rendered the dashboard directly (stat cards, both bar charts, and the empty Labor Distribution Curve card) with no redirect, which confirms Labs is on there.
Labs dashboard
Where it is: sidebar → Labs. URL: /labs.
What it's for: a read-only, at-a-glance summary of your jobs and projects -- four count cards and two status breakdown charts, plus one chart area reserved for a labor visualization that isn't populated yet.
Cards and charts
| Card / chart | Shows |
|---|---|
| Total Jobs | Count of non-archived, non-deleted jobs. |
| Active Jobs | Count of those jobs that are active, with "of N total" shown underneath. |
| Total Projects | Count of non-archived, non-deleted projects. |
| Active Projects | Count of those projects that are active, with "of N total" shown underneath. |
| Jobs by Status | Bar chart of your jobs grouped by job status. |
| Projects by Status | Bar chart of your projects grouped by project status. |
| Labor Distribution Curve | A chart area reserved for a labor distribution visualization. |
If your user role is scoped to project-based visibility, all four counts and both charts are limited to jobs and projects where you are the project lead. There are no filters, date ranges, or drill-down clicks on this page -- it is a fixed, non-interactive summary.
On the demo instance used for these screenshots, the Labor Distribution Curve card rendered empty. Whether it shows a curve likely depends on the labor data available on a given instance.
Permissions and flags: gated only by the Labs instance setting described above. The stat-card and chart counts additionally respect your existing job/project visibility scope (project-lead-only roles see a narrower count), but there is no separate Labs permission.
Drawing Viewer
Where it is: /labs/drawing-viewer (linked from nowhere in the product's navigation -- see
How to open a drawing below). The same underlying component also opens
inside a flyout panel from the Request For Information form's Associate Drawing Reference
button -- see Linking a drawing markup to an RFI.
What it's for: viewing and marking up a PDF drawing or reference document -- zoom, pan, rotate, page through a multi-page sheet set, draw shapes/callouts/photo stamps on top of it, and export the result back out as an annotated PDF. It is also the entry point for tying a specific marked-up area of a drawing to an RFI.
Supported file types
The Drawing Viewer only opens PDF files. There is no support for DWG files or plain images -- if you point it at a non-PDF file, it has nothing to render.
How to open a drawing
The Labs dashboard does not link to the Drawing Viewer -- there is no button for it. Opening it requires a specific PDF file's asset ID, passed in the URL:
-
Go to a job's Files section and find a PDF file.
-
Note the file's asset ID -- shown in the URL when viewing that file's details.
-
Navigate to:
/labs/drawing-viewer?assetId=YOUR_ASSET_ID&jobId=YOUR_JOB_IDThe
jobIdparameter is optional. Supplying it enables the Select Area for RFI button (see below); without it, the viewer opens in plain markup mode with no RFI integration.
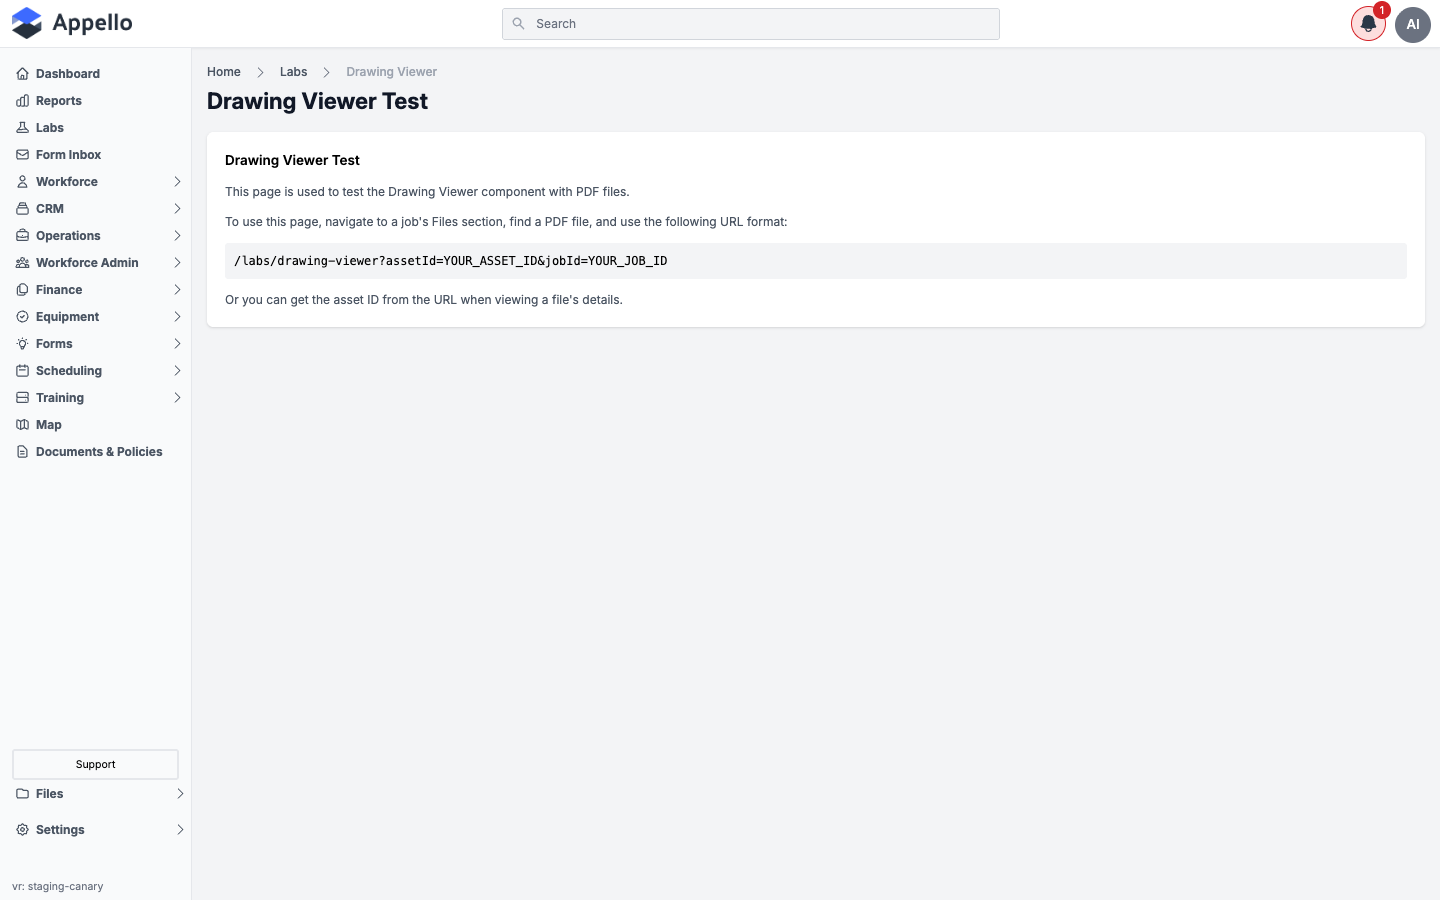
If you open /labs/drawing-viewer with no assetId in the URL, you instead see a placeholder
screen with these same instructions:
The demo instance's seeded jobs (Bay Street Tower — RTU Replacement, Mercy Hospital — Chiller Plant Retrofit) had no PDF files in their Files tab at the time of writing, and the Request For Information list had no existing records either -- so a live screenshot of an opened drawing with markup on it could not be captured on the demo instance (which is also read-only: no file can be uploaded to create one). The tool and data descriptions below are described rather than captured from exercising the loaded viewer.
Zoom, pan, rotation, and pages
| Control | What it does | Keyboard shortcut |
|---|---|---|
| Zoom in / out | Steps through preset zoom levels from 25% to 400%. | + / - |
| Zoom level selector | Jumps directly to a preset level (25%, 50%, 75%, 100%, 125%, 150%, 200%, 300%, 400%). | -- |
| Fit to width | Scales the page to fill the viewer's width. | W |
| Fit to page | Scales the whole page to fit within the viewer. | F |
| Pan tool | Drag to scroll the page instead of drawing. | H |
| Select tool | Click/drag to select and move an existing annotation. | V |
| Rotate left / right | Rotates the drawing 90° at a time. The chosen rotation is saved per document (see below) and applies for every viewer, not just your session. | Shift+R / R |
| Page grid | Opens a thumbnail grid of every page for jumping around a multi-page PDF. | G |
| Next / previous page | Moves one page at a time. | ↓/→ and ↑/← |
| Next / previous file | If the drawing has sibling PDFs open alongside it (e.g. other files in the same folder), switches to the next/previous one. | ] / [ |
| Rename a page | Sets a custom label for the current page (desktop only); shown in place of the default "Page N". | -- |
Undo, redo, and delete-selected are also always available (Z, Shift+Z, Delete/Backspace),
and Esc cancels the current tool or closes an open panel.
Markup tools
When the drawing is open in Markup Editor mode (as opposed to read-only PDF Viewer mode), the toolbar offers:
| Category | Tools |
|---|---|
| Shapes | Rectangle, ellipse, line, arrow, polygon (click points, double-click to close) |
| Freehand | Pencil, highlighter, eraser (click an object to remove it -- not a drag-erase) |
| Cloud markup | Rectangle cloud, freehand cloud, cloud callout (points + a text label) |
| Text & callouts | Text label (click to place editable text), arrow callout (drag an arrow with attached text) |
| Markers | Pin marker, in numbered, circle, square, or star style |
| Sticky notes | A colored square note (yellow, pink, blue, green, or orange) |
| Photos | Attach a new photo (upload or camera capture), or browse and stamp in an existing Appello photo already attached to the Job or Project |
Each drawn object can be styled before or after placement, from options that appear in a tool-specific strip under the main toolbar:
| Option | Applies to | Choices |
|---|---|---|
| Color | Shapes, freehand, cloud markup, text, pins | Red, orange, yellow, green, blue, purple, black, white |
| Stroke width | Shapes, freehand, cloud markup | 1, 2, 3, 5, 8, or 12 px |
| Font size | Text labels, arrow callouts | 10-48 px, in preset steps |
| Cloud arc size | Cloud rectangle / freehand / callout | Small, medium, large |
| Pin style | Pin marker | Numbered, circle, square, star |
| Sticky note color | Sticky note | Yellow, pink, blue, green, orange |
| Photo border | Photo stamp | None, thin, medium, thick, or a white border |
There is no separate concept of layers in the Drawing Viewer -- every annotation, regardless of tool, is one object on the same flat page canvas. Objects can be individually selected, moved, and deleted, but there is no grouping, hiding, or reordering by layer.
Saving annotations and where they're stored
Annotations save themselves as you work -- there is no explicit Save button:
- Each markup object is auto-saved about 1 second after you stop editing it (adding, moving, or resizing it resets that timer).
- Deleting an object saves immediately.
- Undo/redo, and switching pages, force an immediate full-page reconcile rather than waiting on the per-object timer.
Every annotation is saved on the server, one record per drawn object, tied to the drawing and the page it sits on. Deleting an annotation marks it deleted rather than removing it outright.
Two related pieces of drawing state persist the same way, but separately from the markup objects themselves:
- Rotation -- a per-document (not per-page) manual rotation override, shared by every viewer of
that drawing, saved whenever you rotate with the toolbar or
R/Shift+R. - Page labels -- a custom name for an individual page, saved when you rename it. Pages without a saved label fall back to the default "Page N". Renaming is only available from the desktop viewer; the mobile app can display a saved label but not set one.
Linking a drawing markup to an RFI
When the viewer was opened with a job (see How to open a drawing above), a Select Area for RFI button appears in the toolbar. Using it:
- Click Select Area for RFI, then drag a rectangle over the relevant part of the drawing. The selection can be moved and resized before you confirm it.
- Confirming opens either the Create RFI form (for a brand-new RFI) or an Attach to RFI picker (to add the area to an existing RFI), depending on how you got there.
- A thumbnail of the selected area is generated and uploaded, and the reference is saved.
The saved reference records the drawing, the page number, the area you selected, the generated thumbnail, and optional title/description text. Each RFI can hold only one drawing area reference; attaching a new one replaces the previous one.
This is the same flow as the RFI form's Associate Drawing Reference button, which opens the viewer in a flyout instead of the standalone Drawing Viewer page -- see Attaching a drawing reference for that end-to-end walkthrough (creating the RFI, viewing the reference from the RFI, and removing it).
Export and print
The toolbar's Download button is always available, in both viewer and editor mode:
- In read-only PDF Viewer mode, its tooltip reads "Download" and exports the PDF as-is.
- In Markup Editor mode, its tooltip reads "Download with annotations" and exports the PDF with every markup object burned into the page.
There is no separate print button or print preview -- printing a drawing means downloading the (optionally annotated) PDF and printing it from your PDF reader.
Permissions and flags
| Gate | Controls |
|---|---|
| Labs enabled on the instance | Whether Labs (and therefore the standalone Drawing Viewer page under it) exists at all. |
| A job supplied when opening the viewer | Whether the Select Area for RFI button appears. |
| Request For Information → Create | Required to see Select Area for RFI (creating a new RFI or attaching to an existing one). |
| Request For Information → Edit | Required to open an existing RFI's drawing reference for editing from the viewer. |
| Request For Information → View | Required to view an existing RFI's drawing reference from the viewer. |
Beyond those RFI-specific checks, opening a drawing and marking it up is not gated by a separate permission -- if you can open the underlying PDF file at all (i.e. you have normal access to that Job's Files), you can annotate it, undo/redo, and rotate it. The product's own code comments note this is deliberate: adding a permission check to the Annotate toggle would only break rotation persistence for read-only entry points, without adding real protection.
Related pages
- Requests for Information (RFIs) -- the RFI list, detail page, and the full Associate Drawing Reference walkthrough.
- Project Files -- where the PDF files a drawing's asset ID comes from actually live.
- AI & Intelligence overview -- Appello's other early-preview and AI-assisted features.